前言
“图”一直是计算机算法研究的重要领域,但由于图的复杂性缺少成熟的产品。直到社交网络的普及,社会化关系网和复杂网络的更入研究,大家对于“图数据库”有了更强烈的需求。图数据库产品也趋向成熟,慢慢地走进了大家的视野。
Neo4j就是图数据库的代表之作。
关于作者:
- 张丹(Conan), 程序员Java,R,PHP,Javascript
- weibo:@Conan_Z
- blog: http://blog.fens.me
- email: bsspirit@gmail.com
转载请注明出处:
http://blog.fens.me/nosql-neo4j-intro/
目录
- Neo4j简介
- Neo4j单机安装
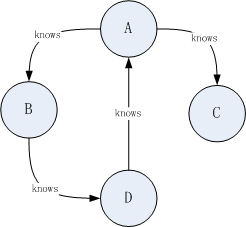
- 创建一个简单的社交关系图
- Neo4j集群安装HA
1. Neo4j简介
Neo4j是一个用Java实现的、高性能的、NoSQL图形数据库。Neo4j 使用图(graph)相关的概念来描述数据模型,通过图中的节点和节点的关系来建模。Neo4j完全兼容ACID的事务性。Neo4j以“节点空间”来表达领域数据,相对于传统的关系型数据库的表、行和列来说,节点空间可以更好地存储由节点关系和属性构成的网络,如社交网络,朋友圈等。
由Neo4j构建“图”模型,也可以准确表达 数据库模型,key-value模型,文档模型的数据关系。
2. Neo4j单机安装
系统环境
- Linux: Ubuntu 12.04.2 LTS 64bit Server
- SUN Java: 1.6.0_29 64-Bit
下载neo4j-enterprise,企业版
~ wget http://dist.neo4j.org/neo4j-enterprise-1.9.4-unix.tar.gz
~ tar xvf neo4j-enterprise-1.9.4-unix.tar.gz
~ mv neo4j-enterprise-1.9.4 neo4j194
~ mv neo4j194/ /home/conan/toolkit/
~ cd /home/conan/toolkit/neo4j194
配置Neo4j服务器允许远程访问,修改neo4j-server.properties
~ vi conf/neo4j-server.properties

#取消注释
org.neo4j.server.webserver.address=0.0.0.0
启动Neo4j
~ bin/neo4j start
WARNING: Max 1024 open files allowed, minimum of 40 000 recommended. See the Neo4j manual.
WARNING! You are using an unsupported version of the Java runtime. Please use Oracle(R) Java(TM) Runtime Environment 7.
Using additional JVM arguments:  -server -XX:+DisableExplicitGC -Dorg.neo4j.server.properties=conf/neo4j-server.properties -Djava.util.logging.config.file=conf/logging.properties -Dlog4j.configuration=file:conf/log4j.properties -XX:+UseConcMarkSweepGC -XX:+CMSClassUnloadingEnabled
Starting Neo4j Server...WARNING: not changing user
process [2408]... waiting for server to be ready....... OK.
Go to http://localhost:7474/webadmin/ for administration interface.
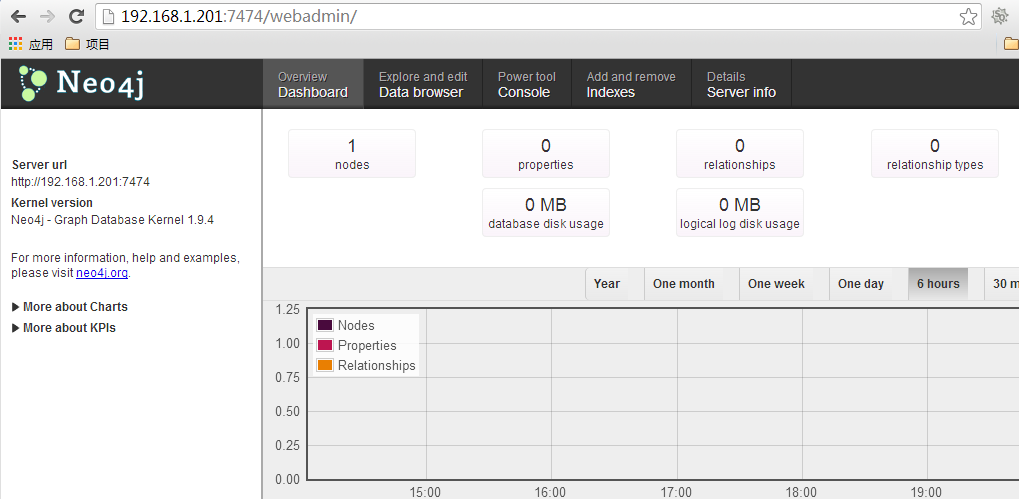
通过浏览器打开Neo4j的web控制台, http://192.168.1.201:7474/webadmin/
非常简单地,完成了单机的Neo4j的安装。
3. 创建一个简单的社交关系图
~ bin/neo4j-shell

neo4j-sh (?)$ CREATE (A {id:1,name:'A'}), (B {id:2,name:'B'}), (C {id:3,name:'C'}), (D {id:4,name:'D'}),(A)-[:knows]->(B),(A)-[:knows]->(C),(B)-[:knows]->(D),(D)-[:knows]->(A);
+-------------------+
| No data returned. |
+-------------------+
Nodes created: 4
Relationships created: 4
Properties set: 8

neo4j-sh (?)$ START n=node(*) RETURN n;
+-------------------------+                                                           | n                       |
+-------------------------+
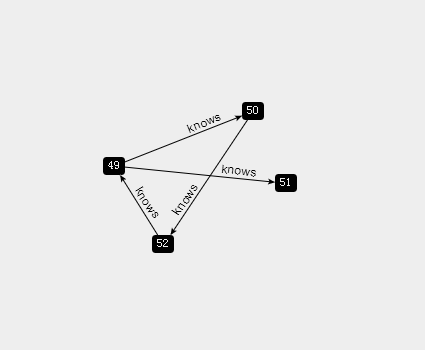
| Node[49]{name:"A",id:1} |
| Node[50]{name:"B",id:2} |
| Node[51]{name:"C",id:3} |
| Node[52]{name:"D",id:4} |
+-------------------------+
4 rows
通过控制台以图形展示
删除数据节点和关系
neo4j-sh (?)$ START n=node(*) MATCH n-[r]-() DELETE n, r;
+-------------------+
| No data returned. |
+-------------------+
Nodes deleted: 4
Relationships deleted: 4

neo4j-sh (?)$ START n=node(*) RETURN n;
+---+
| n |
+---+
+---+
0 row
4. Neo4j集群安装HA
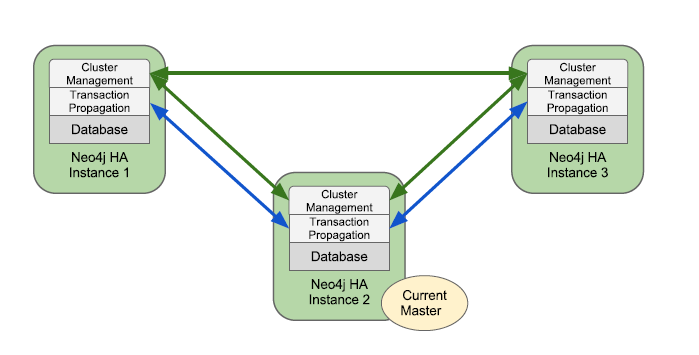
模拟Neo4j的高可用:Neo4j企业版本才提供高可用性功能。
Neo4j HA主要提供以下两个功能:
- 容错数据库架构 保存多个数据副本,即使硬件故障,也能保证可读写。
- 水平方向扩展以读为主架构 读操作负载均衡。
Neo4j HA模式总有单个master,零个或多个slave。与其他ms复制架构,Neo4j HA的slave可以处理写操作,而无需重定向写入到master。
Neo4j的集群需要复制多份Neo4j的环境,我们这里准备构建3个节点
~ mkdir /home/conan/neo4j
~ cd /home/conan/neo4j
~ cp -R /home/conan/toolkit/neo4j194 /home/conan/neo4j
~ mv neo4j194/ n1
~ cp -R n1 n2
~ cp -R n1 n3
~ ls
n1  n2  n3
分别修改各节点的配置文件
- neo4j.properties
- neo4j-server.properties
- neo4j-server.properties
n1节点
~ vi n1/conf/neo4j.properties

ha.server_id=1
ha.server=127.0.0.1:6361
online_backup_server=127.0.0.1:6362
ha.cluster_server=127.0.0.1:5001
ha.initial_hosts=127.0.0.1:5001,127.0.0.1:5002,127.0.0.1:5003

~ vi n1/conf/neo4j-server.properties

org.neo4j.server.webserver.port=7474
org.neo4j.server.webserver.https.port=7473
org.neo4j.server.database.mode=HA

~ vi n1/conf/neo4j-wrapper.conf

wrapper.java.additional.4=-Dcom.sun.management.jmxremote.port=3637
wrapper.java.additional.5=-Dcom.sun.management.jmxremote.password.file=conf/jmx.password
wrapper.java.additional.6=-Dcom.sun.management.jmxremote.access.file=conf/jmx.access
n2节点
~ vi n2/conf/neo4j.properties

ha.server_id=2
ha.server=127.0.0.1:6363
online_backup_server=127.0.0.1:6364
ha.cluster_server=127.0.0.1:5002
ha.initial_hosts=127.0.0.1:5001,127.0.0.1:5002,127.0.0.1:5003

~ vi n2/conf/neo4j-server.properties

org.neo4j.server.webserver.port=7476
org.neo4j.server.webserver.https.port=7475
org.neo4j.server.database.mode=HA

~ vi n1/conf/neo4j-wrapper.conf

wrapper.java.additional.4=-Dcom.sun.management.jmxremote.port=3638
wrapper.java.additional.5=-Dcom.sun.management.jmxremote.password.file=conf/jmx.password
wrapper.java.additional.6=-Dcom.sun.management.jmxremote.access.file=conf/jmx.access
n3节点
~ vi n3/conf/neo4j.properties

ha.server_id=3
ha.server=127.0.0.1:6365
online_backup_server=127.0.0.1:6366
ha.cluster_server=127.0.0.1:5003
ha.initial_hosts=127.0.0.1:5001,127.0.0.1:5002,127.0.0.1:5003

~ vi n3/conf/neo4j-server.properties

org.neo4j.server.webserver.port=7478
org.neo4j.server.webserver.https.port=7478
org.neo4j.server.database.mode=HA

~ vi n1/conf/neo4j-wrapper.conf

wrapper.java.additional.4=-Dcom.sun.management.jmxremote.port=3639
wrapper.java.additional.5=-Dcom.sun.management.jmxremote.password.file=conf/jmx.password
wrapper.java.additional.6=-Dcom.sun.management.jmxremote.access.file=conf/jmx.access
分别启动3个节点:
~ n1/bin/neo4j start
~ n2/bin/neo4j start
~ n3/bin/neo4j start

~ jps
5033 Bootstrapper
4073 StartClient
5546 Jps
5393 Bootstrapper
5219 Bootstrapper
命令行curl访问测试:
curl -H "Content-Type:application/json" -d '["org.neo4j:*"]' http://localhost:7474/db/manage/server/jmx/query
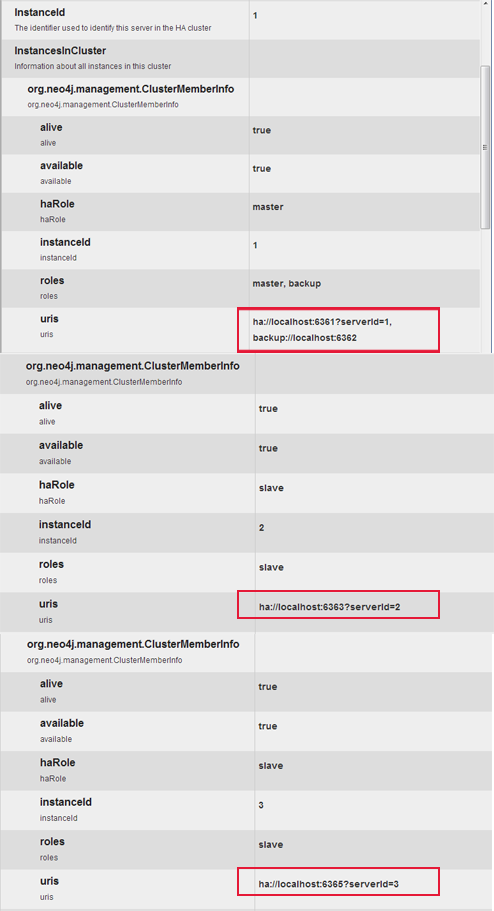
打开浏览器控制台webadmin
http://192.168.1.201:7474/webadmin/#/info/org.neo4j/High%20Availability/
这样就完成了 Neo4j集群对于高可用安装实践!
转载请注明出处:
http://blog.fens.me/nosql-neo4j-intro/

