从零开始nodejs系列文章,将介绍如何利Javascript做为服务端脚本,通过Nodejs框架web开发。Nodejs框架是基于V8的引擎,是目前速度最快的Javascript引擎。chrome浏览器就基于V8,同时打开20-30个网页都很流畅。Nodejs标准的web开发框架Express,可以帮助我们迅速建立web站点,比起PHP的开发效率更高,而且学习曲线更低。非常适合小型网站,个性化网站,我们自己的Geek网站!!
关于作者
- 张丹(Conan), 程序员Java,R,PHP,Javascript
- weibo:@Conan_Z
- blog: http://blog.fens.me
- email: bsspirit@gmail.com
转载请注明出处:
http://blog.fens.me/hexo-blog-github/
前言
很多次想把博客从wordpress迁移到github,为此还特意学了一下Ruby和Jekyll。但由于迁移过程过于复杂,我又没有很多时间,这个计划就被搁置了。慢慢地文章积累越来越多了,更没有时间来整理了,所以就先用着wordpress吧。
不过,了迁移博客我也有一些新的发现。hexo,一个基于Node的博客框架,同样可以实现基于github的博客,而且更轻更快,更适合Node的开发程序员。
目录
- Hexo介绍
- Hexo安装
- Hexo的使用
- 发布到项目到github
- 替换皮肤
- 配置常用插件
1. Hexo介绍
Hexo 是一个简单地、轻量地、基于Node的一个静态博客框架。通过Hexo我们可以快速创建自己的博客,仅需要几条命令就可以完成。
发布时,Hexo可以部署在自己的Node服务器上面,也可以部署github上面。对于个人用户来说,部署在github上好处颇多,不仅可以省去服务器的成本,还可以减少各种系统运维的麻烦事(系统管理、备份、网络)。所以,基于github的个人站点,正在开始流行起来….
Hexo的官方网站:http://hexo.io/ ,也是基于Github构建的网站。
2. Hexo安装
系统环境:
- win7 64bit
- node v0.10.5
- npm 1.2.19
Hexo安装,要用全局安装,加-g参数。
D:\> npm install -g hexo
查看hexo的版本
D:\> hexo version
hexo: 2.5.5
os: Windows_NT 6.1.7601 win32 x64
http_parser: 1.0
node: 0.10.5
v8: 3.14.5.8
ares: 1.9.0-DEV
uv: 0.10.5
zlib: 1.2.3
modules: 11
openssl: 1.0.1e
安装好后,我们就可以使用Hexo创建项目了。
D:\workspace\javascript> hexo init nodejs-hexo
[info] Creating file: source/_posts/hello-world.md
[info] Creating file: package.json
[info] Creating file: .gitignore
[info] Copying file: _config.yml
[info] Copying file: scaffolds/draft.md
[info] Copying file: scaffolds/page.md
[info] Copying file: scaffolds/photo.md
[info] Copying file: scaffolds/post.md
[info] Creating folder: source/_drafts
[info] Creating folder: scripts
[info] Copying theme data...
[info] Initialization has been done. Start blogging with Hexo!
我们看到当前在目录下,出现了一个文件夹,包括初始化的文件。
进入目录,并启动Hexo服务器。
# 进入目录
D:\workspace\javascript>cd nodejs-hexo

# 启动hexo服务器
D:\workspace\nodejs-hexo>hexo server
[info] Hexo is running at http://localhost:4000/. Press Ctrl+C to stop.
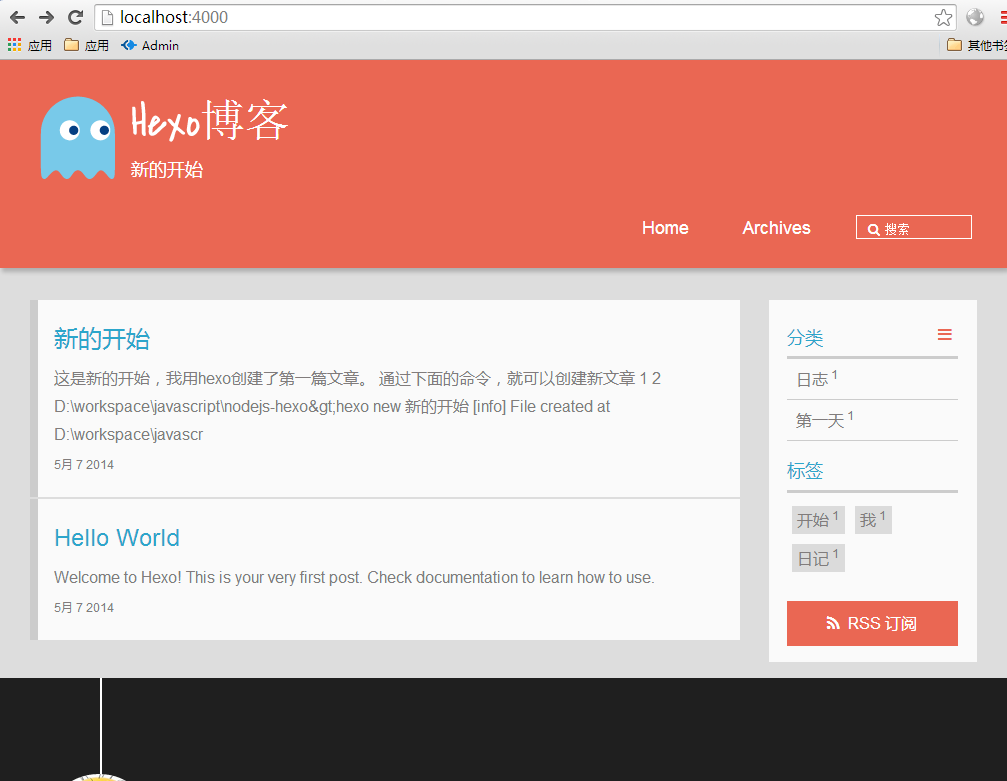
这时端口4000被打开了,我们能过浏览器打开地址,http://localhost:4000/ 。
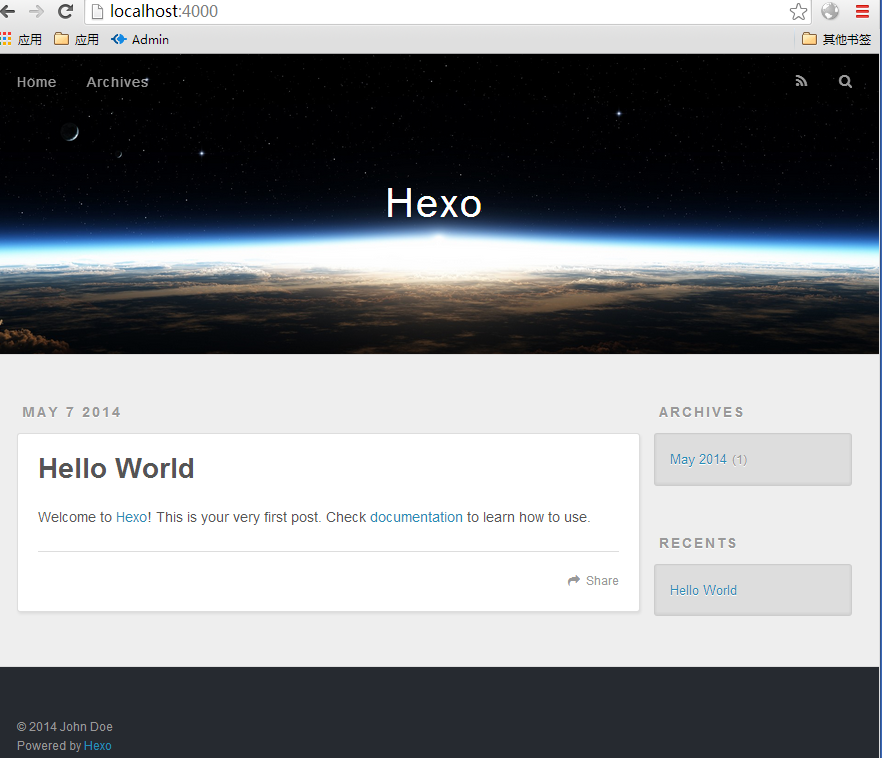
出现了默认的网页界面,是不是很容易呢!!
3. Hexo的使用
接下来,我们要对Hexo做更全面的了解,才能做出个性化一的博客。
3.1 目录和文件
先来看一下,默认生成了哪些东西。
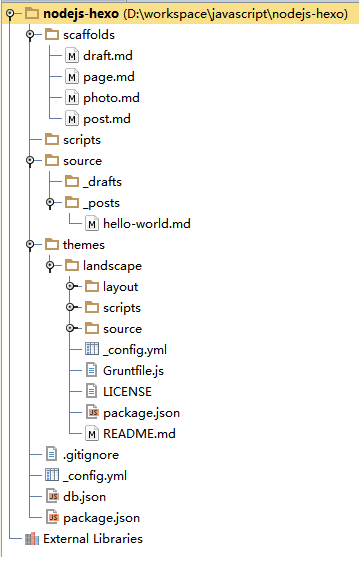
- scaffolds 脚手架,也就是一个工具模板
- scripts 写文件的js,扩展hexo的功能
- source 存放博客正文内容
- source/_drafts 草稿箱
- source/_posts 文件箱
- themes 存放皮肤的目录
- themes/landscape 默认的皮肤
- _config.yml 全局的配置文件
- db.json 静态常量
在这里,我们每次用到的就是_posts目录里的文件,而_config.yml文件和themes目录是第一次配置好就行了。
_posts目录:Hexo是一个静态博客框架,因此没有数据库。文章内容都是以文本文件方式进行存储的,直接存储在_posts的目录。Hexo天生集成了markdown,我们可以直接使用markdown语法格式写博客,例如:hello-world.md。新增加一篇文章,就在_posts目录,新建一个xxx.md的文件。
themes目录:是存放皮肤的,包括一套Javascript+CSS样式和基于EJS的模板设置。通过在themes目录下,新建一个子目录,就可以创建一套新的皮肤,当然我们也可以直接在landscape上面修改。
3.2 全局配置
_config.yml是全局的配置文件:很多的网站配置都在这个文件中定义。
- 站点信息: 定义标题,作者,语言
- URL: URL访问路径
- 文件目录: 正文的存储目录
- 写博客配置:文章标题,文章类型,外部链接等
- 目录和标签:默认分类,分类图,标签图
- 归档设置:归档的类型
- 服务器设置:IP,访问端口,日志输出
- 时间和日期格式: 时间显示格式,日期显示格式
- 分页设置:每页显示数量
- 评论:外挂的Disqus评论系统
- 插件和皮肤:换皮肤,安装插件
- Markdown语言:markdown的标准
- CSS的stylus格式:是否允许压缩
- 部署配置:github发布
查看文件:_config.yml
# Hexo Configuration
## Docs: http://hexo.io/docs/configuration.html
## Source: https://github.com/tommy351/hexo/

# 站点信息
title: Hexo博客
subtitle: 新的开始
description: blog.fens.me
author: bsspirit
email: bsspirit@gmail.com
language: zh-CN

# URL
## If your site is put in a subdirectory, set url as 'http://yoursite.com/child' and root as '/child/'
url: http://blog.fens.me
root: /
permalink: :year/:month/:day/:title/
tag_dir: tags
archive_dir: archives
category_dir: categories
code_dir: downloads/code

# 文件目录
source_dir: source
public_dir: public

# 写博客配置
new_post_name: :title.md # File name of new posts
default_layout: post
auto_spacing: false # Add spaces between asian characters and western characters
titlecase: false # Transform title into titlecase
external_link: true # Open external links in new tab
max_open_file: 100
multi_thread: true
filename_case: 0
render_drafts: false
post_asset_folder: false
highlight:
  enable: true
  line_number: true
  tab_replace:

# 目录和标签
default_category: uncategorized
category_map:
tag_map:

# 归档设置
## 2: Enable pagination
## 1: Disable pagination
## 0: Fully Disable
archive: 2
category: 2
tag: 2

# 服务器设置
## Hexo uses Connect as a server
## You can customize the logger format as defined in
## http://www.senchalabs.org/connect/logger.html
port: 4000
server_ip: 0.0.0.0
logger: false
logger_format:

# 时间和日期格式
## Hexo uses Moment.js to parse and display date
## You can customize the date format as defined in
## http://momentjs.com/docs/#/displaying/format/
date_format: MMM D YYYY
time_format: H:mm:ss

# 分页设置
## Set per_page to 0 to disable pagination
per_page: 10
pagination_dir: page

# 评论
disqus_shortname:

# 插件和皮肤
## Plugins: https://github.com/tommy351/hexo/wiki/Plugins
## Themes: https://github.com/tommy351/hexo/wiki/Themes
theme: landscape
exclude_generator:

# Markdown语法
## https://github.com/chjj/marked
markdown:
  gfm: true
  pedantic: false
  sanitize: false
  tables: true
  breaks: true
  smartLists: true
  smartypants: true

# CSS的stylus格式
stylus:
  compress: false

# 部署配置
## Docs: http://hexo.io/docs/deployment.html
deploy:
  type:
3.3 命令行使用
查看命令行帮助
D:\> hexo help
Usage: hexo

Commands:
  help      Get help on a command
  init      Create a new Hexo folder
  migrate   Migrate your site from other system to Hexo
  version   Display version information

Global Options:
  --config   Specify config file instead of using _config.yml
  --debug    Display all verbose messages in the terminal
  --safe     Disable all plugins and scripts
  --silent   Hide output on console

For more help, you can use `hexo help [command]` for the detailed information
or you can check the docs: http://hexo.io/docs/
命令行解释:
- help 查看帮助信息
- init 创建一个hexo项目
- migrate 从其他系统向hexo迁移
- version 查看hexo的版本
- –config参数,指定配置文件,代替默认的_config.yml
- –debug参数,调试模式,输出所有日志信息
- –safe参数,安全模式,禁用所有的插件和脚本
- –silent参数,无日志输出模式
3.4 创建新文章
接下来,我们开始新博客了,创建第一博客文章。Hexo建议通过命令行操作,当然你也可以直接在_posts目录下创建文件。
通过命令创建新文章
D:\workspace\javascript\nodejs-hexo>hexo new 新的开始
[info] File created at D:\workspace\javascript\nodejs-hexo\source\_posts\新的开始.md
在_posts目录下,就会生成文件:”新的开始.md”。

然后,我们编辑文件:”新的开始.md”,以markdown语法写文章,然后保存。
title: 新的开始
date: 2014-05-07 18:44:12
tags:
- 开始
- 我
- 日记
categories: 日志
---

这是**新的开始**,我用hexo创建了第一篇文章。

通过下面的命令,就可以创建新文章
```{bash}
D:\workspace\javascript\nodejs-hexo>hexo new 新的开始
[info] File created at D:\workspace\javascript\nodejs-hexo\source\_posts\新的开始.md
```

感觉非常好。
在命令行,启动服务器。
D:\workspace\javascript\nodejs-hexo>hexo server
[info] Hexo is running at http://localhost:4000/. Press Ctrl+C to stop.
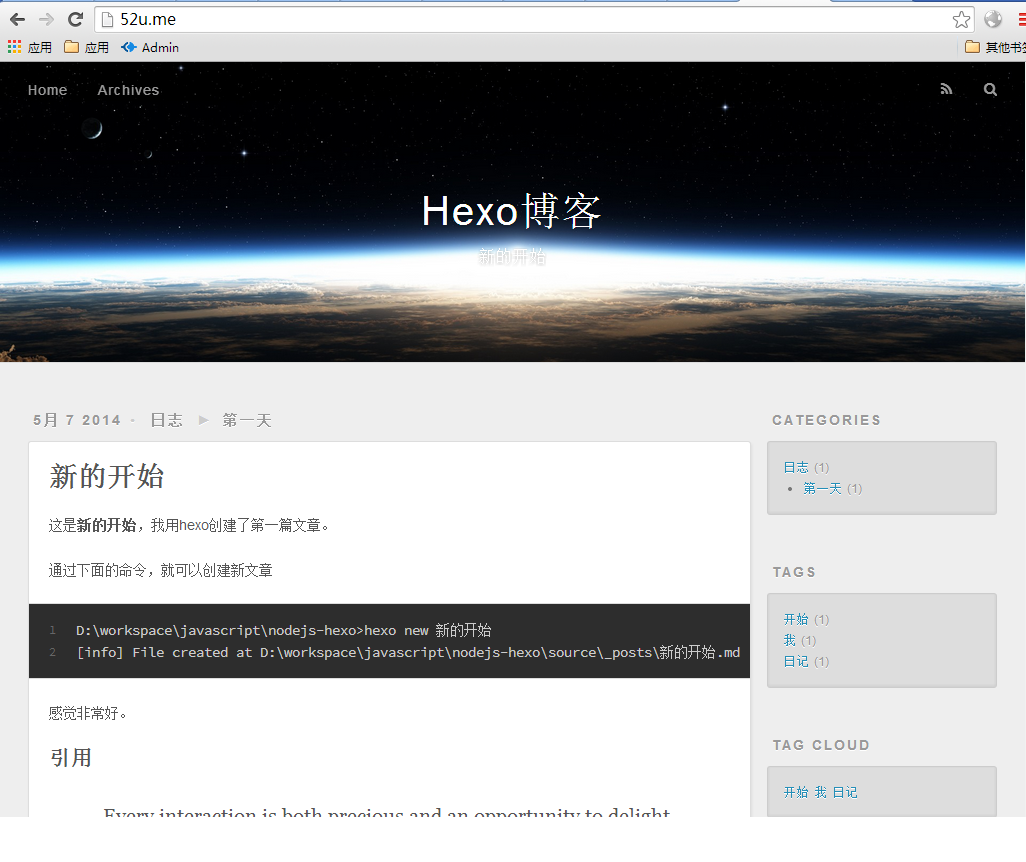
通过浏览器打开, http://localhost:4000/ ,就出现了我们新写的文章。
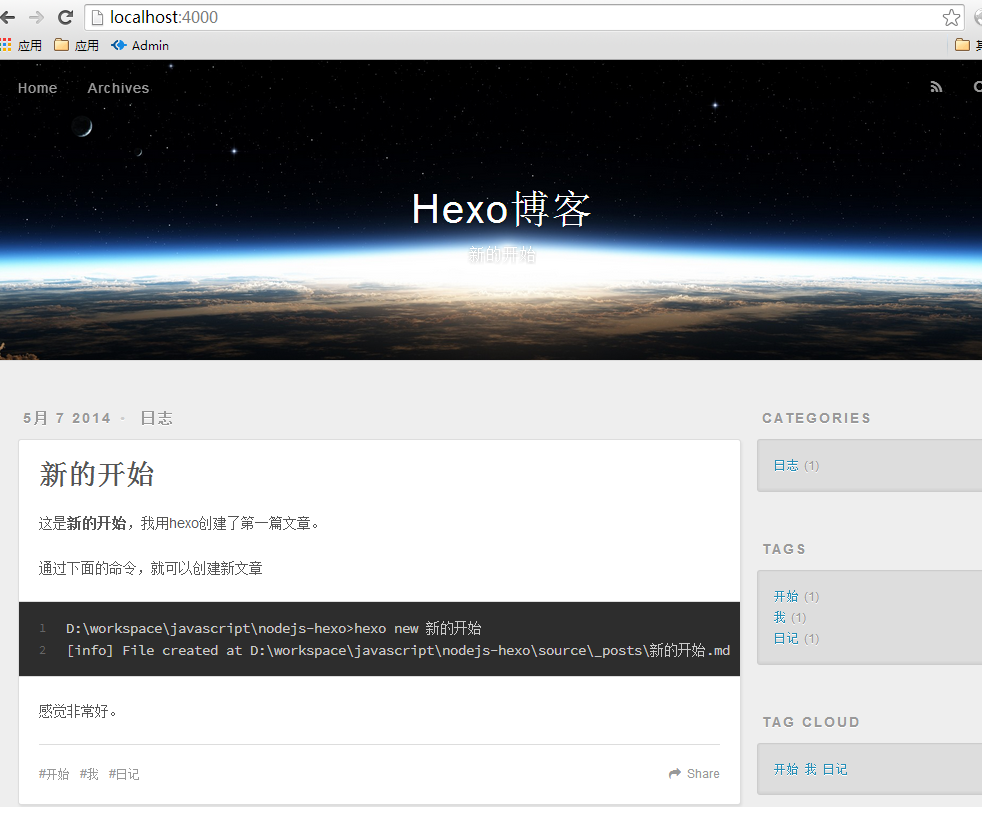
同时,网页的右侧还会出现Categories(目录),Tags(标签),Tag Cloud(标签云)的显示。
3.5 文章的语法
我们在写文章时,有一些语法的要求。
语法包括3部分:
- 基本信息:标题,发布日期,分类目录,标签,类型,固定发布链接
- 正文:markdown语法和Swig语法(掌握一个就行)
- 特殊标记:引用,链接,图片,代码块,iframe,youtube视频
3.5.1 基本信息
必须在文件的顶部,—的行之前的部分。如:
title: 新的开始
date: 2014-05-07 18:44:12
updated	: 2014-05-10 18:44:12
permalink: abc
tags:
- 开始
- 我
- 日记
categories:
- 日志
- 第一天

---
我们可以对刚才发的文章,做上面的修改,再看效果。
3.5.2 正文
hexo的正文要求使用markdown的语法,这里就不在多说,请自行查看markdwon的文档。
3.5.3 特殊标记
hexo对于一些有特殊标记 文字块,做了特殊的定义。
引用
# Swig语法
{% blockquote Seth Godin http://sethgodin.typepad.com/seths_blog/2009/07/welcome-to-island-marketing.html Welcome to Island Marketing %}
Every interaction is both precious and an opportunity to delight.
{% endblockquote %}

# Markdown语法
> Every interaction is both precious and an opportunity to delight.
代码块
# Swig语法
{% codeblock .compact http://underscorejs.org/#compact Underscore.js %}
.compact([0, 1, false, 2, ‘’, 3]);
=> [1, 2, 3]
{% endcodeblock %}

# Markdown语法
```{bash}
.compact([0, 1, false, 2, ‘’, 3]);
=> [1, 2, 3]
```
链接
{% link 粉丝日志 http://blog.fens.me true 粉丝日志 %}

# Markdown语法
[粉丝日志](http://blog.fens.me)
图片,对于本地图片,需要在source目录下面新建一个目录images,然后把图片放到目录中。
# Swig语法
{% img /images/fens.me.png 400 600 这是一张图片 %}
# Markdown语法

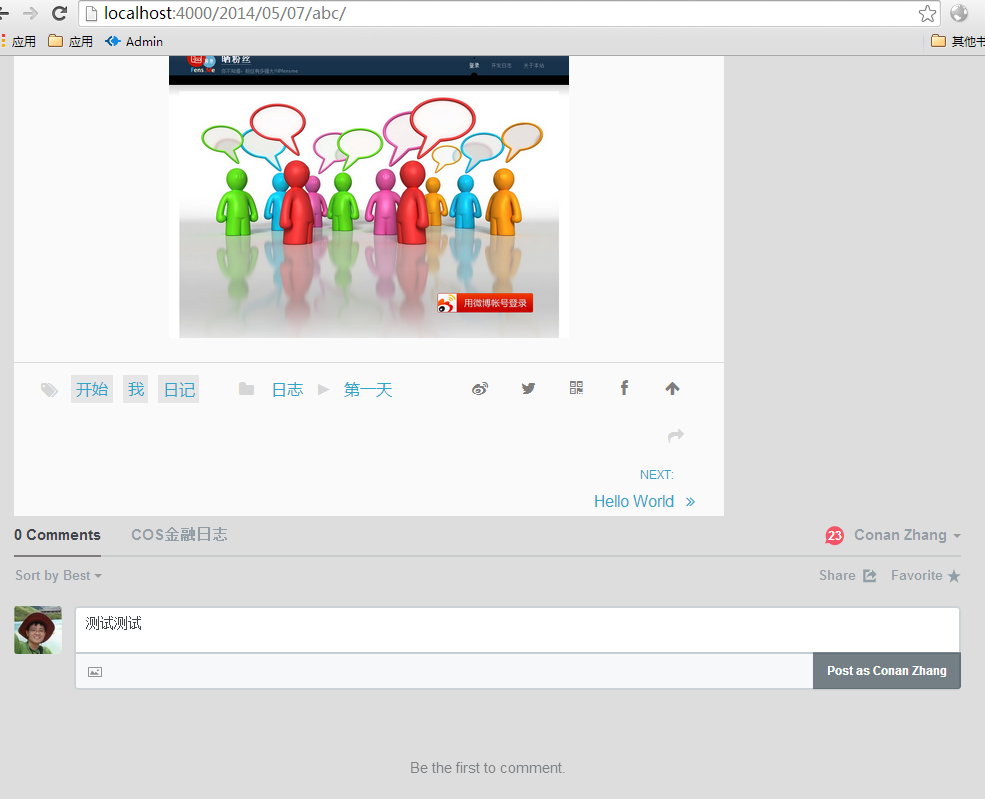
在浏览器中看到效果。
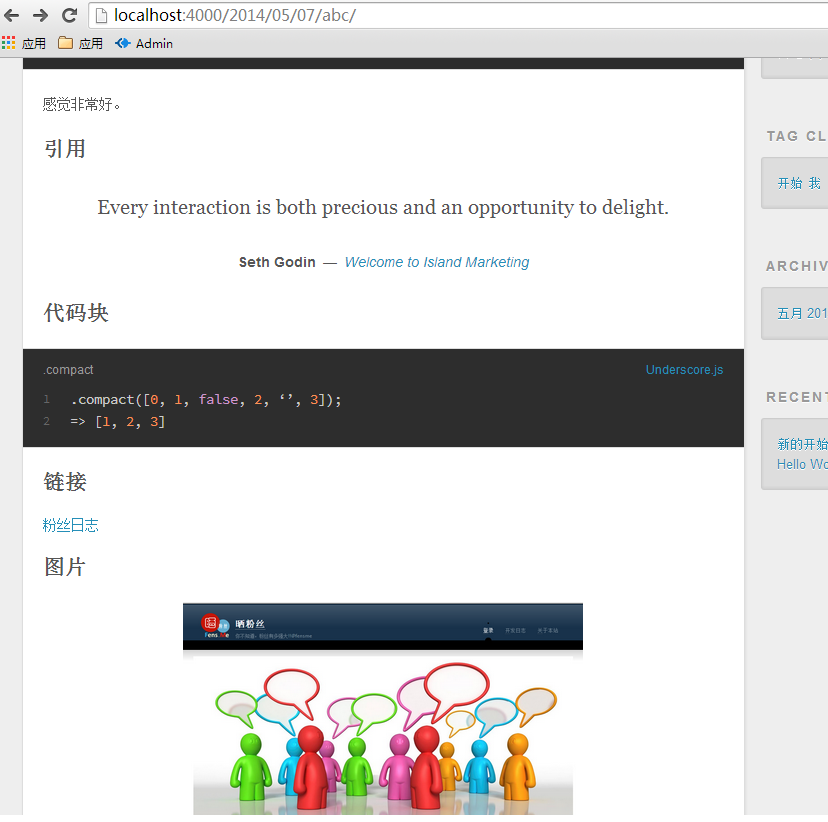
我们发现Swig的语法比markdown语法有更多的配置项,可以让页面更丰富,下面显示完整的基于Swig代码。
title: 新的开始
date: 2014-05-07 18:44:12
permalink: abc
tags:
- 开始
- 我
- 日记
categories:
- 日志
- 第一天

---

这是**新的开始**,我用hexo创建了第一篇文章。

通过下面的命令,就可以创建新文章
```{bash}
D:\workspace\javascript\nodejs-hexo>hexo new 新的开始
[info] File created at D:\workspace\javascript\nodejs-hexo\source\_posts\新的开始.md
```

感觉非常好。


## 引用
{% blockquote Seth Godin http://sethgodin.typepad.com/seths_blog/2009/07/welcome-to-island-marketing.html Welcome to Island Marketing %}
Every interaction is both precious and an opportunity to delight.
{% endblockquote %}

## 代码块
{% codeblock .compact http://underscorejs.org/#compact Underscore.js %}
.compact([0, 1, false, 2, ‘’, 3]);
=> [1, 2, 3]
{% endcodeblock %}

## 链接
{% link 粉丝日志 http://blog.fens.me true 粉丝日志 %}

## 图片
{% img /images/fens.me.png 400 600 这是一张图片 %}
4. 发布到项目到github
4.1 静态化处理
写完了文章,我们就可以发布了。要说明的一点是hexo的静态博客框架,那什么是静态博客呢?静态博客,是只包含html, javascript, css文件的网站,没有动态的脚本。虽然我们是用Node进行的开发,但博客的发布后就与Node无关了。在发布之前,我们要通过一条命令,把所有的文章都做静态化处理,就是生成对应的html, javascript, css,使得所有的文章都是由静态文件组成的。
静态化命令
D:\workspace\javascript\nodejs-hexo>hexo generate
[info] Files loaded in 0.895s
[create] Public: js\script.js
[create] Public: css\fonts\fontawesome-webfont.svg
[create] Public: css\fonts\FontAwesome.otf
[create] Public: css\fonts\fontawesome-webfont.ttf
[create] Public: css\fonts\fontawesome-webfont.eot
[create] Public: css\fonts\fontawesome-webfont.woff
[create] Public: fancybox\blank.gif
[create] Public: fancybox\fancybox_loading@2x.gif
[create] Public: fancybox\fancybox_overlay.png
[create] Public: css\images\banner.jpg
[create] Public: fancybox\fancybox_sprite.png
[create] Public: fancybox\jquery.fancybox.css
[create] Public: fancybox\fancybox_loading.gif
[create] Public: fancybox\fancybox_sprite@2x.png
[create] Public: fancybox\jquery.fancybox.js
[create] Public: fancybox\jquery.fancybox.pack.js
[create] Public: fancybox\helpers\jquery.fancybox-buttons.js
[create] Public: fancybox\helpers\fancybox_buttons.png
[create] Public: fancybox\helpers\jquery.fancybox-buttons.css
[create] Public: fancybox\helpers\jquery.fancybox-media.js
[create] Public: fancybox\helpers\jquery.fancybox-thumbs.css
[create] Public: fancybox\helpers\jquery.fancybox-thumbs.js
[create] Public: archives\index.html
[create] Public: images\fens.me.png
[create] Public: archives\2014\index.html
[create] Public: archives\2014\05\index.html
[create] Public: css\style.css
[create] Public: index.html
[create] Public: categories\日志\index.html
[create] Public: categories\日志\第一天\index.html
[create] Public: 2014\05\07\abc\index.html
[create] Public: 2014\05\07\hello-world\index.html
[create] Public: tags\开始\index.html
[create] Public: tags\我\index.html
[create] Public: tags\日记\index.html
[info] 35 files generated in 0.711s
在本地目录下,会生成一个public的目录,里面包括了所有静态化的文件。
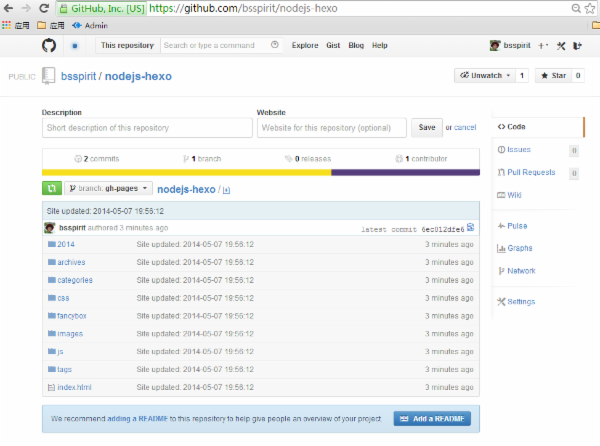
4.2 发布到github
接下来,我们把这个博客发布到github。
在github中创建一个项目nodejs-hexo,项目地址:https://github.com/bsspirit/nodejs-hexo
编辑全局配置文件:_config.yml,找到deploy的部分,设置github的项目地址。
deploy:
  type: github
  repo: git@github.com:bsspirit/nodejs-hexo.git
然后,通过命令进行部署。
D:\workspace\javascript\nodejs-hexo>hexo deploy
[info] Start deploying: github
[info] Setting up GitHub deployment...
Initialized empty Git repository in D:/workspace/javascript/nodejs-hexo/.deploy/.git/
[master (root-commit) 43873d3] First commit
 1 file changed, 0 insertions(+), 0 deletions(-)
 create mode 100644 placeholder
[info] Clearing .deploy folder...
[info] Copying files from public folder...

// 省略部分输出

Branch gh-pages set up to track remote branch gh-pages from github.
To git@github.com:bsspirit/nodejs-hexo.git
 * [new branch]      gh-pages -> gh-pages
[info] Deploy done: github
这个静态的web网站就被部署到了github,检查一下分支是gh-pages。gh-pages是github为了web项目特别设置的分支。
然后,点击”Settings”,找到GitHub Pages,提示“Your site is published at http://bsspirit.github.io/nodejs-hexo”,打开网页 http://bsspirit.github.io/nodejs-hexo,就是我们刚刚发布的站点。

4.3 设置域名
看起来css和js的加载路径不太对,不过没有关系。接下来,我们配置好域名,这个路径就会正确的。比如,我有一个域名是 52u.me,为了中国DNS解析,我先把域名绑定在Dnspod管理,再做跳转。
域名有两种配置方式:
- 主域名绑定:直接绑定主域名52u.me
- 子域名绑定:绑定子域名blog.52u.me
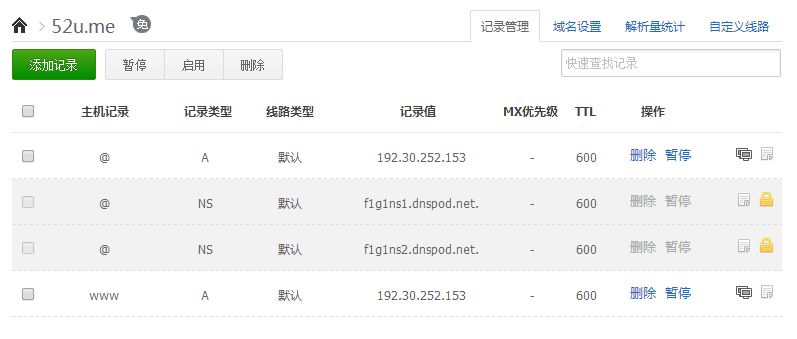
4.3.1 主域名绑定
在dnspod控制台,设置主机记录@,类型A,到IP 192.30.252.153。
大概等几分钟会生效。判断生效,对域名执行ping或者dig命令。
D:\workspace\javascript\nodejs-hexo>ping 52u.me

正在 Ping 52u.me [192.30.252.153] 具有 32 字节的数据:
来自 192.30.252.153 的回复: 字节=32 时间=321ms TTL=48
来自 192.30.252.153 的回复: 字节=32 时间=325ms TTL=48
来自 192.30.252.153 的回复: 字节=32 时间=329ms TTL=48
来自 192.30.252.153 的回复: 字节=32 时间=326ms TTL=48

192.30.252.153 的 Ping 统计信息:
    数据包: 已发送 = 4,已接收 = 4,丢失 = 0 (0% 丢失),
往返行程的估计时间(以毫秒为单位):
    最短 = 321ms,最长 = 329ms,平均 = 325ms
在github项目中,新建一个文件CNAME,文件中写出你要绑定的域名52u.me。通过浏览器,访问http://52u.me,就打开了我们建好的博客站点。
4.3.2 子域名绑定
有时候,我们的主域名正在使用着,需要先新建一个博客绑定到子域名,比如: blog.52u.me。
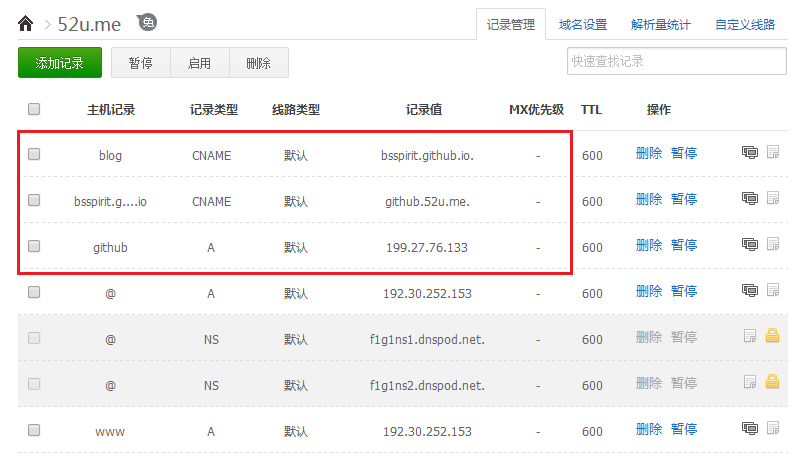
在dnspod控制台,我们要做3步设置。
- 设置主机记录github,类型A,到IP 199.27.76.133
- 设置主机记录bsspirit.github.io,类型CNAME,到github.52u.me.
- 设置主机记录blog,类型CNAME,到 bsspirit.github.io
记得我们还要修改文件CNAME,改为blog.52u.me。通过浏览器,访问http://blog.52u.me,就可以打开了我们的博客站点了,而这次用的是二级域名。
由于每次执行deploy的时候,gh-pages分支所有的文件都会被覆盖,所以我们最好在source目录下创建这个CNAME文件,这样每次部署就不用动手创建了。
5. 替换皮肤
博客系统流行的原因,是因为他的个人性,而皮肤正式个性化的一种体现。
利用hexo替换皮肤,还是比较简单的,3步完成。
5.1 找到一个皮肤或者自己开发一个皮肤
打开hexo的皮肤列表页面,你可以找到很多的皮肤,网页地址: https://github.com/tommy351/hexo/wiki/Themes。
5.2. 放到themes目录下
比如,我觉得pacman(https://github.com/A-limon/pacman)这个皮肤还不错,我就可以下载皮肤到themes目录下面。
通过git命令下载皮肤
git clone https://github.com/A-limon/pacman.git themes/pacman
5.3. 在_config.yml指定皮肤
编辑文件_config.yml,找到theme一行,改成 theme: pacman
本地启动hexo服务器,打开浏览器 http://localhost:4000
新皮肤的效果还不错吧,然后静态化处理,再发布到github,就完成了站点的改版。
6. 配置常用插件
6.1 Disqus评论系统
首先登陆http://disqus.com/ 网站,申请一个新网站的shortname,配置到_config.yml文件里,disqus_shortname: blog52ume

然后,你会得到一段js代码,把他复制文件 themes/pacman/layout/_partial/comment.ejs 。继续修改themes/pacman/layout/layout.ejs文件,增加对comment.ejs的引用。具体修改请详见代码。
这样,评论系统就增加好了!!
6.2 RSS订阅
这个功能非常简单,因为已经有人写好了插件,我们只要安装插件就行了。
D:\workspace\javascript\nodejs-hexo>npm install hexo-generator-feed
npm WARN package.json hexo-site@2.5.5 No readme data!
npm http GET https://registry.npmjs.org/hexo-generator-feed
npm http 304 https://registry.npmjs.org/hexo-generator-feed
npm http GET https://registry.npmjs.org/ejs/0.8.5
npm http GET https://registry.npmjs.org/lodash/2.4.1
npm http 304 https://registry.npmjs.org/ejs/0.8.5
npm http 200 https://registry.npmjs.org/lodash/2.4.1
npm http GET https://registry.npmjs.org/lodash/-/lodash-2.4.1.tgz
npm http 200 https://registry.npmjs.org/lodash/-/lodash-2.4.1.tgz
hexo-generator-feed@0.1.0 node_modules\hexo-generator-feed
├── ejs@0.8.5
└── lodash@2.4.1
启动服务器,用浏览器打开 http://localhost:4000/atom.xml, 就可以看到RSS已经生效了。
6.3 Sitemap站长地图
同样是一条命令,就可以完成。
D:\workspace\javascript\nodejs-hexo>npm install hexo-generator-sitemap
npm WARN package.json hexo-site@2.5.5 No readme data!
npm http GET https://registry.npmjs.org/hexo-generator-sitemap
npm http 304 https://registry.npmjs.org/hexo-generator-sitemap
npm http GET https://registry.npmjs.org/ejs/0.8.5
npm http GET https://registry.npmjs.org/lodash/2.4.1
npm http 304 https://registry.npmjs.org/lodash/2.4.1
npm http 304 https://registry.npmjs.org/ejs/0.8.5
hexo-generator-sitemap@0.1.1 node_modules\hexo-generator-sitemap
├── ejs@0.8.5
└── lodash@2.4.1
启动服务器,用浏览器打开 http://localhost:4000/sitemap.xml, 就可以看到sitemap已经生效了。
6.4 mathjax数学公式
有时候,我们还需要一些高级功能,比如在网页上显示数学公式。
新建一个文件themes/pacman/layout/_partial/mathjax.ejs,找到mathjax的调用代码复制到文件。
<!-- mathjax config similar to math.stackexchange -->

<script type="text/x-mathjax-config">
  MathJax.Hub.Config({
    tex2jax: {
      inlineMath: [ ['$','$'], ["\\(","\\)"] ],
      processEscapes: true
    }
  });
</script>

<script type="text/x-mathjax-config">
    MathJax.Hub.Config({
      tex2jax: {
        skipTags: ['script', 'noscript', 'style', 'textarea', 'pre', 'code']
      }
    });
</script>

<script type="text/x-mathjax-config">
    MathJax.Hub.Queue(function() {
        var all = MathJax.Hub.getAllJax(), i;
        for(i=0; i < all.length; i += 1) {
            all[i].SourceElement().parentNode.className += ' has-jax';
        }
    });
</script>

<script type="text/javascript" src="http://cdn.mathjax.org/mathjax/latest/MathJax.js?config=TeX-AMS-MML_HTMLorMML">
</script>
在themes/pacman/layout/_partial/after_footer.ejs 的最后一行,增加对mathjax的引用,详细内容请查看源代码。
我们修改文章:source/_posts/新的开始.md
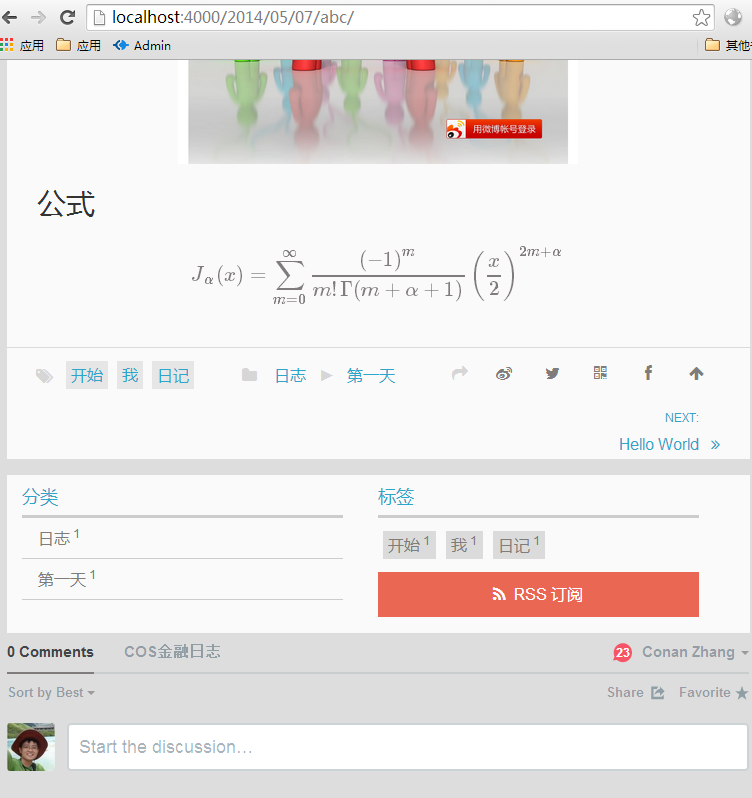
增加公式:
## 公式
$$J\_\alpha(x)=\sum _{m=0}^\infty \frac{(-1)^ m}{m! \, \Gamma (m + \alpha + 1)}{\left({\frac{x}{2}}\right)}^{2 m + \alpha }$$
启动服务器,查看效果:
当然,除了这些还有很多需要的功能,像Google分析,百度统计,微薄转发等,大家可以自己找找,也可以自己开发一些插件!
最后,本文的中代码已经上传的github,https://github.com/bsspirit/nodejs-hexo。 其中master分支是项目源代码,gh-pages分支是发布的站点。
Hexo框架确实如同它介绍中的话: “A fast, simple & powerful blog framework, powered by Node.js.”,Noder还等什么,赶紧搭建一个博客吧!!
转载请注明出处:
http://blog.fens.me/hexo-bootstarp-github/

欢迎加入hexo的世界。
另,有个小小的疑问,您在deploy的时候会自动同时更新master分支和gh-pages分支么?貌似我的只会产生master分支,难道是因为我是deploy到 ***.github.io而不是子项目***.github.io/xxx 的关系?
另,hexo用起来不错,只是他的markdown引擎marked常常与mathjax起冲突,受尽其苦啊。
你的回复速度很快啊!
1. deploy默认是到gh-pages,master是我自己上传的。
2. 我写了几篇文章,还没有发现marked和mathjax的冲突。latex的语法和mathjax要稍微有点不同。
可以试试$x_1+x_2+x_3$
下划线,要加转义”_”,这就是其中一个不同点。
果然是大神啊,当年这个问题困扰了我好久。不过久经考验下我也快摸透他们习性了。
具体怎么将本地的项目传到github上面啊这个不懂。
fatal: ‘github’ does not appear to be a git repository
fatal: Could not read from remote repository.
Please make sure you have the correct access rights
and the repository exists.
[info] Deploy done: github
还有这些错误 不知道怎么回事
你要在github建一个免费项目,然后把生成的静态文件传上去。
您好,我想问下,我安装hexo后本地访问出现代码,猜测应该是partial这个函数没有识别,但是我不知道该怎么解决。求教了。。403860586@qq.com希望能够得到解答。谢谢了。
不应该出现不partial函数没有识别的问题,联系包的作者问吧!
参见这个地址:http://hexo.io/docs/setup.html
要在hexo的文件夹npm install一下。
我也出现这个问题了, 后来到hexo的主页上看了下, 在’hexo server’这一步骤之前, 还有’npm install’ 这一步, 然后问题就解决了. 希望@Conan Zhang:disqus在博文里也能加上. 具体可参见 http://hexo.io/
好吧,如果是因为npm install这一条命令引起的错误,而且自己不会解决。那我只能说先去学基础吧,hexo不适合你。
什么意思?这个命令本来之前的版本就不用。。我最近更新版本也遇到这个问题。。什么学学基础。。语气让人讨厌
这个 你创建项目的时候会有提示,不看提示 。
2.6 以后就更新了
要自己安装
$ npm install hexo-renderer-ejs –save
$ npm install hexo-renderer-stylus –save
$ npm install hexo-renderer-marked –save
https://github.com/hexojs/hexo/issues/632
已经上传。
https://github.com/bsspirit/nodejs-hexo/tree/master/themes/pacman
您好,问一下,我更换主题的时候遇到错误:
$ hexo generate
[error] { name: ‘HexoError’,
reason: ‘incomplete explicit mapping pair; a key node is missed’,
mark:
{ name: null,
buffer: ‘categories: Categoriesnsearch: Searchntags: Tagsntagcloud: Tag
Cloudnprev: Prevnnext: Nextncomment: Commentsncontents: Contentsnarchive_a:
Archivesnarchive_b: Archives: %snpage: Page %dnrecent_posts: Recent Postsnm
enu: Menunlinks: Linksnrss: RSSnshowsidebar: Show Sidebarnhidesidebar: Hide
Sidebarnupdated: Updatednu0000’,
position: 167,
line: 9,
column: 19 },
message: ‘Process failed: languages/default.yml’,
domain:
{ domain: null,
_events: { error: [Function] },
_maxListeners: 10,
members: [ [Object] ] },
domainThrown: true,
stack: undefined }
不知道如何解决,谢谢!
换皮肤出错是正常的。
1. 自己修改源代码,解决问题。
2. 放弃这个皮肤,换个不会出错的皮肤。
刚问完,瞬间找到错误了。。。
🙂
[…] Web开发:express,ejs,hexo, socket.io, restify, cleaver, stylus, browserify,cheerio […]
## 图片
{% img /images/ik.jpg 400 600 这是一张图片 %}
我在自己建的项目目录下创建了 images 里面放了一张ik.jpg图片 用以上方法引用。
type 类型 怎么 成了 text/html 引用图片有什么需要特别注意?
GET 404 (Not Found)
type类型,估计是404引起的,找到图片就应该是图片类型了。
您好,我deploy到github上后发现css和js到加载路径不对,我没有自己到域名,该怎么解决呢?
自己调整一下目录吧,把css和js放到正确的目录中。
谢谢大神指点。你的js的文章写的真棒!
过奖 🙂
麻烦问一下,那个设置评论插件的,js代码是从哪里获得的,我表示对于英文网站,基本一句都看不懂
要去网站注册才能获得对应的JS,http://disqus.com/
注册完了,怎么没有获得的?怎么获得啊
上传到github时出问题了
D:nodejs-hexo>hexo deploy
[info] Start deploying: github
[info] Clearing .deploy folder…
[info] Copying files from public folder…
[error] Error: spawn ENOENT
Error: spawn ENOENT
at errnoException (child_process.js:1001:11)
at Process.ChildProcess._handle.onexit (child_process.js:792:34)
[error] Error: spawn ENOENT
Error: spawn ENOENT
at errnoException (child_process.js:1001:11)
at Process.ChildProcess._handle.onexit (child_process.js:792:34)
[error] Error: spawn ENOENT
Error: spawn ENOENT
at errnoException (child_process.js:1001:11)
at Process.ChildProcess._handle.onexit (child_process.js:792:34)
[info] Deploy done: github
求助!!
应该github访问出错了,先试试git命令是否正常。
您好,新建文章时,直接在_posts目录下创建文件。运行$hexo g $hexo s时,在博客中会出现三篇相同的内容。why?
最好先hexo clear之后再hexo g
🙂
ok,解决了。非常感谢
> 不过,了迁移博客我也有一些新的发现
s/了/为了/
有了什么新发现
typo “了迁移博客”前好像漏了“为”字
子域名为什么这样设置?本来CNMAE指向一个网站,A记录指向一个IP,现在全乱了
Github官方给出的
卡住了,hexo deploy上传不了,一直nothing added to commit but untrackek files present 和src refspec gh-pages does not match any报这两个错,请求支援,先谢谢啦
是不是本地的git没装好?
1. nothing added to commit but untrackek files present,本地的git add 命令出错了。
2. src refspec gh-pages does not match any,分支gh-pages没有。
遇到同样的问题,但是我手动添加add 是可以用的
看一下其他人的评论,应该有能解决你的问题的答案。
没有域名,后面操作不了,赞
买个域名吧,1年也就几十块钱。
那些地方买域名不用备案呢?
gh-pages中的index.html是怎么生成的
我的只能进入每个文章,文章的url都是日期+题目那种
我知道首页对应的是index.html,这个是得自己手写吗?
我的输入localhost:4000/
显示cannot get /
都是自动生成的,你再查一下官方文档吧,是不是因为包升级的原因。
好使了
🙂
怎么好使的?
怎么解决的?我也是这个问题
我也是Cannot GET / 求怎么解决的?
楼主,为什么主域名解析的ip是192.30.252.153呢,192.30.252.153是github的ip吗?这个自己需不需要改?
是的,他指定的路由IP。
hello, hexo deploy的时候一直是直接回复ERROR Deployer not found: github
请问是怎么回事? 各种google 百度都无果啊!
感激不尽!
allengaller@qq.com/ allengaller@gmail.com
deploy: type: git(后面是有个空格的,hexo3.0之后type填写git)
repo: git@github.com:username/username.github.io.git
感谢回复!!
加了空格, 还是一样!
git, github 两种都是报错 deployer not found. 官网文档看了….
解决了, 要安装插件:
$ npm install hexo-deployer-git –save
hexo的版本有升级,需要进一步查看官方文档。
我安装了npm install hexo-deployer-git –save之后还是这样这么办呢?
请问公钥问题怎么破?
INFO Deploying: git
INFO Clearing .deploy folder…
INFO Copying files from public folder…
On branch master
nothing to commit, working directory clean
The authenticity of host ‘github.com (192.30.252.129)’ can’t be established.
RSA key fingerprint is 16:27:ac:a5:76:28:2d:36:63:1b:56:4d:eb:df:a6:48.
Are you sure you want to continue connecting (yes/no)? yes
Warning: Permanently added ‘github.com,192.30.252.129’ (RSA) to the list of known hosts.
Permission denied (publickey).
fatal: Could not read from remote repository.
Please make sure you have the correct access rights
and the repository exists.
FATAL Something’s wrong. Maybe you can find the solution here: http://hexo.io/docs/troubleshooting.html
Error: Warning: Permanently added ‘github.com,192.30.252.129’ (RSA) to the list of known hosts.
Permission denied (publickey).
fatal: Could not read from remote repository.
Please make sure you have the correct access rights
and the repository exists.
at ChildProcess. (/home/ag/Github/allengaller.github.io/node_modules/hexo-deployer-git/node_modules/hexo-util/lib/spawn.js:42:17)
at ChildProcess.emit (events.js:110:17)
at maybeClose (child_process.js:1015:16)
at Process.ChildProcess._handle.onexit (child_process.js:1087:5)
公钥,应该是之前在github上面配置好的。
私钥,在你的本地环境git命令工具也配置好。
hexo是直接调用本地的git命令工具。
解决, 不能用git协议, 要http
解决就好,:-)
ag@ag:~/Github/allengaller.github.io$ hexo deploy
INFO Deploying: git
INFO Clearing .deploy folder…
FATAL Something’s wrong. Maybe you can find the solution here: http://hexo.io/docs/troubleshooting.html
Error: EACCES, unlink ‘/home/ag/Github/allengaller.github.io/.deploy_git/archives/index.html’
at Error (native)
这个问题解决了, 要加sudo
sudo hexo deploy
但是仍然有Permission denied (publickey).
作者你好,我出现了访问github那个项目css和js没有加载的情况,按照你说的设置域名,那个域名是随便的吗?还是我提前已经有这么一个域名了呢.
您好楼主,你这个是什么文本编辑器啊
Webstorm,最近发现 Visual Studio Code也不错。
你好楼主你用的这是什么文本编辑器啊
我用的是jackman主题,从pacman改装的,但是不太会用
查一下主题的帮助文档吧。
十分感谢。
🙂
请问, 我是按照您教程来,gh-pages分支也出来了,但是页面一直都是404 至今没解决, 这是我的地址 谢谢 https://github.com/thinkerchan/thinkerchan.github.io/
你的 http://thinkerchan.com/ 的域名指向的IP是 103.245.222.133, 并不是github指定的域名。
请问 我现在去掉了域名绑定 直接访问thinkerchan.github.io也访问不了 这是为啥?
wo ma
请教下 按楼主的步骤基本搞定了 但在git的setting页面显示的是Your site is ready to be published at http://ftnn.github.io/ftnn. 并不是Your site is published at http://bsspirit.github.io/nodejs-hexo,为何 缺了什么步骤吗?谢谢
在本文发布后,hexo有升级,和本文有出入的地方,请参考官方文档。
OK 多谢
博主求救,我按照你那张图上的dnspod设置,ping的时候显示的不是192.30.252.153
要定位问题,看看是dnspod,还是github的问题。
一直想在github上搞静态blog,先mark一下。
🙂
@bsspirit:disqus 请教一下,我的博客 http://dmoneh.github.io/silentsong/ 文章的底部的评论,点击一下应该可以跳转到对应博文。但是我的有问题,我看了一下链接地址,少了silentsong这部分,所有404了。由于这部分貌似是disqus生成的,我实在不知道怎么设置。 能帮我看一下吗? 谢谢。
在你的博客上面留言了,看上去没有问题。
为什么我hexo deploy时提示:ERROR: Repository not found。事实上是github上的Repository已经存在了,执行ssh -T git@github.com都能提示连上了那个库
估计是哪里配置出了问题,再重新运行一遍试试。
博主,我想请问一下,我在敲hexo deploy命令的时候,命令行中总出现不了start deploying:github等输出信息,直接就到待输入下一条命令的状态,而且也没有部署成功到github上。_config.yml文件按照您说的修改了。请问这是什么问题。谢谢!
输入hexo deploy就是这样:
好像是hexo的新版本修改了API,查一下官方的文档吧。
好的,谢谢
用git bash不要用windows的cmd
请教博主,你现在这个blog是hexo做的吗?是在自己的服务器上搭建的吗?
现在的blog是wordpress,是付费的服务器。hexo对于很大量的文章,更新是很慢的。
博主,我照你的方式设置二级域名,死都不行啊,救解答啊
再查一下github的文档吧,可能有更新了。
已经解决了,多谢博主啊
多谢,问题已解决
太好了!
Hi, You can try hugo, that is more easy to use.
css和js的加载路径不正确,可在Hexo的_config.yml中修改。
url: http://hellojasonzhang.github.io
root: /blog/
修改完毕后http://hellojasonzhang.github.io/blog/就可以正常访问。
希望作者能够修改过来,以免初学者带来误解