Ubuntu实用工具系列文章,将介绍基于Linux ubuntu的各种工具软件的配置和使用。有些工具大家早已耳熟能详,有些工具经常用到但确依然陌生。我将记录我在使用操作系统时,安装及配置工具上面的一些方法,把使用心得记录下来也便于自己的以后查找和回忆。
关于作者:
- 张丹,分析师/程序员/Quant: R,Java,Nodejs
- blog: http://fens.me
- email: bsspirit@gmail.com
转载请注明出处:
http://blog.fens.me/linux-postgresql-install/
前言
PostgreSQL是一个功能非常强大的、源代码开放关系型数据库,我之前主要在用MySQL,为了知识的完整性,也把PostgreSQL练一练。介绍一下PostgreSQL数据库在Ubuntu上的安装过程,和基本的使用操作。大家也可以对比MySQL的安装过程,请参考文章在Ubuntu中安装MySQL
希望本文能让所有的PostgreSQL新手快速上手,顺利完成PostgreSQL数据库的初探。
目录
- PostgreSQL在Ubuntu中安装
- 数据库操作命令
- 用pgadmin远程访问数据库
1. PostgreSQL在Ubuntu中安装
本文使用的Linux是Ubuntu 20.04.1 LTS Server 64bit的系统,安装PostgreSQL数据库软件包可以通过apt实现。
1.1 下载和安装PostgreSQL
在Linux Ubuntu中安装 PostgreSQL 数据库,可以先使用apt查看一下PostgreSQL的版本支持。apt支持的PostgreSQL数据库的最新版本为12,目前来说是主流的。PostgreSQL官方在 2020-09-24 发布了,最新的版本PostgreSQL 13。
# 查看Postgres支持
~  apt show postgresql
Package: postgresql
Version: 12+214ubuntu0.1
Priority: optional
Section: database
Source: postgresql-common (214ubuntu0.1)
Origin: Ubuntu
Maintainer: Ubuntu Developers <ubuntu-devel-discuss@lists.ubuntu.com>
Original-Maintainer: Debian PostgreSQL Maintainers <team+postgresql@tracker.debian.org>
Bugs: https://bugs.launchpad.net/ubuntu/+filebug
Installed-Size: 67.6 kB
Depends: postgresql-12
Suggests: postgresql-doc
Task: postgresql-server
Download-Size: 3,924 B
APT-Sources: http://cn.archive.ubuntu.com/ubuntu focal-updates/main amd64 Packages
Description: object-relational SQL database (supported version)
 This metapackage always depends on the currently supported PostgreSQL
 database server version.
 .
 PostgreSQL is a fully featured object-relational database management
 system.  It supports a large part of the SQL standard and is designed
 to be extensible by users in many aspects.  Some of the features are:
 ACID transactions, foreign keys, views, sequences, subqueries,
 triggers, user-defined types and functions, outer joins, multiversion
 concurrency control.  Graphical user interfaces and bindings for many
 programming languages are available as well.

N: There is 1 additional record. Please use the '-a' switch to see it
我们可以直接使用apt的源进行安装,一条命令就够了。
# 安装Postgres服务器端
~ sudo apt install postgresql
安装完成后,查看系统进程情况,和服务器端口占用情况
# 检查postgresql服务器系统进程
~ ps -aux|grep postgresql
postgres   18145  0.0  0.1 215652 29396 ?        Ss   10:30   0:00 /usr/lib/postgresql/12/bin/postgres -D /var/lib/postgresql/12/main -c config_file=/etc/postgresql/12/main/postgresql.conf

# 检查postgresql服务器占用端口,默认为5432
~  netstat -nlt|grep 5432
tcp        0      0 127.0.0.1:5432          0.0.0.0:*               LISTEN
通过系统服务命令检查 postgresql 服务器状态
~  service postgresql status
● postgresql.service - PostgreSQL RDBMS
     Loaded: loaded (/lib/systemd/system/postgresql.service; enabled; vendor preset: enabled)
     Active: active (exited) since Fri 2020-11-06 10:30:38 UTC; 12min ago
   Main PID: 17860 (code=exited, status=0/SUCCESS)
      Tasks: 0 (limit: 18660)
     Memory: 0B
     CGroup: /system.slice/postgresql.service

Nov 06 10:30:38 conan systemd[1]: Starting PostgreSQL RDBMS...
Nov 06 10:30:38 conan systemd[1]: Finished PostgreSQL RDBMS.
1.2 设置 postgres 账户密码
安装 PostgreSQL 数据库后,会自动创建 Ubuntu 的 postgres 用户和 PostgreSQL 的 postgres 用户。为了后续让测试更方便,我们可以设置这两个账户的密码保持一致,都为 postgres。
首先,修改Ubuntu系统中,postgres用户的密码为postgres。
# 清除原有 postgres账户密码
~ sudo passwd -d postgres
passwd: password expiry information changed.

# 设置新密码 postgres
~ sudo -u postgres passwd
New password:
Retype new password:
passwd: password updated successfully
然后,登陆到PostgreSQL数据库,修改postgres用户的密码为postgres 。
#  登陆psql客户端
~ sudo -u postgres psql
psql (12.4 (Ubuntu 12.4-0ubuntu0.20.04.1))
Type "help" for help.

postgres=# ALTER USER postgres WITH PASSWORD 'postgres'
postgres-# \q
完成数据库中 postgres 账户的密码修改。
1.3 初始化PostgreSQL数据库空间
我们自己需要创建数据库空间,这里与MySQL是不同的,MySQL没有这一步骤。PostgreSQL 官方文档推荐的位置是 /user/local/pgsql/data 或 /var/lib/pgsql/data。那么,我们也把数据库空间放到/user/local/pgsql/data 目录吧。
首先要创建目录,各种安装过程中的问题从此处开始。
# 创建目录,-p 表示创建多级目录
~ sudo mkdir -p /usr/local/pgsql/data

# 设置权限
~ sudo chown postgres -R /usr/local/pgsql

# 创建数据库空间
~ sudo -u postgres initdb -D /user/local/pgsql/data
sudo: initdb: command not found
问题一:没有 initdb 命令。
我们从根目录搜索一下,查找initdb的命令位置。
~ sudo find / -name initdb
/usr/lib/postgresql/12/bin/initdb
指定initdb的位置后,再重新创建数据库空间,创建成功。
~ sudo -u postgres /usr/lib/postgresql/12/bin/initdb -D /usr/local/pgsql/data
The files belonging to this database system will be owned by user "postgres".
This user must also own the server process.

The database cluster will be initialized with locale "en_US.UTF-8".
The default database encoding has accordingly been set to "UTF8".
The default text search configuration will be set to "english".

Data page checksums are disabled.

fixing permissions on existing directory /usr/local/pgsql/data ... ok
creating subdirectories ... ok
selecting dynamic shared memory implementation ... posix
selecting default max_connections ... 100
selecting default shared_buffers ... 128MB
selecting default time zone ... Etc/UTC
creating configuration files ... ok
running bootstrap script ... ok
performing post-bootstrap initialization ... ok
syncing data to disk ... ok

initdb: warning: enabling "trust" authentication for local connections
You can change this by editing pg_hba.conf or using the option -A, or
--auth-local and --auth-host, the next time you run initdb.

Success. You can now start the database server using:

    /usr/lib/postgresql/12/bin/pg_ctl -D /usr/local/pgsql/data -l logfile start
1.4 启动数据库
启动数据库,执行上面最后一个提示的命令即可,pg_ctl是用于初始化PostgreSQL数据库集群。
~ sudo -u postgres /usr/lib/postgresql/12/bin/pg_ctl -D /usr/local/pgsql/data -l logfile start
waiting for server to start..../bin/sh: 1: cannot create logfile: Permission denied
 stopped waiting
pg_ctl: could not start server
Examine the log output.
问题二:pg_ctl权限问题
又出现了一个问题Permission denied,权限问题。增加输出目录/var/lib/postgresql/到logfile ,再次执行命令,程序正常启动!
~ sudo -u postgres /usr/lib/postgresql/12/bin/pg_ctl -D /usr/local/pgsql/data -l /var/lib/postgresql/logfile start
waiting for server to start.... done
server started
2. 数据库操作命令
安装postgresql服务器完成后,会自动地一起安装postgresql命令行客户端程序 psql。
在本机输入psql命令就可以启动,客户端程序访问postgresql服务器,直接输入 psql 命令时,会提示当前的用户没有授权。
~ psql
psql: error: could not connect to server: FATAL:  role "conan" does not exist
要使用postgres 用户,启动psql程序
~ sudo -u postgres psql
psql (12.4 (Ubuntu 12.4-0ubuntu0.20.04.1))
Type "help" for help.

postgres=#
如果一切正常,系统提示符会变为 postgres=# ,表示这时已经进入了数据库控制台。
2.1 控制台的命令使用
接下来的操作命令都在控制台内完成了,我们先要了解一下控制台,支持哪些操作。psql程序有一些不属于SQL命令的内部命令。它们以反斜线开头,“\”。
控制台命令列表:
- \password 命令(设置密码)
- \q 命令(退出)
- \h:查看SQL命令的解释,比如\h select。
- \?:查看psql命令列表。
- \l:列出所有数据库。
- \c [database_name]:连接其他数据库。
- \d:列出当前数据库的所有表格。
- \d [table_name]:列出某一张表格的结构。
- \du:列出所有用户。
- \e:打开文本编辑器。
- \conninfo:列出当前数据库和连接的信息。
我们都分别试一下,这些命令。
查看当前数据库信息
postgres-# \conninfo
You are connected to database "postgres" as user "postgres" via socket in "/var/run/postgresql" at port "5432".
查看数据库和操作系统版本
postgres=# SELECT version();
                                                            version
-------------------------------------------------------------------------------------------------------------------------------
 PostgreSQL 12.4 (Ubuntu 12.4-0ubuntu0.20.04.1) on x86_64-pc-linux-gnu, compiled by gcc (Ubuntu 9.3.0-10ubuntu2) 9.3.0, 64-bit
(1 row)
查看SQL命令解释
postgres=# \h
Available help:
  ABORT                            ALTER SYSTEM                     CREATE FOREIGN DATA WRAPPER      CREATE USER MAPPING              DROP ROUTINE                     PREPARE
  ALTER AGGREGATE                  ALTER TABLE                      CREATE FOREIGN TABLE             CREATE VIEW                      DROP RULE                        PREPARE TRANSACTION
  ALTER COLLATION                  ALTER TABLESPACE                 CREATE FUNCTION                  DEALLOCATE                       DROP SCHEMA                      REASSIGN OWNED
  ALTER CONVERSION                 ALTER TEXT SEARCH CONFIGURATION  CREATE GROUP                     DECLARE                          DROP SEQUENCE                    REFRESH MATERIALIZED VIEW
  ALTER DATABASE                   ALTER TEXT SEARCH DICTIONARY     CREATE INDEX                     DELETE                           DROP SERVER                      REINDEX
  ALTER DEFAULT PRIVILEGES         ALTER TEXT SEARCH PARSER         CREATE LANGUAGE                  DISCARD                          DROP STATISTICS                  RELEASE SAVEPOINT
  ALTER DOMAIN                     ALTER TEXT SEARCH TEMPLATE       CREATE MATERIALIZED VIEW         DO                               DROP SUBSCRIPTION                RESET
  ALTER EVENT TRIGGER              ALTER TRIGGER                    CREATE OPERATOR                  DROP ACCESS METHOD               DROP TABLE                       REVOKE
  ALTER EXTENSION                  ALTER TYPE                       CREATE OPERATOR CLASS            DROP AGGREGATE                   DROP TABLESPACE                  ROLLBACK
  ALTER FOREIGN DATA WRAPPER       ALTER USER                       CREATE OPERATOR FAMILY           DROP CAST                        DROP TEXT SEARCH CONFIGURATION   ROLLBACK PREPARED
  ALTER FOREIGN TABLE              ALTER USER MAPPING               CREATE POLICY                    DROP COLLATION                   DROP TEXT SEARCH DICTIONARY      ROLLBACK TO SAVEPOINT
  ALTER FUNCTION                   ALTER VIEW                       CREATE PROCEDURE                 DROP CONVERSION                  DROP TEXT SEARCH PARSER          SAVEPOINT
  ALTER GROUP                      ANALYZE                          CREATE PUBLICATION               DROP DATABASE                    DROP TEXT SEARCH TEMPLATE        SECURITY LABEL
  ALTER INDEX                      BEGIN                            CREATE ROLE                      DROP DOMAIN                      DROP TRANSFORM                   SELECT
  ALTER LANGUAGE                   CALL                             CREATE RULE                      DROP EVENT TRIGGER               DROP TRIGGER                     SELECT INTO
  ALTER LARGE OBJECT               CHECKPOINT                       CREATE SCHEMA                    DROP EXTENSION                   DROP TYPE                        SET
  ALTER MATERIALIZED VIEW          CLOSE                            CREATE SEQUENCE                  DROP FOREIGN DATA WRAPPER        DROP USER                        SET CONSTRAINTS
  ALTER OPERATOR                   CLUSTER                          CREATE SERVER                    DROP FOREIGN TABLE               DROP USER MAPPING                SET ROLE
  ALTER OPERATOR CLASS             COMMENT                          CREATE STATISTICS                DROP FUNCTION                    DROP VIEW                        SET SESSION AUTHORIZATION
  ALTER OPERATOR FAMILY            COMMIT                           CREATE SUBSCRIPTION              DROP GROUP                       END                              SET TRANSACTION
  ALTER POLICY                     COMMIT PREPARED                  CREATE TABLE                     DROP INDEX                       EXECUTE                          SHOW
  ALTER PROCEDURE                  COPY                             CREATE TABLE AS                  DROP LANGUAGE                    EXPLAIN                          START TRANSACTION
  ALTER PUBLICATION                CREATE ACCESS METHOD             CREATE TABLESPACE                DROP MATERIALIZED VIEW           FETCH                            TABLE
  ALTER ROLE                       CREATE AGGREGATE                 CREATE TEXT SEARCH CONFIGURATION DROP OPERATOR                    GRANT                            TRUNCATE
  ALTER ROUTINE                    CREATE CAST                      CREATE TEXT SEARCH DICTIONARY    DROP OPERATOR CLASS              IMPORT FOREIGN SCHEMA            UNLISTEN
  ALTER RULE                       CREATE COLLATION                 CREATE TEXT SEARCH PARSER        DROP OPERATOR FAMILY             INSERT                           UPDATE
  ALTER SCHEMA                     CREATE CONVERSION                CREATE TEXT SEARCH TEMPLATE      DROP OWNED                       LISTEN                           VACUUM
  ALTER SEQUENCE                   CREATE DATABASE                  CREATE TRANSFORM                 DROP POLICY                      LOAD                             VALUES
  ALTER SERVER                     CREATE DOMAIN                    CREATE TRIGGER                   DROP PROCEDURE                   LOCK                             WITH
  ALTER STATISTICS                 CREATE EVENT TRIGGER             CREATE TYPE                      DROP PUBLICATION                 MOVE
  ALTER SUBSCRIPTION               CREATE EXTENSION                 CREATE USER                      DROP ROLE                        NOTIFY
查看数据库列表
postgres-# \l
                                  List of databases
   Name    |  Owner   | Encoding |   Collate   |    Ctype    |   Access privileges
-----------+----------+----------+-------------+-------------+-----------------------
 postgres  | postgres | UTF8     | en_US.UTF-8 | en_US.UTF-8 |
 template0 | postgres | UTF8     | en_US.UTF-8 | en_US.UTF-8 | =c/postgres          +
           |          |          |             |             | postgres=CTc/postgres
 template1 | postgres | UTF8     | en_US.UTF-8 | en_US.UTF-8 | =c/postgres          +
           |          |          |             |             | postgres=CTc/postgres
(3 rows)
查看所有用户角色
postgres-# \du
                                   List of roles
 Role name |                         Attributes                         | Member of
-----------+------------------------------------------------------------+-----------
 postgres  | Superuser, Create role, Create DB, Replication, Bypass RLS | {}
查看当前的用户角色
postgres=# \c
You are now connected to database "postgres" as user "postgres".
要退出 psql 命令行
postgres=# \q
2.2 创建数据库testdb
创建一个用户数据库 testdb。
# 创建数据库
postgres=# create database testdb;
CREATE DATABASE

# 查看所有数据库
postgres=# \l
                                  List of databases
   Name    |  Owner   | Encoding |   Collate   |    Ctype    |   Access privileges
-----------+----------+----------+-------------+-------------+-----------------------
 postgres  | postgres | UTF8     | en_US.UTF-8 | en_US.UTF-8 |
 template0 | postgres | UTF8     | en_US.UTF-8 | en_US.UTF-8 | =c/postgres          +
           |          |          |             |             | postgres=CTc/postgres
 template1 | postgres | UTF8     | en_US.UTF-8 | en_US.UTF-8 | =c/postgres          +
           |          |          |             |             | postgres=CTc/postgres
 testdb    | postgres | UTF8     | en_US.UTF-8 | en_US.UTF-8 |
(4 rows)
选择指定的数据库testdb。
# 选择数据库
postgres=# \c testdb
You are now connected to database "testdb" as user "postgres".
2.3 创建新用户
通常来说,不建议直接使用超级管理员账户来直接进行数据操作,我们可以创建一些用户来完成对数据库的使用,避免超级管理员权限过大的问题。
创建2个新用户 test 和 test_readonly,密码都为 test 。test用户可直接完全访问testdb数据库,test_readonly用户仅直接只读访问testdb数据库。
postgres=# create user test with password 'test';
CREATE ROLE
postgres=# create user test_readonly with password 'test';
CREATE ROLE
给 test 用户授权可以完成控制 testdb 。
postgres=# GRANT ALL PRIVILEGES ON DATABASE testdb TO test;
GRANT
给 test_readonly 用户授权可以只读访问 testdb 。
# 切换数据库
postgres=# \c testdb;
You are now connected to database "testdb" as user "postgres".

# 赋予只读权限
testdb=# GRANT SELECT ON ALL TABLES in schema public TO test_readonly ;
GRANT
2.4 建表
让我们切换一下用户,使用test用户,建表和插入数据。
testdb=# \c - test
You are now connected to database "testdb" as user "test".
在testdb数据库中,建表,主键自增
# 建表
testdb=# create table account(
testdb(#     user_id serial primary key,
testdb(#     username varchar(50) unique not null,
testdb(#     password varchar(50) not null
testdb(# );
CREATE TABLE
查看testdb库的所有表
testdb=> \d
                List of relations
 Schema |        Name         |   Type   | Owner
--------+---------------------+----------+-------
 public | account             | table    | test
 public | account_user_id_seq | sequence | test
(2 rows)
查看account表的数据结构
# 查看表结构
testdb=> \d  account
                                       Table "public.account"
  Column  |         Type          | Collation | Nullable |                 Default
----------+-----------------------+-----------+----------+------------------------------------------
 user_id  | integer               |           | not null | nextval('account_user_id_seq'::regclass)
 username | character varying(50) |           | not null |
 password | character varying(50) |           | not null |
Indexes:
    "account_pkey" PRIMARY KEY, btree (user_id)
    "account_username_key" UNIQUE CONSTRAINT, btree (username)
2.5 插入数据
插入3条数据,因为主键是自增的,所以我们不用插入主键
# 单条插入
testdb=> INSERT INTO account(username , password ) VALUES('a1', 'a1');
INSERT 0 1

# 多条插入
testdb=> INSERT INTO account(username , password ) VALUES('a2', 'a2'),('a3', 'a3');
INSERT 0 2
进行查询,共有3条记录。
testdb=> SELECT * FROM account;
 user_id | username | password
---------+----------+----------
       1 | a1       | a1
       2 | a2       | a2
       3 | a3       | a3
(3 rows)
2.5 修改数据
修改user_id = 1的数据,username 改为 aaa1
# 修改数据
testdb=> UPDATE account SET username = 'aaa1' where user_id = 1;
UPDATE 1

# 进行查询
testdb=>  SELECT * FROM account;
 user_id | username | password
---------+----------+----------
       2 | a2       | a2
       3 | a3       | a3
       1 | aaa1     | a1
(3 rows)
修改user_id = 2的数据
# 删除数据
testdb=> DELETE FROM account where user_id = 2;
DELETE 1

# 进行查询
testdb=> SELECT * FROM account;
 user_id | username | password
---------+----------+----------
       3 | a3       | a3
       1 | aaa1     | a1
(2 rows)
2.6 切换只读用户test_readonly
切换用户test_readonly
testdb=# \c - test_readonly;
You are now connected to database "testdb" as user "test_readonly".

# 进行查询
testdb=> SELECT * FROM account;
 user_id | username | password
---------+----------+----------
       3 | a3       | a3
       1 | aaa1     | a1
(2 rows)
进行插入、修改、删除操作。
# 插入拒绝
testdb=> INSERT INTO account(username , password ) VALUES('a4', 'a4');
ERROR:  permission denied for table account

# 修改拒绝
testdb=> UPDATE account SET username = 'aaa3' where user_id = 3;
ERROR:  permission denied for table account

# 删除拒绝
testdb=> DELETE FROM account where user_id = 1;
ERROR:  permission denied for table account
3. 用pgAdmin远程访问数据库
安装好PostgreSQL数据库后,我们就需要进行数据库访问操作了,通常会使用远程的客户端程序来执行SQL语句,使用官方的pgAdmin客户端软件。
3.1 pgadmin下载
我们使用官方的pgadmin 4的客户端来进行数据库操作,pgadmin 4的客户端下载地址为:https://www.pgadmin.org/download/。
下载后,我在window 10上进行安装,打开是web版本的界面。
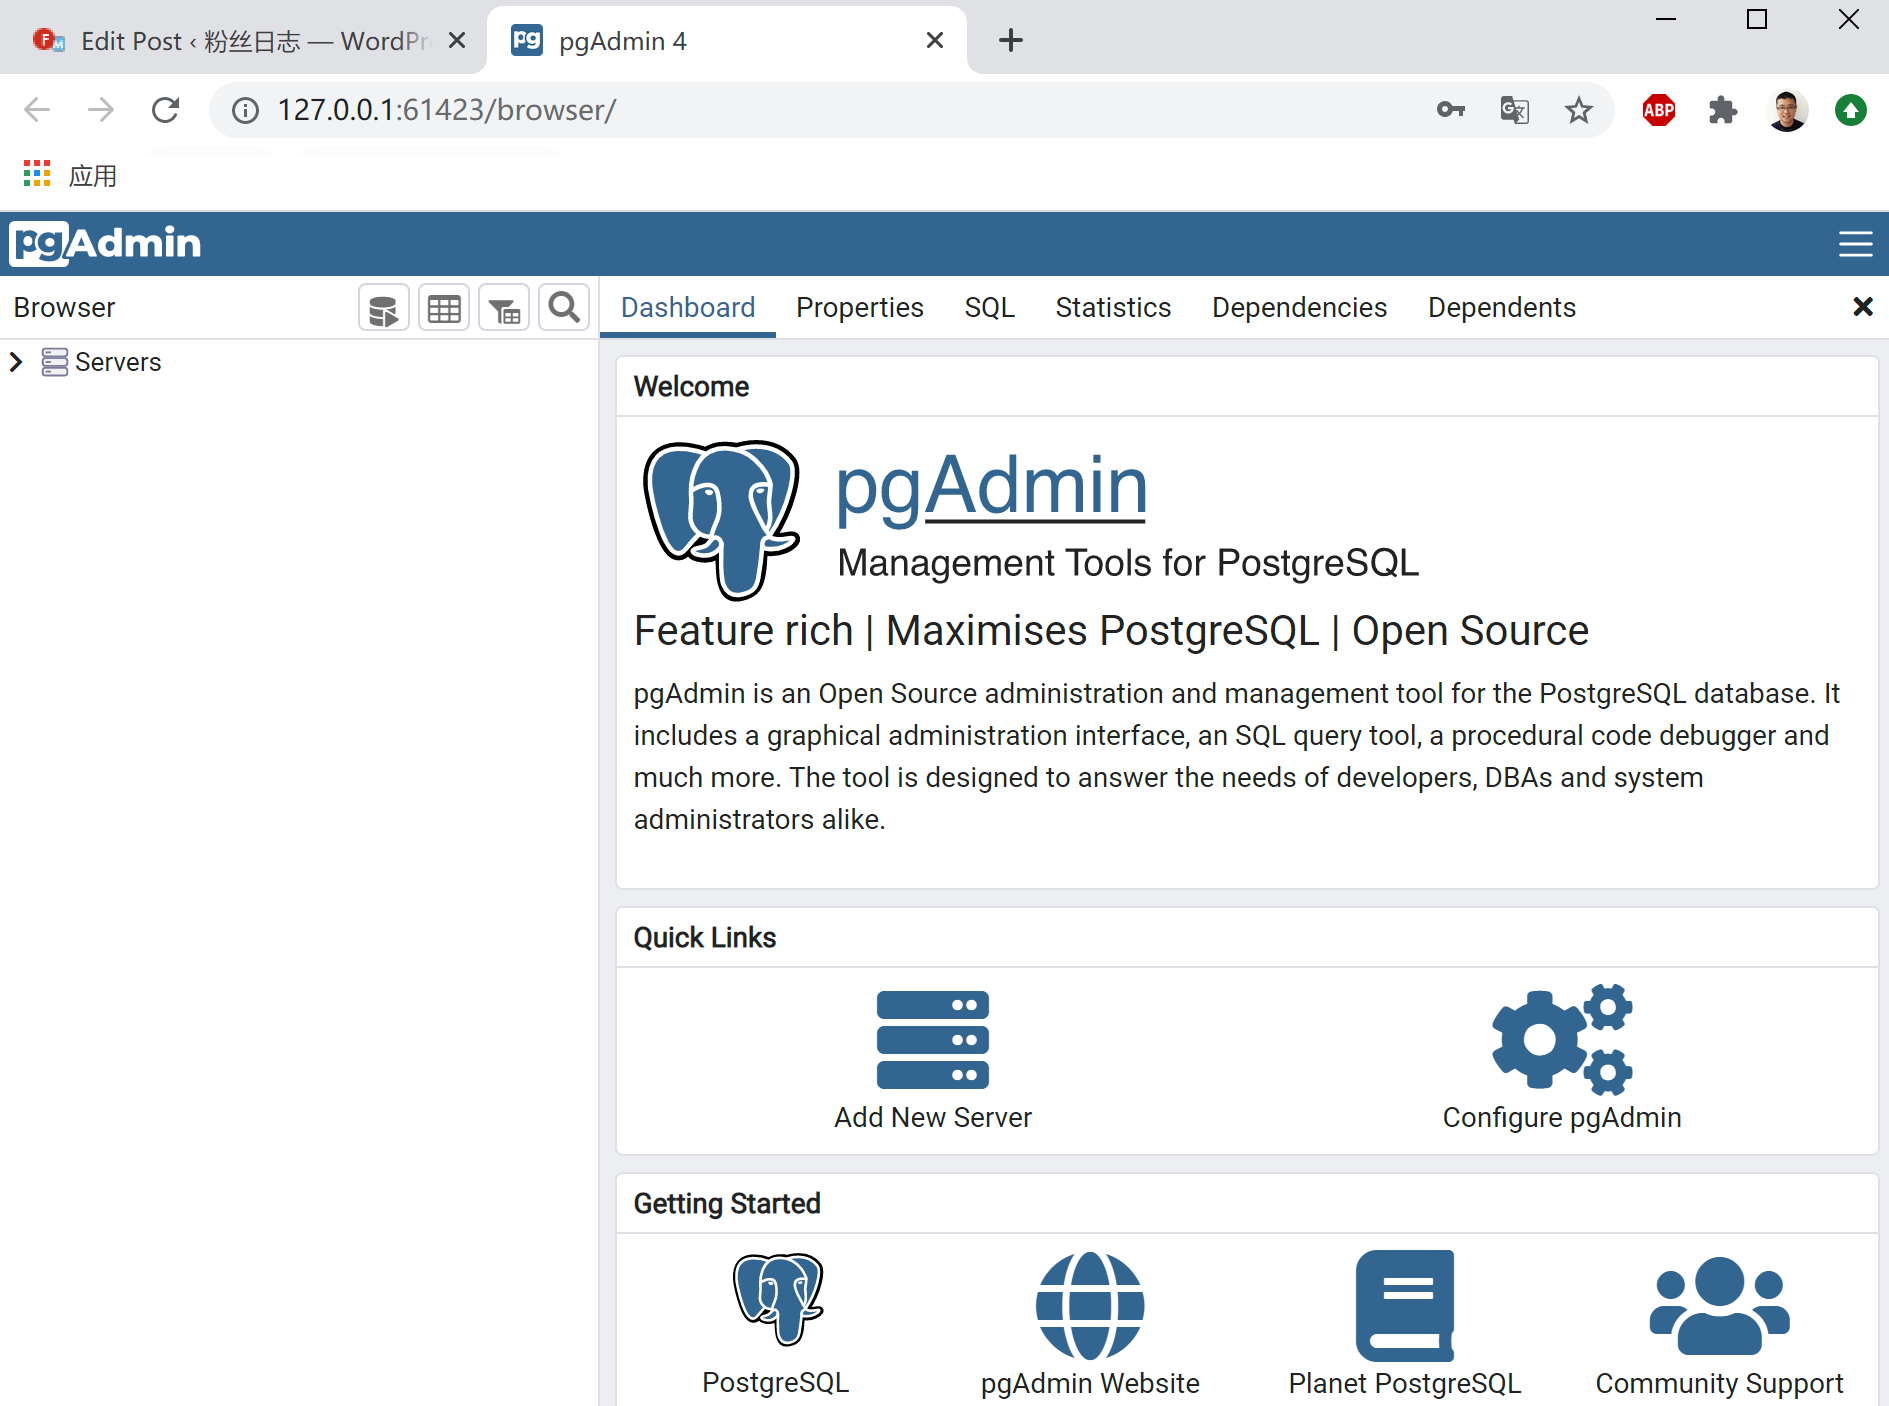
添加数据库服务器,并建立连接,发现数据库连接被拒绝。
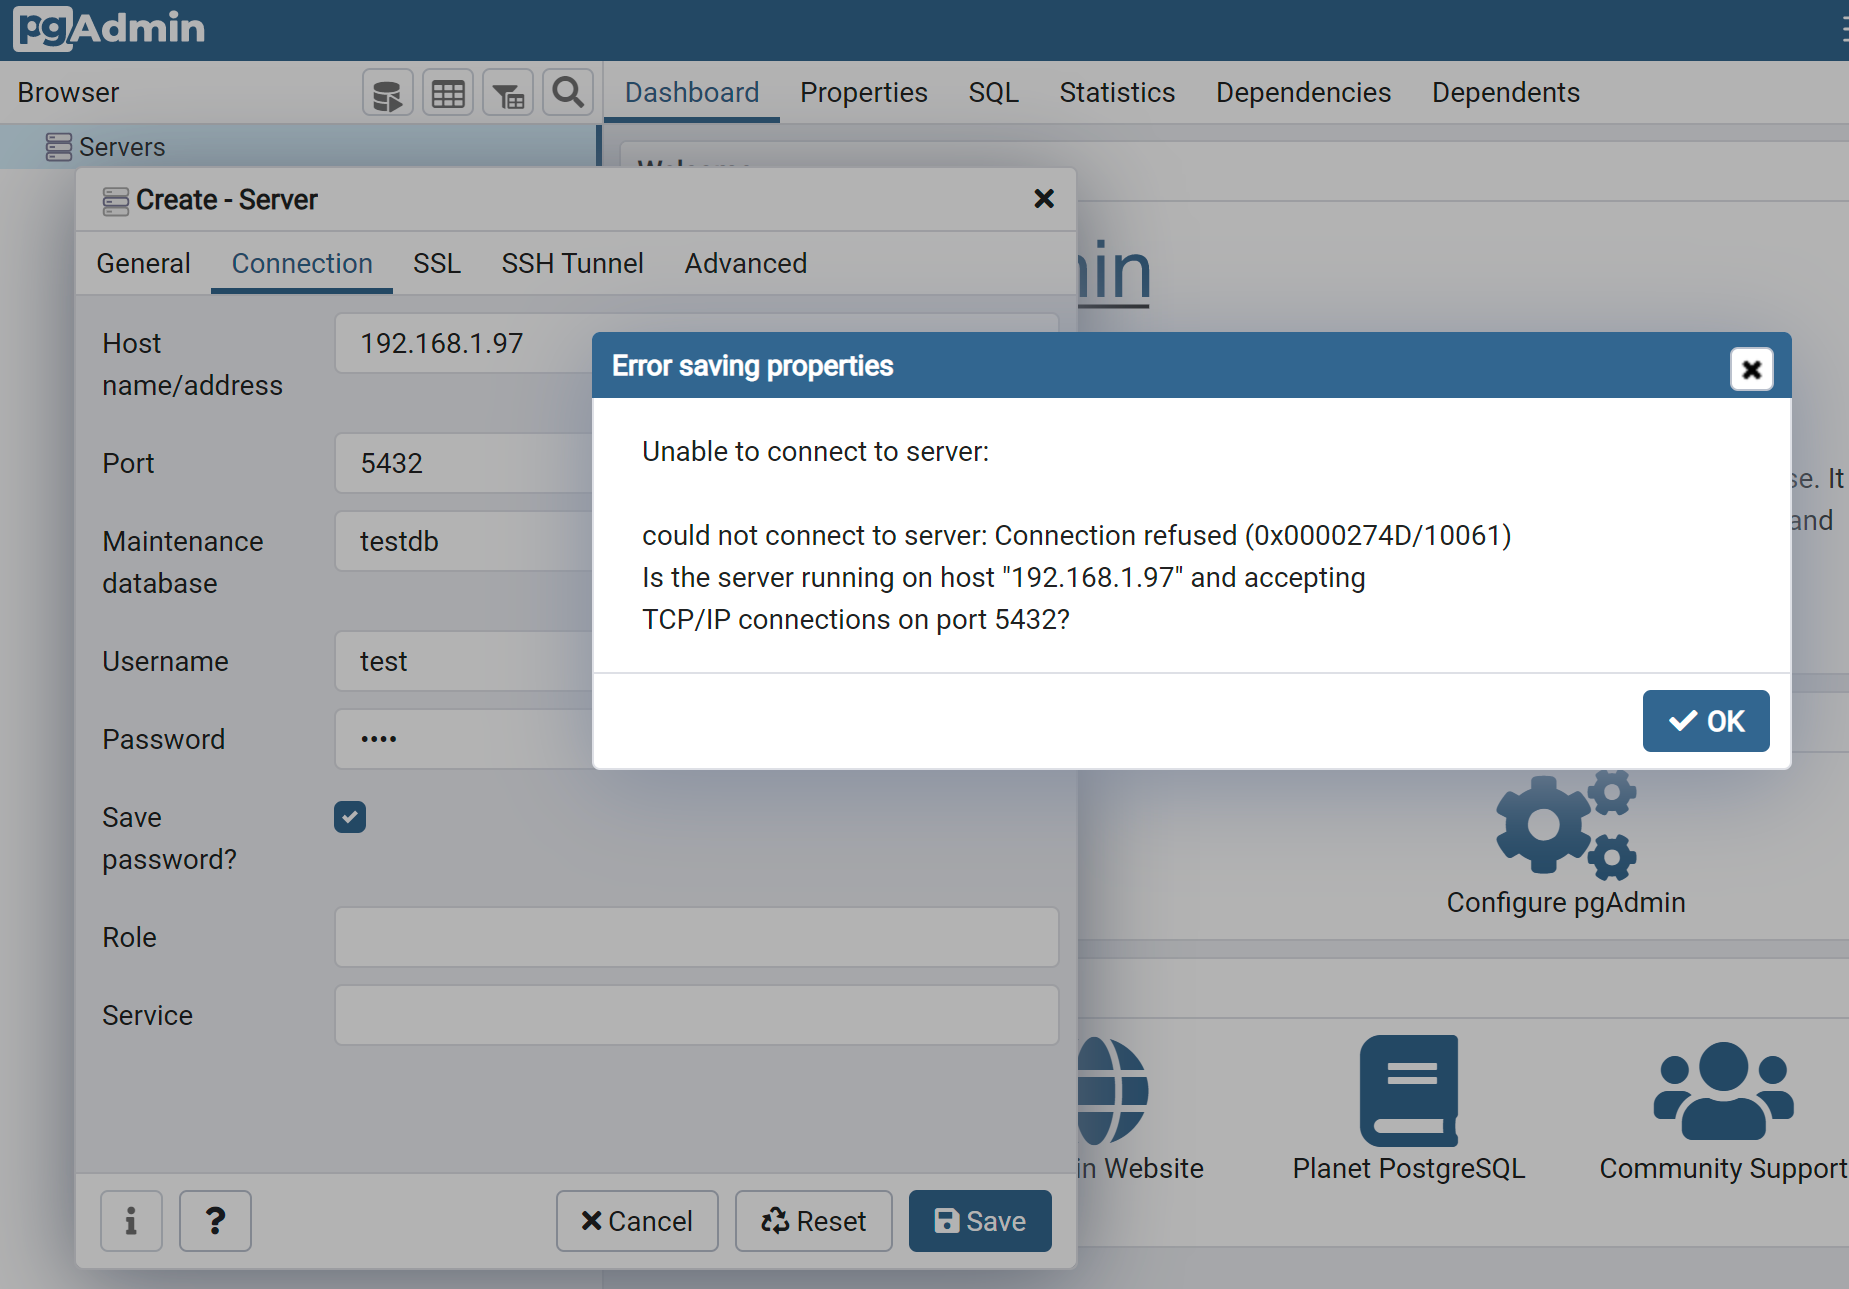
默认情况下,postgreSQL数据库只允许本机连接,要在其他机器上远程连接到postgreSQL数据库还需要修改相应的配置。
3.2 修改远程连接配置
前方有坑!按照网上的大部分教程,我们要修改配置文件,/etc/postgresql/12/main/postgresql.conf , 找到”#listen_addresses = ‘localhost'”中的注释去掉并改为 listen_addresses = ‘*’,允许远程客户端连接
~ sudo vi /etc/postgresql/12/main/postgresql.conf

listen_addresses = '*'
PostgreSQL客户端身份验证在名为的配置文件中定义pg_hba.conf。缺省情况下,PostgreSQL使用对等身份验证方法进行本地连接。
接下来,打开允许访问的IP段,修改 /etc/postgresql/12/main/pg_hba.conf , 在文件末尾添加 host all all 0.0.0.0 0.0.0.0 md5 ,表示允许任何IP连接
~ sudo vi /etc/postgresql/12/main/pg_hba.conf

host all all 0.0.0.0 0.0.0.0 md5
最后,重启数据库,就生效了。
sudo /etc/init.d/postgresql restart
我们检查postgresql 的网络监听端口
~ netstat -nlt|grep 5432
  tcp        0      127.0.0.1:5432            0.0.0.0:*               LISTEN
怎么一直都是127.0.0.1:5432而没有编程0 0.0.0.0:5432。我确认过了好几次呢。
问题三:远程配置怎么不生效?
仔细研究后发现,我们前文中在 新创建了 /usr/local/pgsql/data 数据空间,initdb的过程,会把pg_hba.conf和postgresql.conf文件初始化,所以需要改动 /usr/local/pgsql/data 目录下的这2个配置文件才可以。
进入目录 /usr/local/pgsql/data,发现又没有权限。
~ cd /usr/local/pgsql/data
-bash: cd: /usr/local/pgsql/data: Permission denied
切换为postgres用户,再进入目录 /usr/local/pgsql/data
# 切换用户
~ su postgres
Password:

# 进入目录
~  cd /usr/local/pgsql/data
 ls
base          pg_hba.conf    pg_notify     pg_stat      pg_twophase  postgresql.auto.conf
global        pg_ident.conf  pg_replslot   pg_stat_tmp  PG_VERSION   postgresql.conf
pg_commit_ts  pg_logical     pg_serial     pg_subtrans  pg_wal       postmaster.opts
pg_dynshmem   pg_multixact   pg_snapshots  pg_tblspc    pg_xact      postmaster.pid
修改pg_hba.conf,在最后一行加入host all all 0.0.0.0 0.0.0.0 md5。修改 postgresql.conf 文件,把 listen_addresses = ‘*’。
退出postgress用户
postgres@conan:/usr/local/pgsql/data$ exit
exit
conan@conan:/var/lib/postgresql
再用pg_ctl命令进行重启数据库服务。
# 停止数据库
~ sudo -u postgres /usr/lib/postgresql/12/bin/pg_ctl -D /usr/local/pgsql/data -l logfile stop
[sudo] password for conan:
waiting for server to shut down.... done
server stopped

# 启动数据库
~ sudo -u postgres /usr/lib/postgresql/12/bin/pg_ctl -D /usr/local/pgsql/data -l logfile start
waiting for server to start.... done
server started
查看服务器端口
# 检查PostgreSQL服务器占用端口
~ netstat -nlt|grep 5432
  tcp        0      0 0.0.0.0:5432            0.0.0.0:*               LISTEN
终于,从之前的网络监听从 127.0.0.1:5432 变成 0 0.0.0.0:5432,表示PostgreSQL已经允许远程登陆访问。
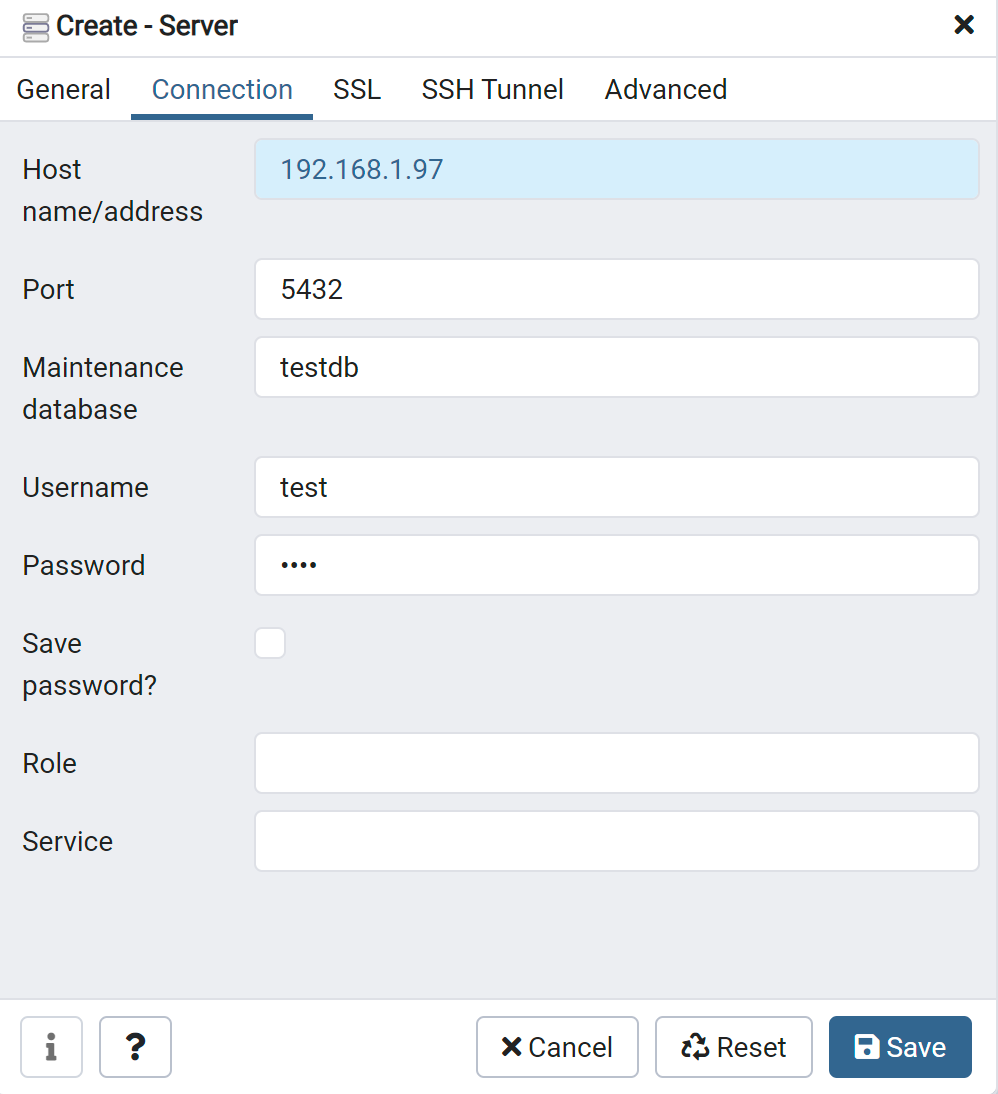
3.3 使用pgadmin进行远程连接
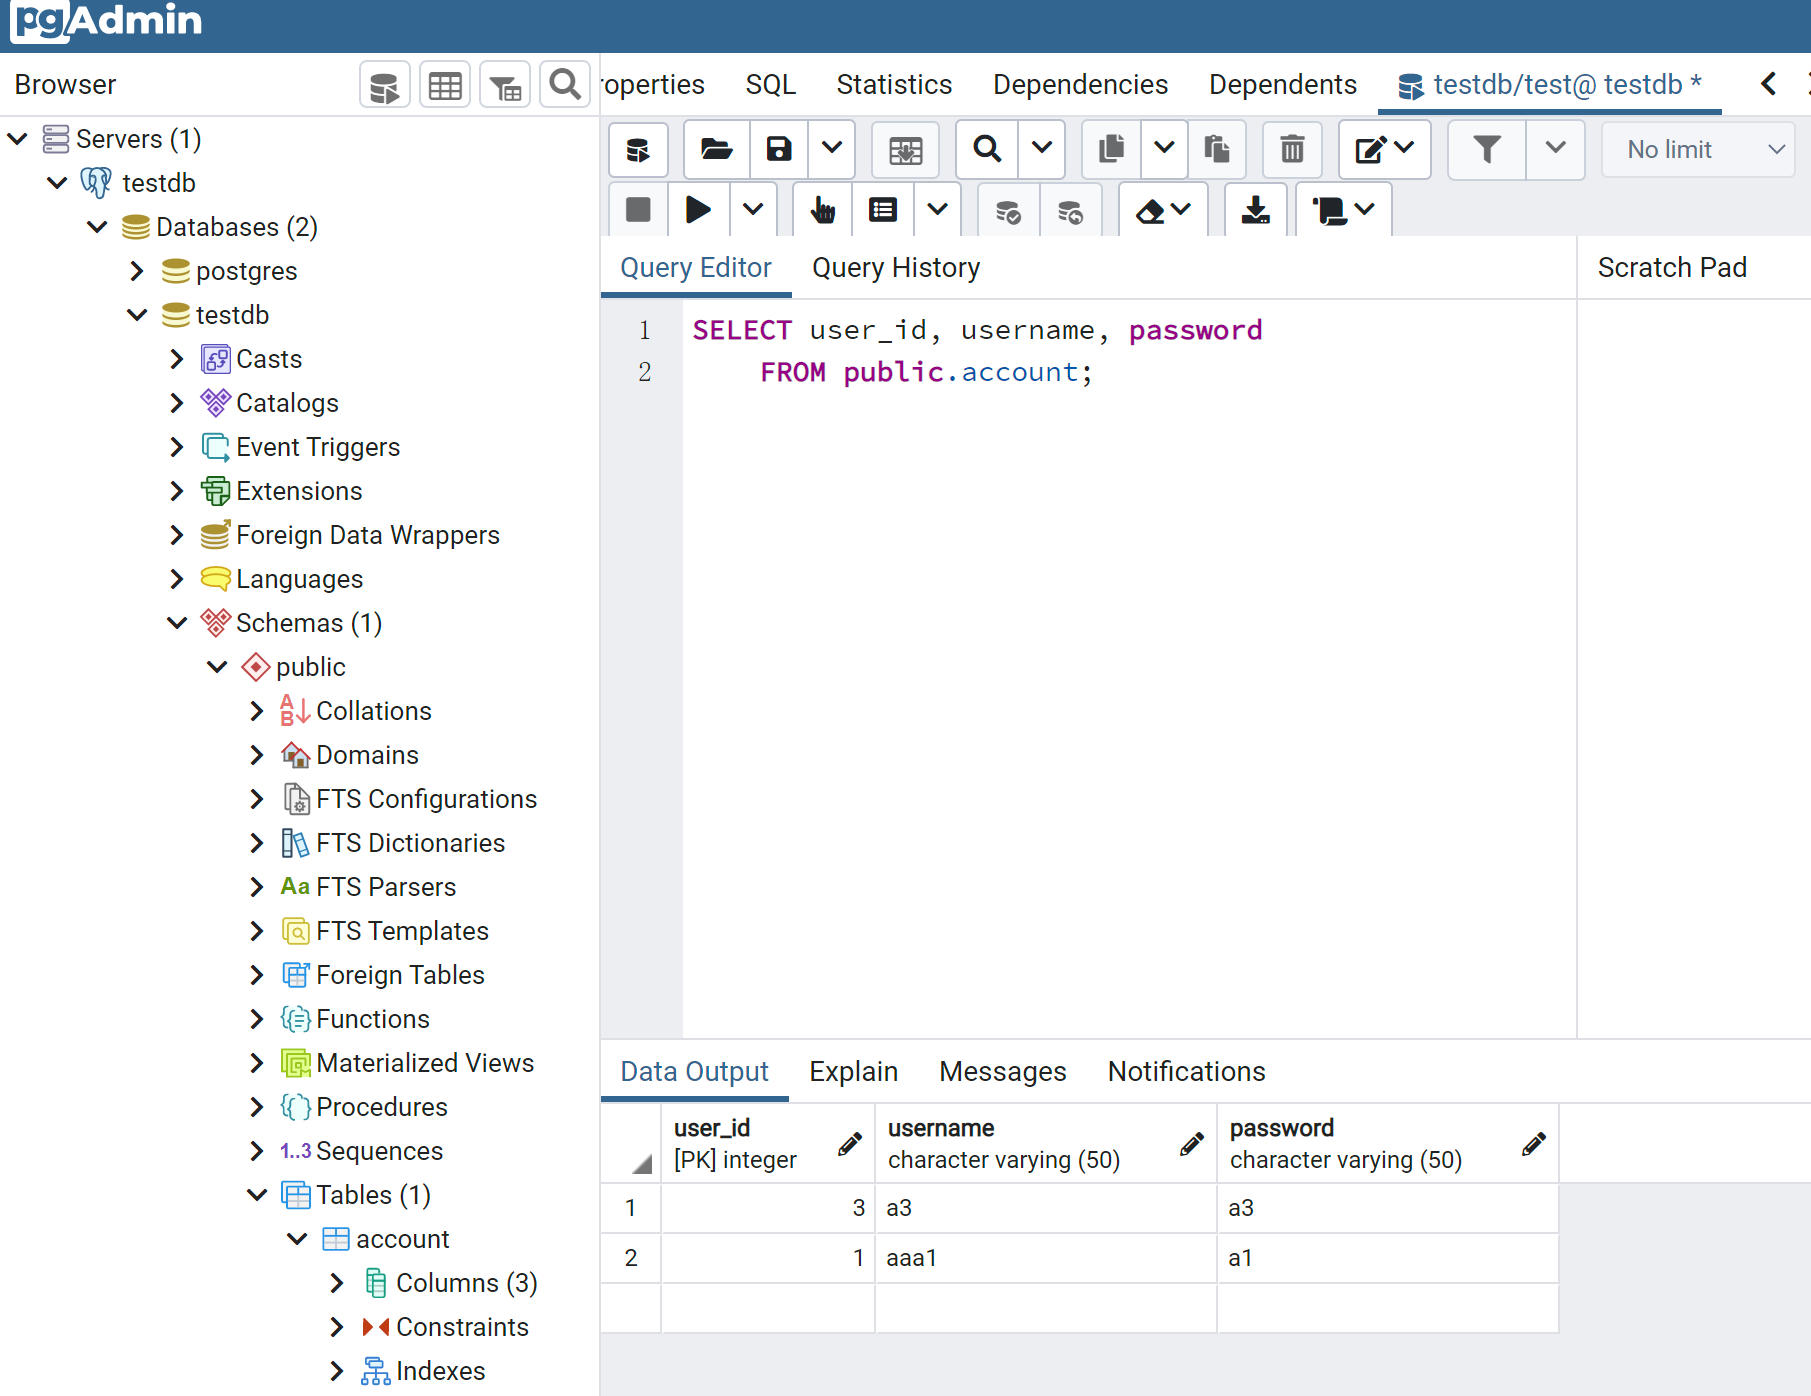
使用pgadmin配置数据库的远程连接。
进入pgadmin的界面,功能很强大,查看testdb的数据库统计。
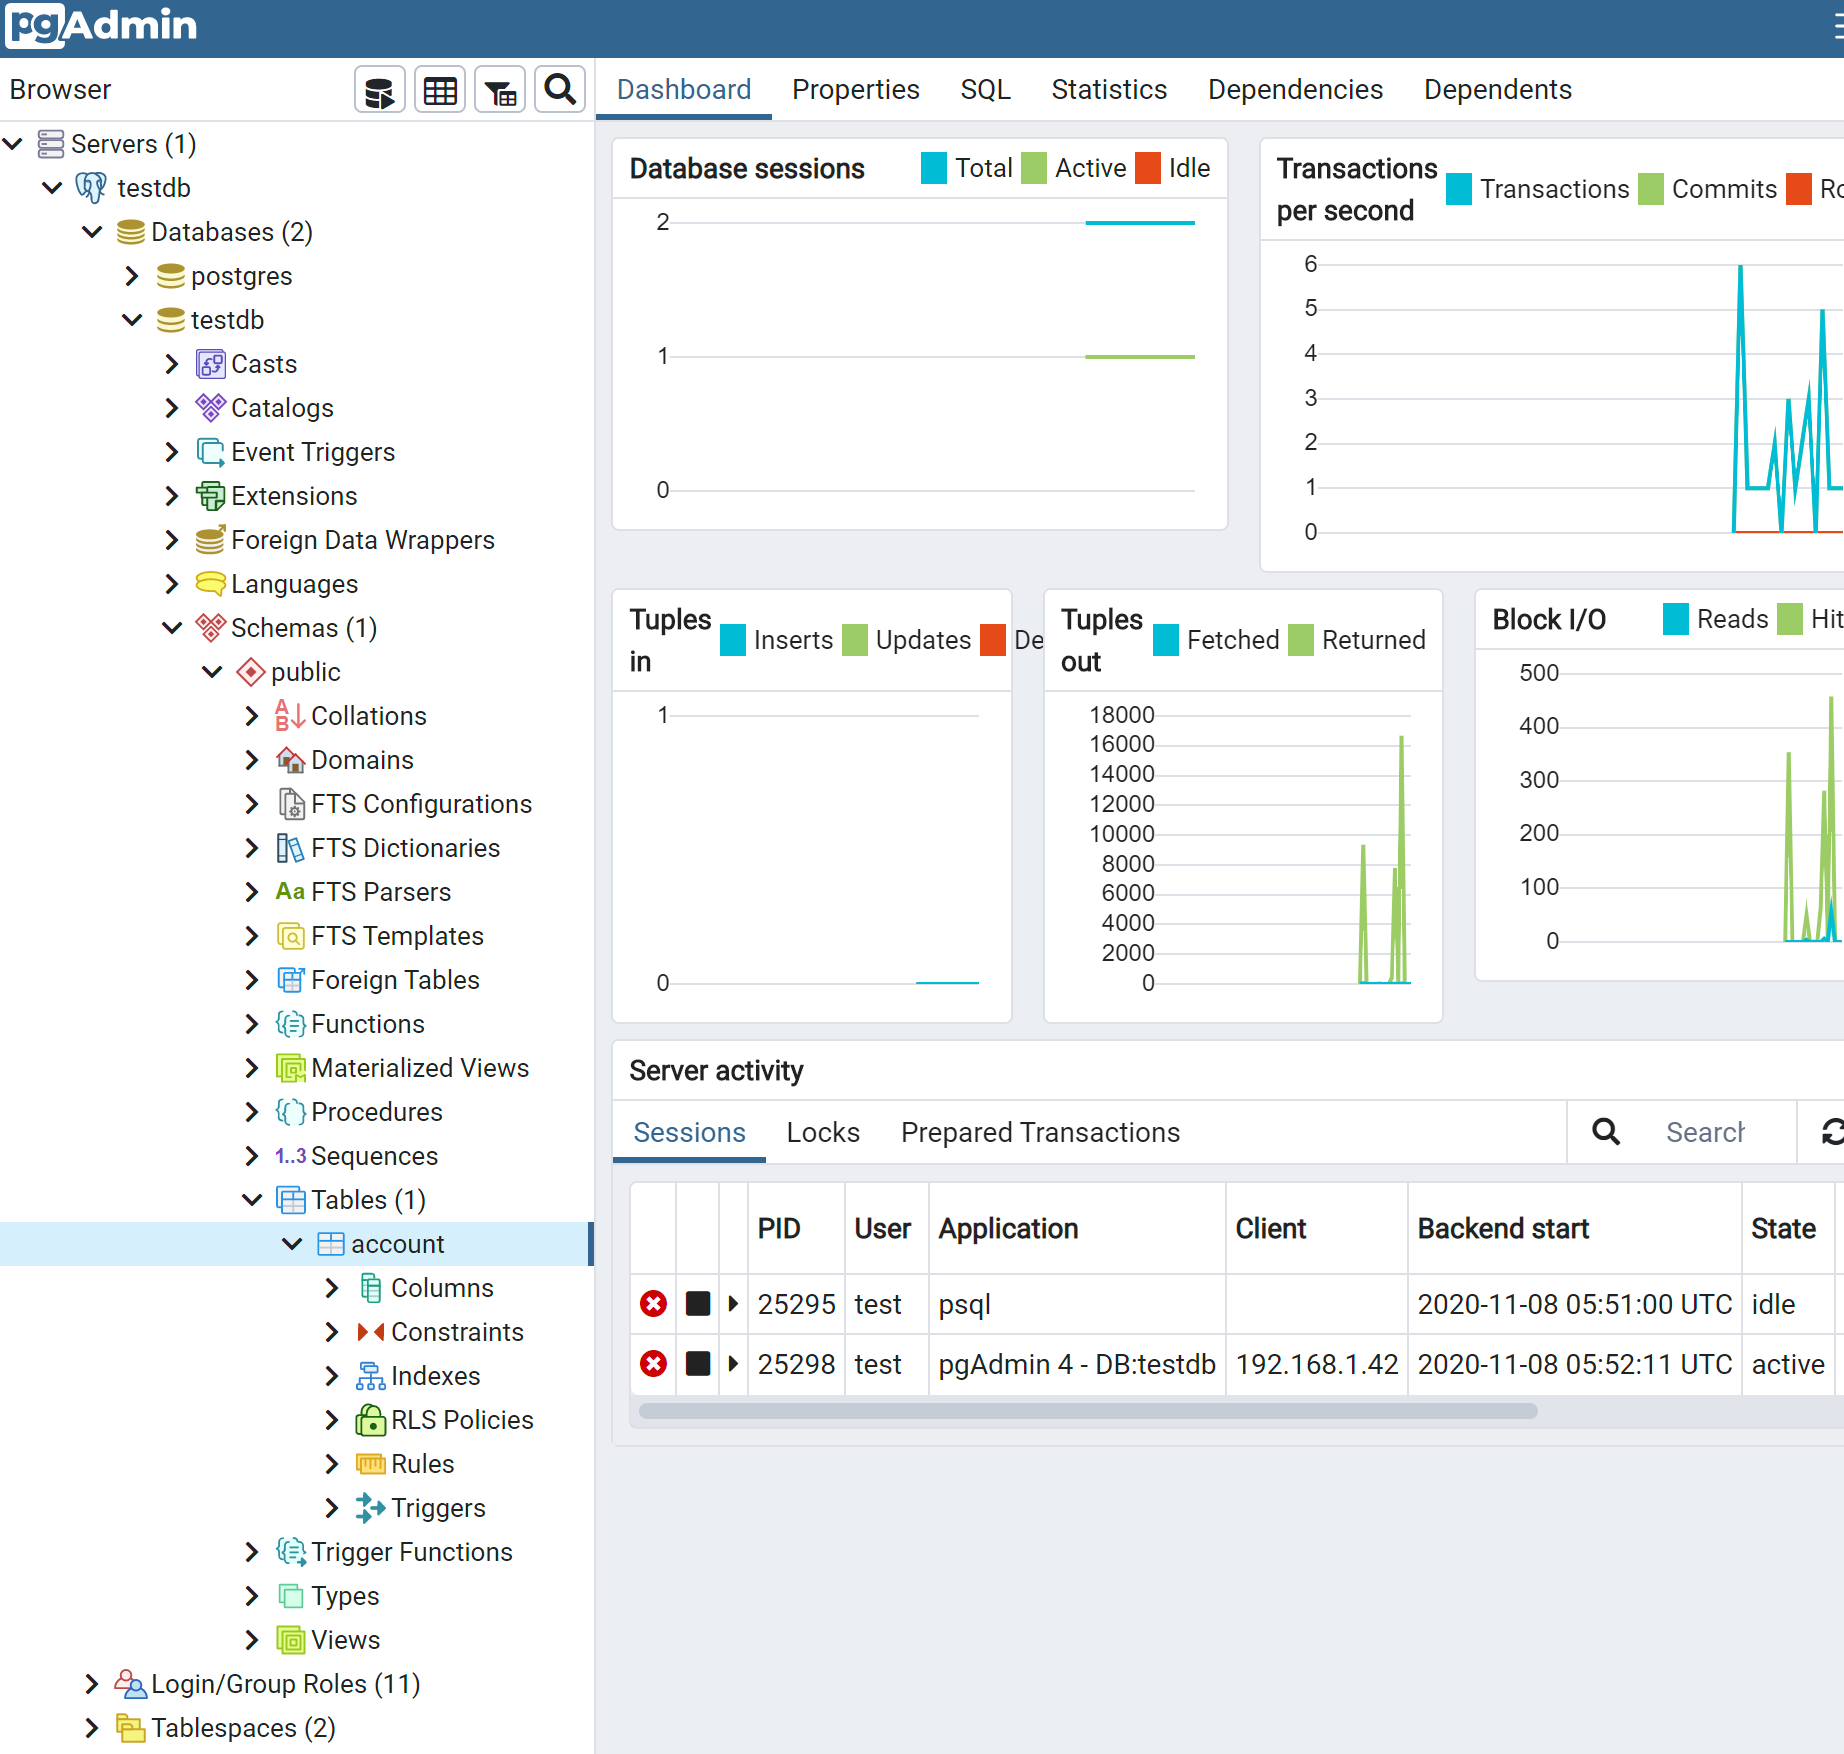
进行数据表的SQL查询。
通过上面的操作,我们就把PostgreSQL数据库服务器,在Linux Ubuntu中的系统安装完成,并完成了数据库的客户端远程连接访问!希望本文能让所有的PostgreSQL新手快速上手,顺利完成PostgreSQL数据库的初探。
转载请注明出处:
http://blog.fens.me/linux-postgresql-install/