• Posts tagged "sql"

Blog Archives

RSQLite数据库编程指南

R的极客理想系列文章,涵盖了R的思想,使用,工具,创新等的一系列要点,以我个人的学习和体验去诠释R的强大。

R语言作为统计学一门语言,一直在小众领域闪耀着光芒。直到大数据的爆发,R语言变成了一门炙手可热的数据分析的利器。随着越来越多的工程背景的人的加入,R语言的社区在迅速扩大成长。现在已不仅仅是统计领域,教育,银行,电商,互联网….都在使用R语言。

要成为有理想的极客,我们不能停留在语法上,要掌握牢固的数学,概率,统计知识,同时还要有创新精神,把R语言发挥到各个领域。让我们一起动起来吧,开始R的极客理想。

关于作者:

  • 张丹,分析师/程序员/Quant: R,Java,Nodejs
  • blog: http://blog.fens.me
  • email: bsspirit@gmail.com

转载请注明出处:
http://blog.fens.me/r-rsqlite/

前言

RSQLite包支持在R中的非常方便地创建和使用sqlite数据库,sqlite是单文件数据库,不需要预先安装,可内嵌在程序代码中。RSQLite的主要数据库操作依赖于DBI包,DBI是R语言中关系型数据库的底层接口包,除了支持RSQLite, 还支持 RMySQL, RPostgreSQL等连接其他数据库的包。

RSQLite的使用,是不需要本地提前装好SQLite的。本文阅读时,可以跳过第1,2节直接看RSQLite安装和使用。

目录

  1. SQLite数据库介绍
  2. 在 Windows 上安装 SQLite
  3. RSQLite 安装和使用

1. SQLite数据库介绍

SQLite 是一个开源的、轻量级的单进程数据库,通过单文件实现数据库存储。SQLite 数据库无服务器端、零配置的、支持事务性的 SQL 数据库引擎,应用程序可以进行静态或动态连接,直接访问其存储文件。SQLite 源代码不受版权限制。

SQLite官方网站:https://www.sqlite.org/index.html

2. 在 Windows 上安装 SQLite

如果单独使用 SQLite 时,我们可以从官方网站下载页面,从 Windows 区下载预编译的二进制文件和命令行工具文件。

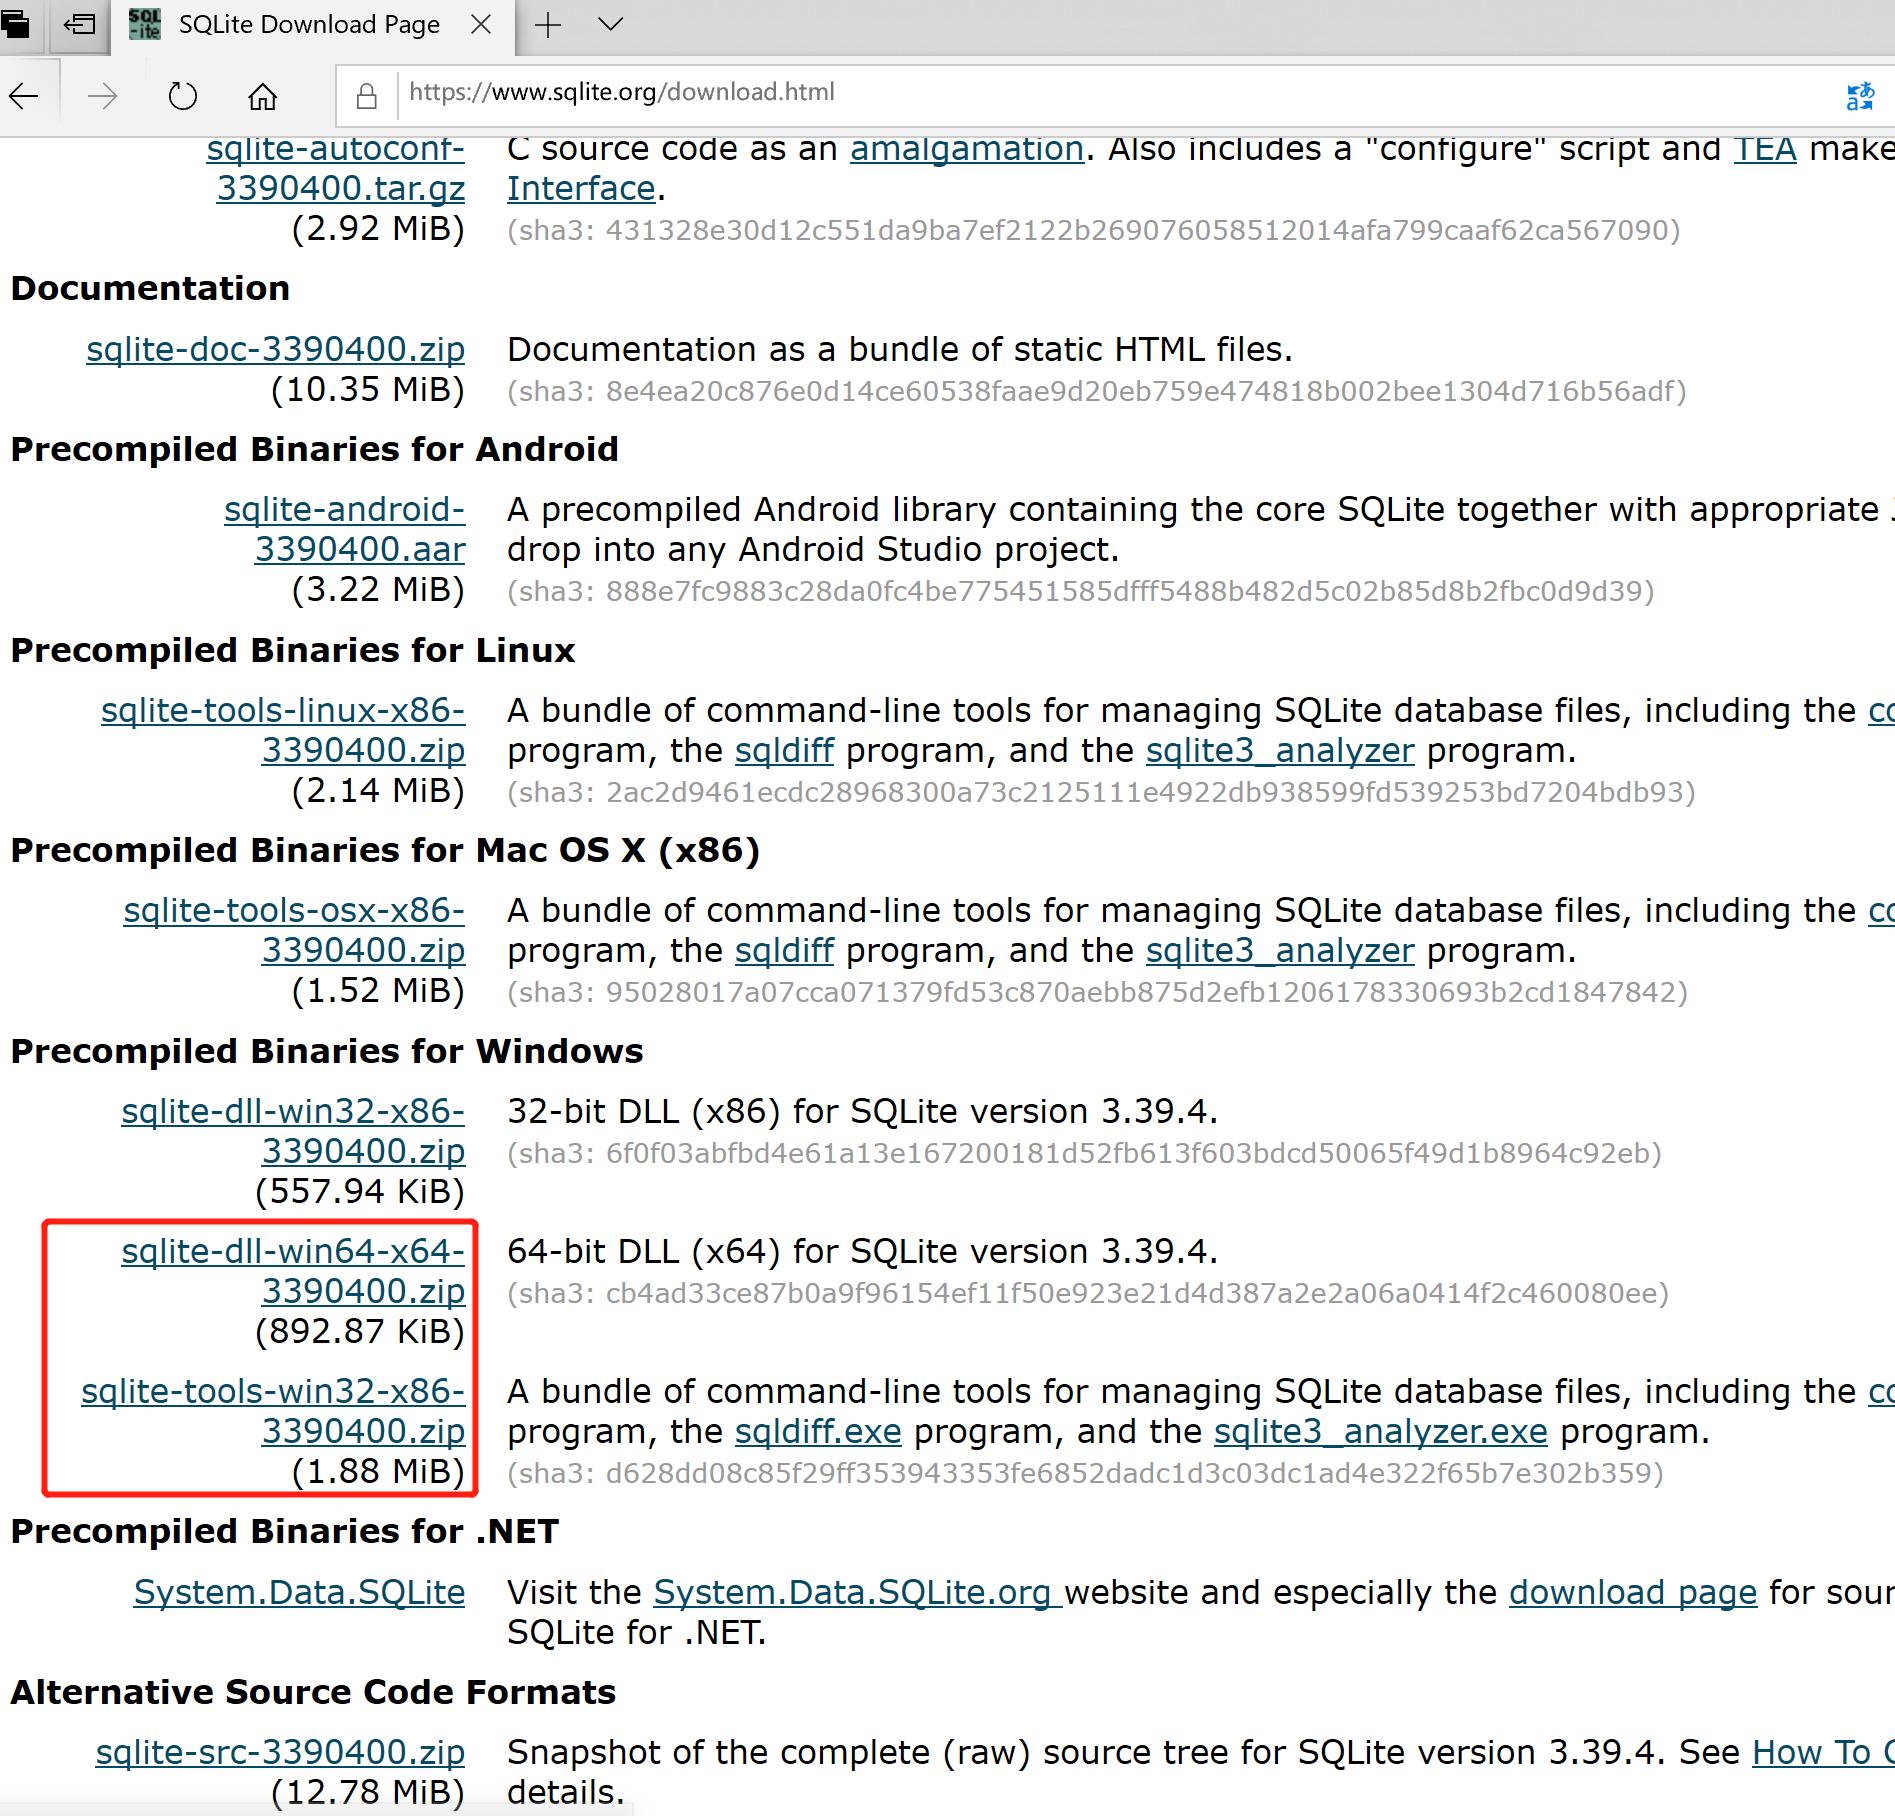
把上面2个目录的文件,进行解压,统一放到一个目录下面,我放到了D:/sqlite目录。

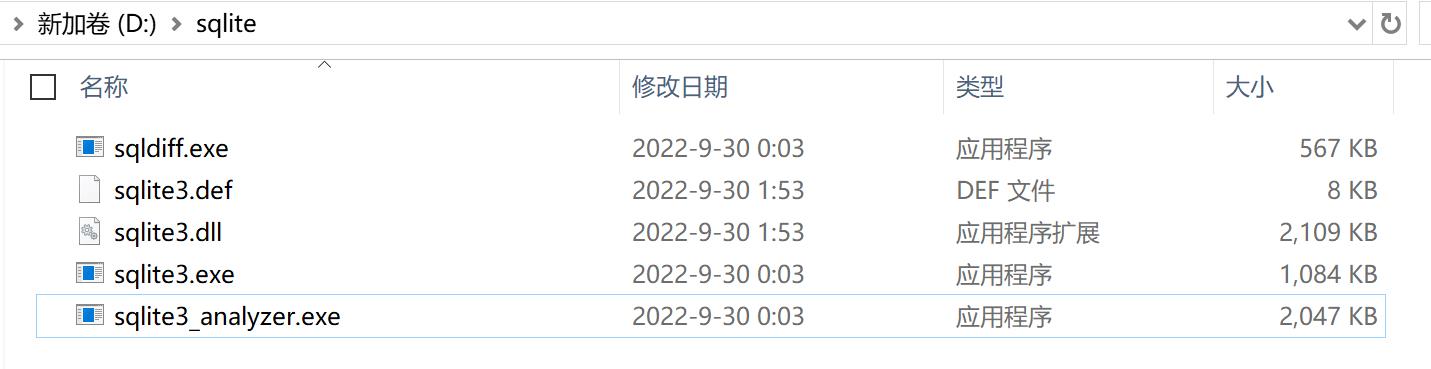
双击sqlite3.exe文件,用来启动命令行工具。

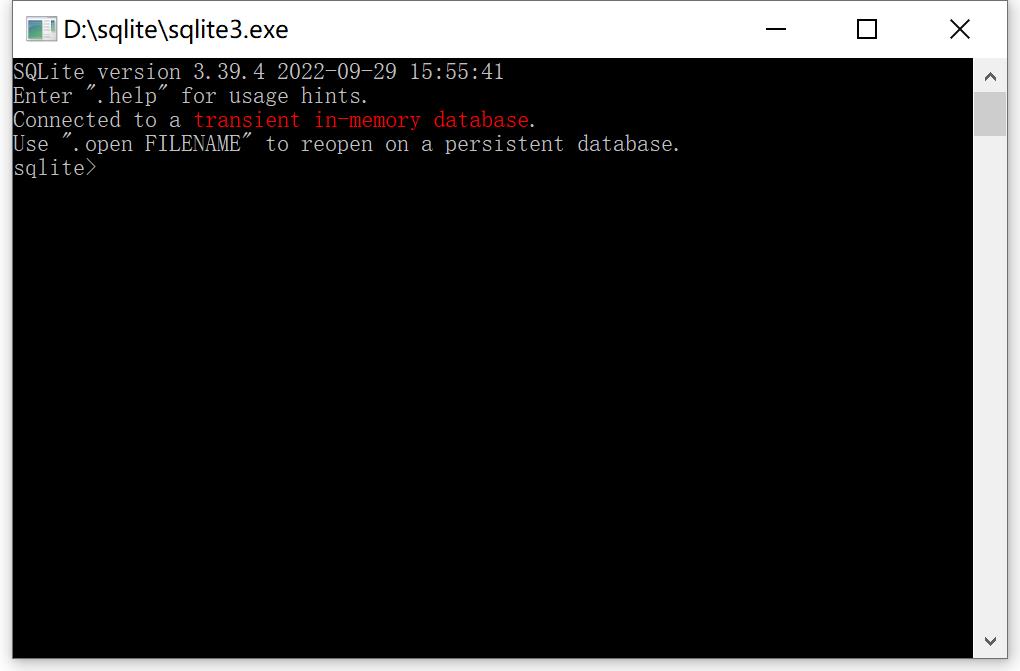
最后,添加 D:\sqlite 到 PATH 环境变量,就可以直接在命令提示符下,使用 sqlite3 命令,可以在任意目录启动sqlite数据库。

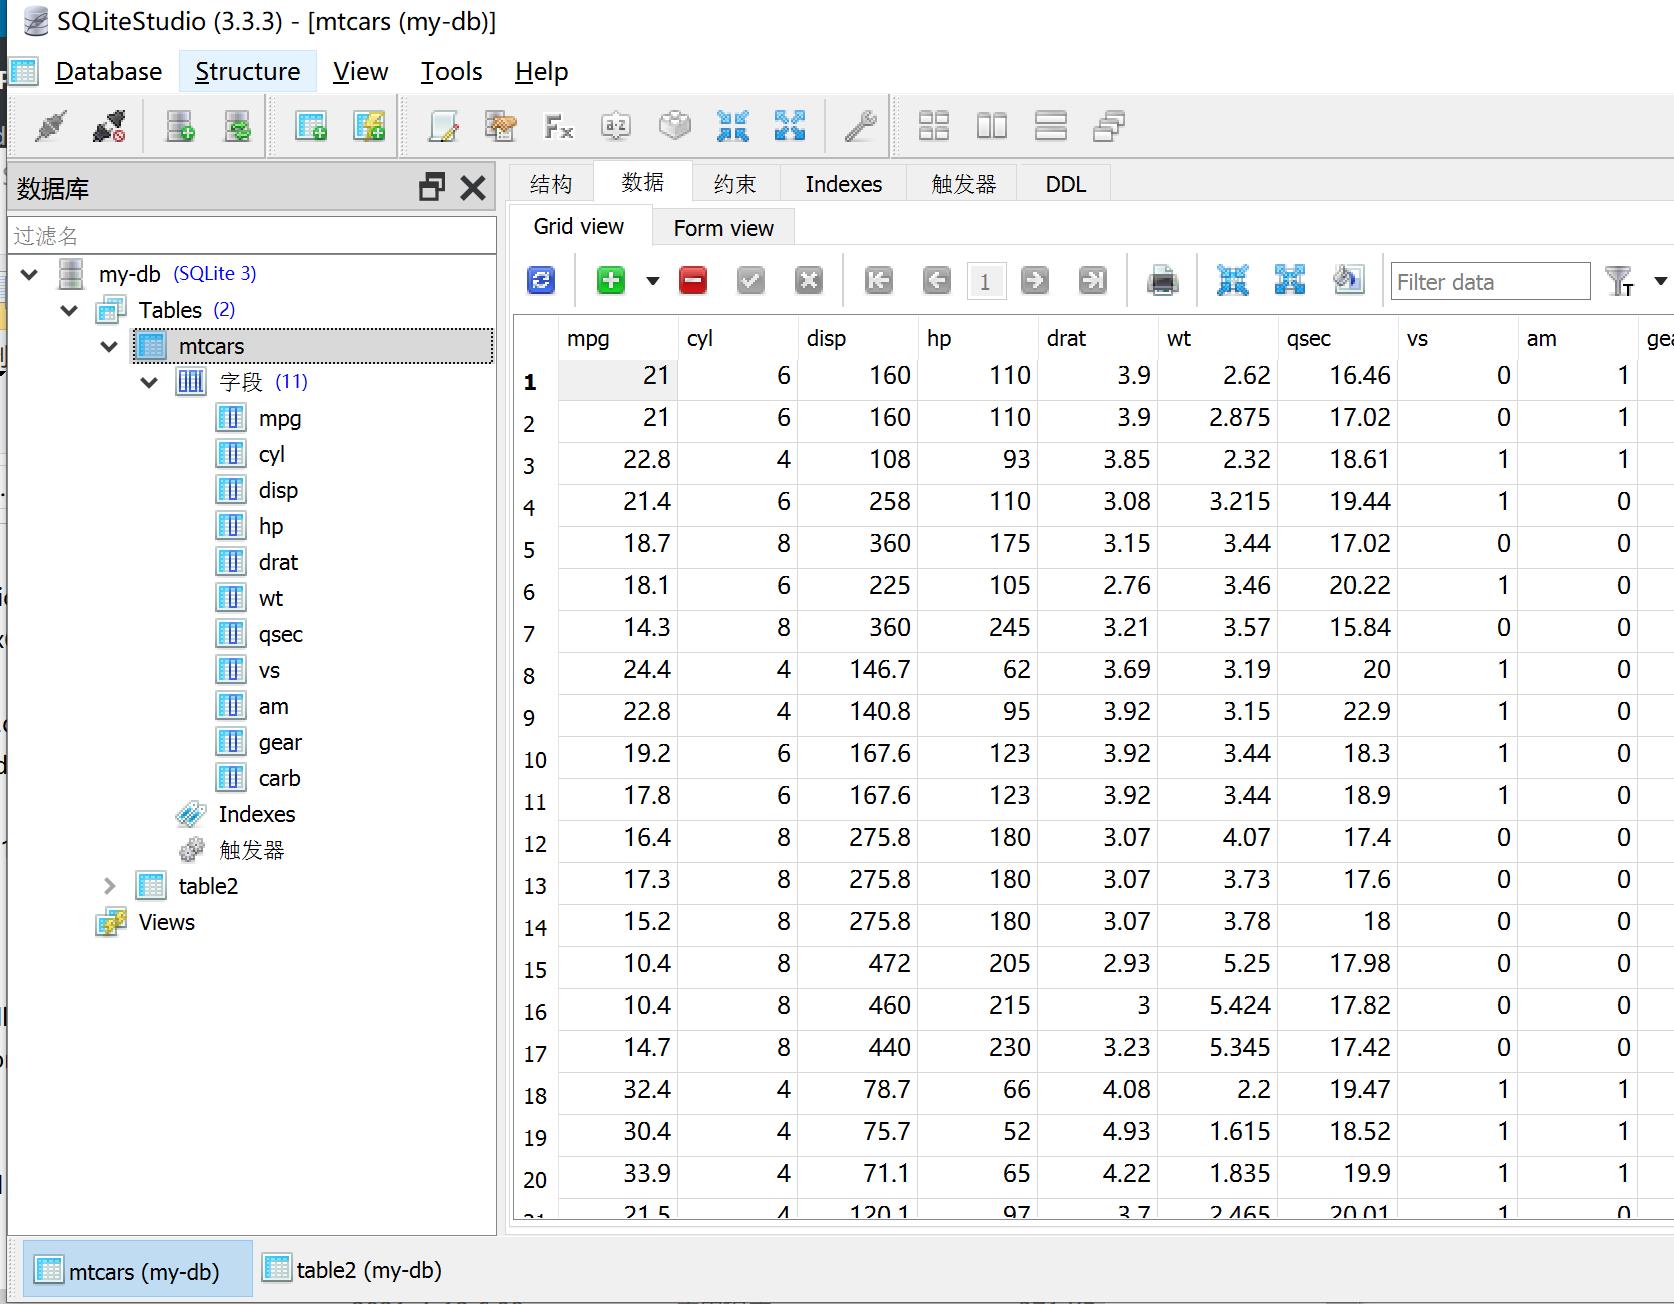
我们也可以安装sqlite可视化工具,进行操作,如免费的sqlitestudio工具https://www.sqlitestudio.pl/

3. RSQLite安装和使用

在R语言中,我们也可以非常方便地使用RSQLite数据库,本地多个文件,也不用再单独装个MySQL之类的,对于数据量不太大的应用来说,是非常方便的,特别是结合shiny的原型小应用。RSQLite的使用,不需求本地提前装好RSQLite的程序。

RSQLite 大部分功能都是依赖于DBI包的,在DBI之外,RSQLite包支持事务,数据库拷贝,修改配置等功能。话说RSQLite 也是Hadley Wickham开发的。RSQLite 包的 API列表:https://rsqlite.r-dbi.org/reference/index.html

4.1 RSQLite安装
首先,我们安装RSQLite是非常简单的,就一条语句

# 安装RSQLite包
> install.packages("RSQLite")

# 加载RSQLite包
> library(RSQLite)

RSQLite 数据库就是一个文件,所以我们首先要,先设置一个工作路径,然后给定义一个文件名。在目录中,会多出一个文件 C:\work\R\db\my-db.sqlite,这样我们的数据库就算是建立好了。


> setwd("C:\\work\\R\\db")
> conn <- dbConnect(SQLite(), "my-db.sqlite")
> dbGetInfo(conn)
$db.version
[1] "3.39.4"

$dbname
[1] "C:\\work\\R\\db\\my-db.sqlite"

$username
[1] NA

$host
[1] NA

$port
[1] NA

建立连接后,数据库的所有操作,都在内存中进行,并不会实时同步到文件,只有在执行关闭数据库连接的时候,才会一次性写入本地数据库的文件中。

4.2 整表操作
接下来,我们用RSQLite来创建数据表,通过整个表的方式,创建表 mtcars,并把数据集mtcars整体写入表,读取表。


# 查看数据集
> head(mtcars)
                   mpg cyl disp  hp drat    wt  qsec vs am gear carb
Mazda RX4         21.0   6  160 110 3.90 2.620 16.46  0  1    4    4
Mazda RX4 Wag     21.0   6  160 110 3.90 2.875 17.02  0  1    4    4
Datsun 710        22.8   4  108  93 3.85 2.320 18.61  1  1    4    1
Hornet 4 Drive    21.4   6  258 110 3.08 3.215 19.44  1  0    3    1
Hornet Sportabout 18.7   8  360 175 3.15 3.440 17.02  0  0    3    2
Valiant           18.1   6  225 105 2.76 3.460 20.22  1  0    3    1

# 创建表 mtcars,数据整表写入
> dbWriteTable(conn, "mtcars", head(mtcars))

# 查看当前数据库中的表
> dbListTables(conn)
[1] "mtcars"

# 数据整表读取
> dbReadTable(conn,"mtcars")
   mpg cyl disp  hp drat    wt  qsec vs am gear carb
1 21.0   6  160 110 3.90 2.620 16.46  0  1    4    4
2 21.0   6  160 110 3.90 2.875 17.02  0  1    4    4
3 22.8   4  108  93 3.85 2.320 18.61  1  1    4    1
4 21.4   6  258 110 3.08 3.215 19.44  1  0    3    1
5 18.7   8  360 175 3.15 3.440 17.02  0  0    3    2
6 18.1   6  225 105 2.76 3.460 20.22  1  0    3    1

# 用SQL读取数据
> dbGetQuery(conn, 'SELECT * FROM mtcars where cyl < 6')
   mpg cyl disp hp drat   wt  qsec vs am gear carb
1 22.8   4  108 93 3.85 2.32 18.61  1  1    4    1

# 用预定义变量的SQL读取数据
> dbGetQuery(conn, 'SELECT * FROM mtcars WHERE mpg < :x',
+            params = list(x = 20))
   mpg cyl disp  hp drat   wt  qsec vs am gear carb
1 18.7   8  360 175 3.15 3.44 17.02  0  0    3    2
2 18.1   6  225 105 2.76 3.46 20.22  1  0    3    1

# 删除表
> dbRemoveTable(conn,"mtcars")

4.3 增删改查独立语句
按照每一步创建表,和执行CRUD操作的进行独立语句的执行。

创建表,用一个已知的data.frame数据集,进行表的创建,只会创建表结构,不会写入数据集的数据。


# 创建表
> dbCreateTable(conn,"table2",mtcars)

# 查看表的字段
> dbListFields(conn,"table2")
 [1] "mpg"  "cyl"  "disp" "hp"   "drat" "wt"   "qsec" "vs"   "am"  
[10] "gear" "carb"

# 读取表,没有数据
> dbReadTable(conn,"table2")
 [1] mpg  cyl  disp hp   drat wt   qsec vs   am   gear carb
<0 行> (或0-长度的row.names)

用SQL的INSERT INTO语法插入数据。


# 拼接SQL
> sql1<-"INSERT INTO table2 VALUES ("
> sql2<-paste(table1[1,],collapse = ",")
> sql3<-")"
> sql<-paste0(sql1,sql2,sql3);
> sql
[1] "INSERT INTO table2 VALUES (21,6,160,110,3.9,2.62,16.46,0,1,4,4)"

# 执行插入
> dbExecute(conn,sql)
[1] 1

# 查看数据
> dbReadTable(conn,"table2")
  mpg cyl disp  hp drat   wt  qsec vs am gear carb
1  21   6  160 110  3.9 2.62 16.46  0  1    4    4

使用SQL的UPDATE语法修改数据


# 把cyl改成改成17
> dbExecute(conn,"UPDATE table2 SET cyl=17 WHERE mpg=21",immediate = TRUE)
[1] 1

# 查看数据
> dbReadTable(conn,"table2")
  mpg cyl disp  hp drat   wt  qsec vs am gear carb
1  21  17  160 110  3.9 2.62 16.46  0  1    4    4

用SQL的DELETE语法,删除数据。


# 再插入一条数据
> dbExecute(conn,sql)
[1] 1
> dbReadTable(conn,"table2")
  mpg cyl disp  hp drat   wt  qsec vs am gear carb
1  21  17  160 110  3.9 2.62 16.46  0  1    4    4
2  21   6  160 110  3.9 2.62 16.46  0  1    4    4

# 执行删除数据
> dbExecute(conn, 'DELETE FROM table2 WHERE cyl=17')
[1] 1
> dbReadTable(conn,"table2")
  mpg cyl disp  hp drat   wt  qsec vs am gear carb
1  21   6  160 110  3.9 2.62 16.46  0  1    4    4

4.4 执行完成
执行完成,关闭数据库连接。


> # 关闭连接
> dbDisconnect(conn)

这个时候,我们刚才的操作才会同步写入到 my-db.sqlite 文件中,之前一直都是在内存中执行的。
4.5 批量查询
RSQLite还提供了批量查询功能,对于数据量很大的时候,可以采用批量的方式,分步加载数据。


# 建立数据库连接
> conn <- dbConnect(SQLite(), "my-db.sqlite")

# 执行延迟查询,获得查询的句柄rs
> rs <- dbSendQuery(conn, 'SELECT * FROM mtcars')

# 以分页批次方式获取数据,每页为5条
> while (!dbHasCompleted(rs)) {
+   df <- dbFetch(rs, n = 5)
+   print(df)
+ }
   mpg cyl disp  hp drat    wt  qsec vs am gear carb
1 21.0   6  160 110 3.90 2.620 16.46  0  1    4    4
2 21.0   6  160 110 3.90 2.875 17.02  0  1    4    4
3 22.8   4  108  93 3.85 2.320 18.61  1  1    4    1
4 21.4   6  258 110 3.08 3.215 19.44  1  0    3    1
5 18.7   8  360 175 3.15 3.440 17.02  0  0    3    2
   mpg cyl  disp  hp drat   wt  qsec vs am gear carb
1 18.1   6 225.0 105 2.76 3.46 20.22  1  0    3    1
2 14.3   8 360.0 245 3.21 3.57 15.84  0  0    3    4
3 24.4   4 146.7  62 3.69 3.19 20.00  1  0    4    2
4 22.8   4 140.8  95 3.92 3.15 22.90  1  0    4    2
5 19.2   6 167.6 123 3.92 3.44 18.30  1  0    4    4
   mpg cyl  disp  hp drat   wt  qsec vs am gear carb
1 17.8   6 167.6 123 3.92 3.44 18.90  1  0    4    4
2 16.4   8 275.8 180 3.07 4.07 17.40  0  0    3    3
3 17.3   8 275.8 180 3.07 3.73 17.60  0  0    3    3
4 15.2   8 275.8 180 3.07 3.78 18.00  0  0    3    3
5 10.4   8 472.0 205 2.93 5.25 17.98  0  0    3    4
   mpg cyl  disp  hp drat    wt  qsec vs am gear carb
1 10.4   8 460.0 215 3.00 5.424 17.82  0  0    3    4
2 14.7   8 440.0 230 3.23 5.345 17.42  0  0    3    4
3 32.4   4  78.7  66 4.08 2.200 19.47  1  1    4    1
4 30.4   4  75.7  52 4.93 1.615 18.52  1  1    4    2
5 33.9   4  71.1  65 4.22 1.835 19.90  1  1    4    1
   mpg cyl  disp  hp drat    wt  qsec vs am gear carb
1 21.5   4 120.1  97 3.70 2.465 20.01  1  0    3    1
2 15.5   8 318.0 150 2.76 3.520 16.87  0  0    3    2
3 15.2   8 304.0 150 3.15 3.435 17.30  0  0    3    2
4 13.3   8 350.0 245 3.73 3.840 15.41  0  0    3    4
5 19.2   8 400.0 175 3.08 3.845 17.05  0  0    3    2
   mpg cyl  disp  hp drat    wt qsec vs am gear carb
1 27.3   4  79.0  66 4.08 1.935 18.9  1  1    4    1
2 26.0   4 120.3  91 4.43 2.140 16.7  0  1    5    2
3 30.4   4  95.1 113 3.77 1.513 16.9  1  1    5    2
4 15.8   8 351.0 264 4.22 3.170 14.5  0  1    5    4
5 19.7   6 145.0 175 3.62 2.770 15.5  0  1    5    6
   mpg cyl disp  hp drat   wt qsec vs am gear carb
1 15.0   8  301 335 3.54 3.57 14.6  0  1    5    8
2 21.4   4  121 109 4.11 2.78 18.6  1  1    4    2

# 关闭查询句柄
> dbClearResult(rs)

4.6 预编译参数使用
通过dbBind可以使用预编译参数,防止SQL注入,也是需要用到dbSendQuery()的延迟查询,通过dbFetch()来获得数据。


> rs <- dbSendQuery(conn, 'SELECT * FROM mtcars WHERE mpg  < :x')
> dbBind(rs, params = list(x = 15))
> dbFetch(rs)
   mpg cyl disp  hp drat    wt  qsec vs am gear carb
1 14.3   8  360 245 3.21 3.570 15.84  0  0    3    4
2 10.4   8  472 205 2.93 5.250 17.98  0  0    3    4
3 10.4   8  460 215 3.00 5.424 17.82  0  0    3    4
4 14.7   8  440 230 3.23 5.345 17.42  0  0    3    4
5 13.3   8  350 245 3.73 3.840 15.41  0  0    3    4
> dbClearResult(rs)

我们可以进行多参数绑定查询,查询mpg在20到30之间以0.2为间隔的数据。


> rs <- dbSendQuery(conn, 'SELECT * FROM mtcars WHERE mpg = :x')
> dbBind(rs, params = list(x = seq(20, 30, by = 0.2)))
> dbFetch(rs)
   mpg cyl  disp  hp drat    wt  qsec vs am gear carb
1 21.0   6 160.0 110 3.90 2.620 16.46  0  1    4    4
2 21.0   6 160.0 110 3.90 2.875 17.02  0  1    4    4
3 21.4   6 258.0 110 3.08 3.215 19.44  1  0    3    1
4 21.4   4 121.0 109 4.11 2.780 18.60  1  1    4    2
5 22.8   4 108.0  93 3.85 2.320 18.61  1  1    4    1
6 22.8   4 140.8  95 3.92 3.150 22.90  1  0    4    2
7 24.4   4 146.7  62 3.69 3.190 20.00  1  0    4    2
8 26.0   4 120.3  91 4.43 2.140 16.70  0  1    5    2
> dbClearResult(rs)
> dbDisconnect(conn) 

RSQLite的使用起来是非常简单地,这样我们可以避免小应用每次都需要安装数据库,一个独立的数据库文件什么都能做,轻巧简单!

转载请注明出处:
http://blog.fens.me/r-rsqlite/

打赏作者

R利剑NoSQL系列文章 之 Hive

R利剑NoSQL系列文章,主要介绍通过R语言连接使用nosql数据库。涉及的NoSQL产品,包括Redis,MongoDBHBaseHiveCassandra, Neo4j。希望通过我的介绍让广大的R语言爱好者,有更多的开发选择,做出更多地激动人心的应用。

关于作者:

  • 张丹(Conan), 程序员Java,R,PHP,Javascript
  • weibo:@Conan_Z
  • blog: http://blog.fens.me
  • email: bsspirit@gmail.com

转载请注明:
http://blog.fens.me/nosql-r-hive/

rhive

第四篇 R利剑Hive,分为5个章节。

  1. Hive介绍
  2. Hive安装
  3. RHive安装
  4. RHive函数库
  5. RHive基本使用操作

1. Hive介绍

Hive是建立在Hadoop上的数据仓库基础构架。它提供了一系列的工具,可以用来进行数据提取转化加载(ETL),这是一种可以存储、查询和分析存储在 Hadoop 中的大规模数据的机制。Hive 定义了简单的类 SQL 查询语言,称为 HQL,它允许熟悉 SQL 的用户查询数据。同时,这个语言也允许熟悉 MapReduce 开发者的开发自定义的 mapper 和 reducer 来处理内建的 mapper 和 reducer 无法完成的复杂的分析工作。

Hive 没有专门的数据格式。 Hive 可以很好的工作在 Thrift 之上,控制分隔符,也允许用户指定数据格式

上面内容摘自 百度百科(http://baike.baidu.com/view/699292.htm)

hive与关系数据库的区别:

  • 数据存储不同:hive基于hadoop的HDFS,关系数据库则基于本地文件系统
  • 计算模型不同:hive基于hadoop的mapreduce,关系数据库则基于索引的内存计算模型
  • 应用场景不同:hive是OLAP数据仓库系统提供海量数据查询的,实时性很差;关系数据库是OLTP事务系统,为实时查询业务服务
  • 扩展性不同:hive基于hadoop很容易通过分布式增加存储能力和计算能力,关系数据库水平扩展很难,要不断增加单机的性能

2. Hive安装

Hive是基于Hadoop开发的数据仓库产品,所以首先我们要先有Hadoop的环境。

rhive

Hadoop安装,请参考:Hadoop环境搭建, 创建Hadoop母体虚拟机

Hive的安装,请参考:Hive安装及使用攻略

Hadoop-1.0.3的下载地址
http://archive.apache.org/dist/hadoop/core/hadoop-1.0.3/

Hive-0.9.0的下载地址
http://archive.apache.org/dist/hive/hive-0.9.0/

Hive安装好后
启动hiveserver的服务

~ nohup hive --service hiveserver  &
Starting Hive Thrift Server

打开hive shell

~ hive shell
Logging initialized using configuration in file:/home/conan/hadoop/hive-0.9.0/conf/hive-log4j.proper             ties
Hive history file=/tmp/conan/hive_job_log_conan_201306261459_153868095.txt

#查看hive的表
hive> show tables;
hive_algo_t_account
o_account
r_t_account
Time taken: 2.12 seconds

#查看o_account表的数据
hive> select * from o_account;
1       abc@163.com     2013-04-22 12:21:39
2       dedac@163.com   2013-04-22 12:21:39
3       qq8fed@163.com  2013-04-22 12:21:39
4       qw1@163.com     2013-04-22 12:21:39
5       af3d@163.com    2013-04-22 12:21:39
6       ab34@163.com    2013-04-22 12:21:39
7       q8d1@gmail.com  2013-04-23 09:21:24
8       conan@gmail.com 2013-04-23 09:21:24
9       adeg@sohu.com   2013-04-23 09:21:24
10      ade121@sohu.com 2013-04-23 09:21:24
11      addde@sohu.com  2013-04-23 09:21:24
Time taken: 0.469 seconds

3. RHive安装

请提前配置好JAVA的环境:

~ java -version
java version "1.6.0_29"
Java(TM) SE Runtime Environment (build 1.6.0_29-b11)
Java HotSpot(TM) 64-Bit Server VM (build 20.4-b02, mixed mode)

安装R:Ubuntu 12.04,请更新源再下载R2.15.3版本

~ sudo sh -c "echo deb http://mirror.bjtu.edu.cn/cran/bin/linux/ubuntu precise/ >>/etc/apt/sources.list"
~ sudo apt-get update
~ sudo apt-get install r-base-core=2.15.3-1precise0precise1

安装R依赖库:rjava

#配置rJava
~ sudo R CMD javareconf

#启动R程序
~ sudo R
install.packages("rJava")

安装RHive


install.packages("RHive")
library(RHive)
Loading required package: rJava
Loading required package: Rserve
This is RHive 0.0-7. For overview type ‘?RHive’.
HIVE_HOME=/home/conan/hadoop/hive-0.9.0
call rhive.init() because HIVE_HOME is set.

由于RHive已经从CRAN上移除,需要动手下载安装,下载地址:https://cran.r-project.org/src/contrib/Archive/RHive/。我们需要动手下载RHive_0.0-7.tar.gz包,然后通过命令进行安装。


# 安装RHive
~ R CMD INSTALL RHive_0.0-7.tar.gz

4. RHive函数库

rhive.aggregate        rhive.connect          rhive.hdfs.exists      rhive.mapapply
rhive.assign           rhive.desc.table       rhive.hdfs.get         rhive.mrapply
rhive.basic.by         rhive.drop.table       rhive.hdfs.info        rhive.napply
rhive.basic.cut        rhive.env              rhive.hdfs.ls          rhive.query
rhive.basic.cut2       rhive.exist.table      rhive.hdfs.mkdirs      rhive.reduceapply
rhive.basic.merge      rhive.export           rhive.hdfs.put         rhive.rm
rhive.basic.mode       rhive.exportAll        rhive.hdfs.rename      rhive.sapply
rhive.basic.range      rhive.hdfs.cat         rhive.hdfs.rm          rhive.save
rhive.basic.scale      rhive.hdfs.chgrp       rhive.hdfs.tail        rhive.script.export
rhive.basic.t.test     rhive.hdfs.chmod       rhive.init             rhive.script.unexport
rhive.basic.xtabs      rhive.hdfs.chown       rhive.list.tables      
rhive.size.table
rhive.big.query        rhive.hdfs.close       rhive.load             rhive.write.table
rhive.block.sample     rhive.hdfs.connect     rhive.load.table
rhive.close            rhive.hdfs.du          rhive.load.table2

Hive和RHive的基本操作对比:


#连接到hive
Hive:  hive shell
RHive: rhive.connect("192.168.1.210")

#列出所有hive的表
Hive:  show tables;
RHive: rhive.list.tables()

#查看表结构
Hive:  desc o_account;
RHive: rhive.desc.table('o_account'), rhive.desc.table('o_account',TRUE)

#执行HQL查询
Hive:  select * from o_account;
RHive: rhive.query('select * from o_account')

#查看hdfs目录
Hive:  dfs -ls /;
RHive: rhive.hdfs.ls()

#查看hdfs文件内容
Hive:  dfs -cat /user/hive/warehouse/o_account/part-m-00000;
RHive: rhive.hdfs.cat('/user/hive/warehouse/o_account/part-m-00000')

#断开连接
Hive:  quit;
RHive: rhive.close()

5. RHive基本使用操作

#初始化
rhive.init()

#连接hive
rhive.connect("192.168.1.210")

#查看所有表
rhive.list.tables()
             tab_name
1 hive_algo_t_account
2           o_account
3         r_t_account

#查看表结构
rhive.desc.table('o_account');
     col_name data_type comment
1          id       int
2       email    string
3 create_date    string

#执行HQL查询
rhive.query("select * from o_account");
   id           email         create_date
1   1     abc@163.com 2013-04-22 12:21:39
2   2   dedac@163.com 2013-04-22 12:21:39
3   3  qq8fed@163.com 2013-04-22 12:21:39
4   4     qw1@163.com 2013-04-22 12:21:39
5   5    af3d@163.com 2013-04-22 12:21:39
6   6    ab34@163.com 2013-04-22 12:21:39
7   7  q8d1@gmail.com 2013-04-23 09:21:24
8   8 conan@gmail.com 2013-04-23 09:21:24
9   9   adeg@sohu.com 2013-04-23 09:21:24
10 10 ade121@sohu.com 2013-04-23 09:21:24
11 11  addde@sohu.com 2013-04-23 09:21:24

#关闭连接
rhive.close()
[1] TRUE

创建临时表


rhive.block.sample('o_account', subset="id<5")
[1] "rhive_sblk_1372238856"

rhive.query("select * from rhive_sblk_1372238856");
  id          email         create_date
1  1    abc@163.com 2013-04-22 12:21:39
2  2  dedac@163.com 2013-04-22 12:21:39
3  3 qq8fed@163.com 2013-04-22 12:21:39
4  4    qw1@163.com 2013-04-22 12:21:39

#查看hdfs的文件
rhive.hdfs.ls('/user/hive/warehouse/rhive_sblk_1372238856/')
  permission owner      group length      modify-time
1  rw-r--r-- conan supergroup    141 2013-06-26 17:28
                                                 file
1 /user/hive/warehouse/rhive_sblk_1372238856/000000_0

rhive.hdfs.cat('/user/hive/warehouse/rhive_sblk_1372238856/000000_0')
1abc@163.com2013-04-22 12:21:39
2dedac@163.com2013-04-22 12:21:39
3qq8fed@163.com2013-04-22 12:21:39
4qw1@163.com2013-04-22 12:21:39

按范围分割字段数据


rhive.basic.cut('o_account','id',breaks='0:100:3')
[1] "rhive_result_20130626173626"
attr(,"result:size")
[1] 443

rhive.query("select * from rhive_result_20130626173626");
             email         create_date     id
1      abc@163.com 2013-04-22 12:21:39  (0,3]
2    dedac@163.com 2013-04-22 12:21:39  (0,3]
3   qq8fed@163.com 2013-04-22 12:21:39  (0,3]
4      qw1@163.com 2013-04-22 12:21:39  (3,6]
5     af3d@163.com 2013-04-22 12:21:39  (3,6]
6     ab34@163.com 2013-04-22 12:21:39  (3,6]
7   q8d1@gmail.com 2013-04-23 09:21:24  (6,9]
8  conan@gmail.com 2013-04-23 09:21:24  (6,9]
9    adeg@sohu.com 2013-04-23 09:21:24  (6,9]
10 ade121@sohu.com 2013-04-23 09:21:24 (9,12]
11  addde@sohu.com 2013-04-23 09:21:24 (9,12]

Hive操作HDFS


#查看hdfs文件目录
rhive.hdfs.ls()
  permission owner      group length      modify-time   file
1  rwxr-xr-x conan supergroup      0 2013-04-24 01:52 /hbase
2  rwxr-xr-x conan supergroup      0 2013-06-23 10:59  /home
3  rwxr-xr-x conan supergroup      0 2013-06-26 11:18 /rhive
4  rwxr-xr-x conan supergroup      0 2013-06-23 13:27   /tmp
5  rwxr-xr-x conan supergroup      0 2013-04-24 19:28  /user

#查看hdfs文件内容
rhive.hdfs.cat('/user/hive/warehouse/o_account/part-m-00000')
1abc@163.com2013-04-22 12:21:39
2dedac@163.com2013-04-22 12:21:39
3qq8fed@163.com2013-04-22 12:21:39

转载请注明:
http://blog.fens.me/nosql-r-hive/

打赏作者

Hive安装及使用攻略

让Hadoop跑在云端系列文章,介绍了如何整合虚拟化和Hadoop,让Hadoop集群跑在VPS虚拟主机上,通过云向用户提供存储和计算的服务。

现在硬件越来越便宜,一台非品牌服务器,2颗24核CPU,配48G内存,2T的硬盘,已经降到2万块人民币以下了。这种配置如果简单地放几个web应用,显然是奢侈的浪费。就算是用来实现单节点的hadoop,对计算资源浪费也是非常高的。对于这么高性能的计算机,如何有效利用计算资源,就成为成本控制的一项重要议题了。

通过虚拟化技术,我们可以将一台服务器,拆分成12台VPS,每台2核CPU,4G内存,40G硬盘,并且支持资源重新分配。多么伟大的技术啊!现在我们有了12个节点的hadoop集群, 让Hadoop跑在云端,让世界加速。

关于作者:

  • 张丹(Conan), 程序员Java,R,PHP,Javascript
  • weibo:@Conan_Z
  • blog: http://blog.fens.me
  • email: bsspirit@gmail.com

转载请注明出处:
 http://blog.fens.me/hadoop-hive-intro/

hadoop-hive

前言

Hive是Hadoop一个程序接口,Hive让数据分析人员快速上手,Hive使用了类SQL的语法,Hive让JAVA的世界变得简单而轻巧,Hive让Hadoop普及到了程序员以外的人。

从Hive开始,让分析师们也能玩转大数据。

目录

  1. Hive的安装
  2. Hive的基本使用:CRUD
  3. Hive交互式模式
  4. 数据导入
  5. 数据导出
  6. Hive查询HiveQL
  7. Hive视图
  8. Hive分区表

1. Hive的安装

系统环境
装好hadoop的环境后,我们可以把Hive装在namenode机器上(c1)。
hadoop的环境,请参考:让Hadoop跑在云端系列文章RHadoop实践系列之一:Hadoop环境搭建

下载: hive-0.9.0.tar.gz
解压到: /home/cos/toolkit/hive-0.9.0

hive配置


~ cd /home/cos/toolkit/hive-0.9.0
~ cp hive-default.xml.template hive-site.xml
~ cp hive-log4j.properties.template hive-log4j.properties

修改hive-site.xml配置文件
把Hive的元数据存储到MySQL中


~ vi conf/hive-site.xml

<property>
<name>javax.jdo.option.ConnectionURL</name>
<value>jdbc:mysql://c1:3306/hive_metadata?createDatabaseIfNotExist=true</value>
<description>JDBC connect string for a JDBC metastore</description>
</property>

<property>
<name>javax.jdo.option.ConnectionDriverName</name>
<value>com.mysql.jdbc.Driver</value>
<description>Driver class name for a JDBC metastore</description>
</property>

<property>
<name>javax.jdo.option.ConnectionUserName</name>
<value>hive</value>
<description>username to use against metastore database</description>
</property>

<property>
<name>javax.jdo.option.ConnectionPassword</name>
<value>hive</value>
<description>password to use against metastore database</description>
</property>

<property>
<name>hive.metastore.warehouse.dir</name>
<value>/user/hive/warehouse</value>
<description>location of default database for the warehouse</description>
</property>

修改hive-log4j.properties

#log4j.appender.EventCounter=org.apache.hadoop.metrics.jvm.EventCounter
log4j.appender.EventCounter=org.apache.hadoop.log.metrics.EventCounter

设置环境变量


~ sudo vi /etc/environment

PATH="/usr/local/sbin:/usr/local/bin:/usr/sbin:/usr/bin:/sbin:/bin:/usr/games:/usr/local/games:/home/cos/toolkit/ant184/bin:/home/cos/toolkit/jdk16/bin:/home/cos/toolkit/maven3/bin:/home/cos/toolkit/hadoop-1.0.3/bin:/home/cos/toolkit/hive-0.9.0/bin"

JAVA_HOME=/home/cos/toolkit/jdk16
ANT_HOME=/home/cos/toolkit/ant184
MAVEN_HOME=/home/cos/toolkit/maven3

HADOOP_HOME=/home/cos/toolkit/hadoop-1.0.3
HIVE_HOME=/home/cos/toolkit/hive-0.9.0

CLASSPATH=/home/cos/toolkit/jdk16/lib/dt.jar:/home/cos/toolkit/jdk16/lib/tools.jar

在hdfs上面,创建目录


$HADOOP_HOME/bin/hadoop fs -mkidr /tmp
$HADOOP_HOME/bin/hadoop fs -mkidr /user/hive/warehouse
$HADOOP_HOME/bin/hadoop fs -chmod g+w /tmp
$HADOOP_HOME/bin/hadoop fs -chmod g+w /user/hive/warehouse

在MySQL中创建数据库


create database hive_metadata;
grant all on hive_metadata.* to hive@'%' identified by 'hive';
grant all on hive_metadata.* to hive@localhost identified by 'hive';
ALTER DATABASE hive_metadata CHARACTER SET latin1;

手动上传mysql的jdbc库到hive/lib


~ ls /home/cos/toolkit/hive-0.9.0/lib
mysql-connector-java-5.1.22-bin.jar

启动hive


#启动metastore服务
~ bin/hive --service metastore &
Starting Hive Metastore Server

#启动hiveserver服务
~ bin/hive --service hiveserver &
Starting Hive Thrift Server

#启动hive客户端
~ bin/hive shell
Logging initialized using configuration in file:/root/hive-0.9.0/conf/hive-log4j.properties
Hive history file=/tmp/root/hive_job_log_root_201211141845_1864939641.txt

hive> show tables
OK

查询MySQL数据库中的元数据


~ mysql -uroot -p
mysql> use hive_metadata;
Database changed

mysql> show tables;
+-------------------------+
| Tables_in_hive_metadata |
+-------------------------+
| BUCKETING_COLS          |
| CDS                     |
| COLUMNS_V2              |
| DATABASE_PARAMS         |
| DBS                     |
| IDXS                    |
| INDEX_PARAMS            |
| PARTITIONS              |
| PARTITION_KEYS          |
| PARTITION_KEY_VALS      |
| PARTITION_PARAMS        |
| PART_COL_PRIVS          |
| PART_PRIVS              |
| SDS                     |
| SD_PARAMS               |
| SEQUENCE_TABLE          |
| SERDES                  |
| SERDE_PARAMS            |
| SORT_COLS               |
| TABLE_PARAMS            |
| TBLS                    |
| TBL_COL_PRIVS           |
| TBL_PRIVS               |
+-------------------------+
23 rows in set (0.00 sec)

Hive已经成功安装,下面是hive的使用攻略。

2. Hive的基本使用

1. 进入hive控制台


~ cd /home/cos/toolkit/hive-0.9.0

~ bin/hive shell
Logging initialized using configuration in file:/home/cos/toolkit/hive-0.9.0/conf/hive-log4j.properties
Hive history file=/tmp/cos/hive_job_log_cos_201307160003_95040367.txt
hive>

新建表


#创建数据(文本以tab分隔)
~ vi /home/cos/demo/t_hive.txt

16      2       3
61      12      13
41      2       31
17      21      3
71      2       31
1       12      34
11      2       34

#创建新表
hive> CREATE TABLE t_hive (a int, b int, c int) ROW FORMAT DELIMITED FIELDS TERMINATED BY '\t';
OK
Time taken: 0.489 seconds

#导入数据t_hive.txt到t_hive表
hive> LOAD DATA LOCAL INPATH '/home/cos/demo/t_hive.txt' OVERWRITE INTO TABLE t_hive ;
Copying data from file:/home/cos/demo/t_hive.txt
Copying file: file:/home/cos/demo/t_hive.txt
Loading data to table default.t_hive
Deleted hdfs://c1.wtmart.com:9000/user/hive/warehouse/t_hive
OK
Time taken: 0.397 seconds

查看表和数据


#查看表 
hive> show tables;
OK
t_hive
Time taken: 0.099 seconds

#正则匹配表名
hive>show tables '*t*';
OK
t_hive
Time taken: 0.065 seconds

#查看表数据
hive> select * from t_hive;
OK
16      2       3
61      12      13
41      2       31
17      21      3
71      2       31
1       12      34
11      2       34
Time taken: 0.264 seconds

#查看表结构
hive> desc t_hive;
OK
a       int
b       int
c       int
Time taken: 0.1 seconds

修改表


#增加一个字段
hive> ALTER TABLE t_hive ADD COLUMNS (new_col String);
OK
Time taken: 0.186 seconds
hive> desc t_hive;
OK
a       int
b       int
c       int
new_col string
Time taken: 0.086 seconds

#重命令表名
~ ALTER TABLE t_hive RENAME TO t_hadoop;
OK
Time taken: 0.45 seconds
hive> show tables;
OK
t_hadoop
Time taken: 0.07 seconds

删除表


hive> DROP TABLE t_hadoop;
OK
Time taken: 0.767 seconds

hive> show tables;
OK
Time taken: 0.064 seconds

3. Hive交互式模式

  • quit,exit:  退出交互式shell
  • reset: 重置配置为默认值
  • set <key>=<value> : 修改特定变量的值(如果变量名拼写错误,不会报错)
  • set :  输出用户覆盖的hive配置变量
  • set -v : 输出所有Hadoop和Hive的配置变量
  • add FILE[S] *, add JAR[S] *, add ARCHIVE[S] * : 添加 一个或多个 file, jar, archives到分布式缓存
  • list FILE[S], list JAR[S], list ARCHIVE[S] : 输出已经添加到分布式缓存的资源。
  • list FILE[S] *, list JAR[S] *,list ARCHIVE[S] * : 检查给定的资源是否添加到分布式缓存
  • delete FILE[S] *,delete JAR[S] *,delete ARCHIVE[S] * : 从分布式缓存删除指定的资源
  • ! <command> :  从Hive shell执行一个shell命令
  • dfs <dfs command> :  从Hive shell执行一个dfs命令
  • <query string> : 执行一个Hive 查询,然后输出结果到标准输出
  • source FILE <filepath>:  在CLI里执行一个hive脚本文件

4. 数据导入

还以刚才的t_hive为例。

#创建表结构
hive> CREATE TABLE t_hive (a int, b int, c int) ROW FORMAT DELIMITED FIELDS TERMINATED BY '\t';

从操作本地文件系统加载数据(LOCAL)


hive> LOAD DATA LOCAL INPATH '/home/cos/demo/t_hive.txt' OVERWRITE INTO TABLE t_hive ;
Copying data from file:/home/cos/demo/t_hive.txt
Copying file: file:/home/cos/demo/t_hive.txt
Loading data to table default.t_hive
Deleted hdfs://c1.wtmart.com:9000/user/hive/warehouse/t_hive
OK
Time taken: 0.612 seconds

#在HDFS中查找刚刚导入的数据
~ hadoop fs -cat /user/hive/warehouse/t_hive/t_hive.txt

16      2       3
61      12      13
41      2       31
17      21      3
71      2       31
1       12      34
11      2       34

从HDFS加载数据


创建表t_hive2
hive> CREATE TABLE t_hive2 (a int, b int, c int) ROW FORMAT DELIMITED FIELDS TERMINATED BY '\t';

#从HDFS加载数据
hive> LOAD DATA INPATH '/user/hive/warehouse/t_hive/t_hive.txt' OVERWRITE INTO TABLE t_hive2;
Loading data to table default.t_hive2
Deleted hdfs://c1.wtmart.com:9000/user/hive/warehouse/t_hive2
OK
Time taken: 0.325 seconds

#查看数据
hive> select * from t_hive2;
OK
16      2       3
61      12      13
41      2       31
17      21      3
71      2       31
1       12      34
11      2       34
Time taken: 0.287 seconds

从其他表导入数据


hive> INSERT OVERWRITE TABLE t_hive2 SELECT * FROM t_hive ;

Total MapReduce jobs = 2
Launching Job 1 out of 2
Number of reduce tasks is set to 0 since there's no reduce operator
Starting Job = job_201307131407_0002, Tracking URL = http://c1.wtmart.com:50030/jobdetails.jsp?jobid=job_201307131407_0002
Kill Command = /home/cos/toolkit/hadoop-1.0.3/libexec/../bin/hadoop job  -Dmapred.job.tracker=hdfs://c1.wtmart.com:9001 -kill job_201307131407_0002
Hadoop job information for Stage-1: number of mappers: 1; number of reducers: 0
2013-07-16 10:32:41,979 Stage-1 map = 0%,  reduce = 0%
2013-07-16 10:32:48,034 Stage-1 map = 100%,  reduce = 0%, Cumulative CPU 1.03 sec
2013-07-16 10:32:49,050 Stage-1 map = 100%,  reduce = 0%, Cumulative CPU 1.03 sec
2013-07-16 10:32:50,068 Stage-1 map = 100%,  reduce = 0%, Cumulative CPU 1.03 sec
2013-07-16 10:32:51,082 Stage-1 map = 100%,  reduce = 0%, Cumulative CPU 1.03 sec
2013-07-16 10:32:52,093 Stage-1 map = 100%,  reduce = 0%, Cumulative CPU 1.03 sec
2013-07-16 10:32:53,102 Stage-1 map = 100%,  reduce = 0%, Cumulative CPU 1.03 sec
2013-07-16 10:32:54,112 Stage-1 map = 100%,  reduce = 100%, Cumulative CPU 1.03 sec
MapReduce Total cumulative CPU time: 1 seconds 30 msec
Ended Job = job_201307131407_0002
Ended Job = -314818888, job is filtered out (removed at runtime).
Moving data to: hdfs://c1.wtmart.com:9000/tmp/hive-cos/hive_2013-07-16_10-32-31_323_5732404975764014154/-ext-10000
Loading data to table default.t_hive2
Deleted hdfs://c1.wtmart.com:9000/user/hive/warehouse/t_hive2
Table default.t_hive2 stats: [num_partitions: 0, num_files: 1, num_rows: 0, total_size: 56, raw_data_size: 0]
7 Rows loaded to t_hive2
MapReduce Jobs Launched:
Job 0: Map: 1   Cumulative CPU: 1.03 sec   HDFS Read: 273 HDFS Write: 56 SUCCESS
Total MapReduce CPU Time Spent: 1 seconds 30 msec
OK
Time taken: 23.227 seconds

hive> select * from t_hive2;
OK
16      2       3
61      12      13
41      2       31
17      21      3
71      2       31
1       12      34
11      2       34
Time taken: 0.134 seconds

创建表并从其他表导入数据


#删除表
hive> DROP TABLE t_hive;

#创建表并从其他表导入数据
hive> CREATE TABLE t_hive AS SELECT * FROM t_hive2 ;

Total MapReduce jobs = 2
Launching Job 1 out of 2
Number of reduce tasks is set to 0 since there's no reduce operator
Starting Job = job_201307131407_0003, Tracking URL = http://c1.wtmart.com:50030/jobdetails.jsp?jobid=job_201307131407_0003
Kill Command = /home/cos/toolkit/hadoop-1.0.3/libexec/../bin/hadoop job  -Dmapred.job.tracker=hdfs://c1.wtmart.com:9001 -kill job_201307131407_0003
Hadoop job information for Stage-1: number of mappers: 1; number of reducers: 0
2013-07-16 10:36:48,612 Stage-1 map = 0%,  reduce = 0%
2013-07-16 10:36:54,648 Stage-1 map = 100%,  reduce = 0%, Cumulative CPU 1.13 sec
2013-07-16 10:36:55,657 Stage-1 map = 100%,  reduce = 0%, Cumulative CPU 1.13 sec
2013-07-16 10:36:56,666 Stage-1 map = 100%,  reduce = 0%, Cumulative CPU 1.13 sec
2013-07-16 10:36:57,673 Stage-1 map = 100%,  reduce = 0%, Cumulative CPU 1.13 sec
2013-07-16 10:36:58,683 Stage-1 map = 100%,  reduce = 0%, Cumulative CPU 1.13 sec
2013-07-16 10:36:59,691 Stage-1 map = 100%,  reduce = 100%, Cumulative CPU 1.13 sec
MapReduce Total cumulative CPU time: 1 seconds 130 msec
Ended Job = job_201307131407_0003
Ended Job = -670956236, job is filtered out (removed at runtime).
Moving data to: hdfs://c1.wtmart.com:9000/tmp/hive-cos/hive_2013-07-16_10-36-39_986_1343249562812540343/-ext-10001
Moving data to: hdfs://c1.wtmart.com:9000/user/hive/warehouse/t_hive
Table default.t_hive stats: [num_partitions: 0, num_files: 1, num_rows: 0, total_size: 56, raw_data_size: 0]
7 Rows loaded to hdfs://c1.wtmart.com:9000/tmp/hive-cos/hive_2013-07-16_10-36-39_986_1343249562812540343/-ext-10000
MapReduce Jobs Launched:
Job 0: Map: 1   Cumulative CPU: 1.13 sec   HDFS Read: 272 HDFS Write: 56 SUCCESS
Total MapReduce CPU Time Spent: 1 seconds 130 msec
OK
Time taken: 20.13 seconds

hive> select * from t_hive;
OK
16      2       3
61      12      13
41      2       31
17      21      3
71      2       31
1       12      34
11      2       34
Time taken: 0.109 seconds

仅复制表结构不导数据


hive> CREATE TABLE t_hive3 LIKE t_hive;
hive> select * from t_hive3;
OK
Time taken: 0.077 seconds

从MySQL数据库导入数据
我们将在介绍Sqoop时讲。

5. 数据导出

从HDFS复制到HDFS其他位置


~ hadoop fs -cp /user/hive/warehouse/t_hive /

~ hadoop fs -ls /t_hive
Found 1 items
-rw-r--r--   1 cos supergroup         56 2013-07-16 10:41 /t_hive/000000_0

~ hadoop fs -cat /t_hive/000000_0
1623
611213
41231
17213
71231
11234
11234

通过Hive导出到本地文件系统


hive> INSERT OVERWRITE LOCAL DIRECTORY '/tmp/t_hive' SELECT * FROM t_hive;
Total MapReduce jobs = 1
Launching Job 1 out of 1
Number of reduce tasks is set to 0 since there's no reduce operator
Starting Job = job_201307131407_0005, Tracking URL = http://c1.wtmart.com:50030/jobdetails.jsp?jobid=job_201307131407_0005
Kill Command = /home/cos/toolkit/hadoop-1.0.3/libexec/../bin/hadoop job  -Dmapred.job.tracker=hdfs://c1.wtmart.com:9001 -kill job_201307131407_0005
Hadoop job information for Stage-1: number of mappers: 1; number of reducers: 0
2013-07-16 10:46:24,774 Stage-1 map = 0%,  reduce = 0%
2013-07-16 10:46:30,823 Stage-1 map = 100%,  reduce = 0%, Cumulative CPU 0.87 sec
2013-07-16 10:46:31,833 Stage-1 map = 100%,  reduce = 0%, Cumulative CPU 0.87 sec
2013-07-16 10:46:32,844 Stage-1 map = 100%,  reduce = 0%, Cumulative CPU 0.87 sec
2013-07-16 10:46:33,856 Stage-1 map = 100%,  reduce = 0%, Cumulative CPU 0.87 sec
2013-07-16 10:46:34,865 Stage-1 map = 100%,  reduce = 0%, Cumulative CPU 0.87 sec
2013-07-16 10:46:35,873 Stage-1 map = 100%,  reduce = 0%, Cumulative CPU 0.87 sec
2013-07-16 10:46:36,884 Stage-1 map = 100%,  reduce = 100%, Cumulative CPU 0.87 sec
MapReduce Total cumulative CPU time: 870 msec
Ended Job = job_201307131407_0005
Copying data to local directory /tmp/t_hive
7 Rows loaded to /tmp/t_hive
MapReduce Jobs Launched:
Job 0: Map: 1   Cumulative CPU: 0.87 sec   HDFS Read: 271 HDFS Write: 56 SUCCESS
Total MapReduce CPU Time Spent: 870 msec
OK
Time taken: 23.369 seconds

#查看本地操作系统
hive> ! cat /tmp/t_hive/000000_0;
hive> 1623
611213
41231
17213
71231
11234
11234

6. Hive查询HiveQL

注:以下代码将去掉map,reduce的日志输出部分。

普通查询:排序,列别名,嵌套子查询


hive> FROM (
    >   SELECT b,c as c2 FROM t_hive
    > ) t
    > SELECT t.b, t.c2
    > WHERE b>2
    > LIMIT 2;
12      13
21      3

连接查询:JOIN


hive> SELECT t1.a,t1.b,t2.a,t2.b
    > FROM t_hive t1 JOIN t_hive2 t2 on t1.a=t2.a
    > WHERE t1.c>10;

1       12      1       12
11      2       11      2
41      2       41      2
61      12      61      12
71      2       71      2

聚合查询1:count, avg


hive> SELECT count(*), avg(a) FROM t_hive;
7       31.142857142857142

聚合查询2:count, distinct


hive> SELECT count(DISTINCT b) FROM t_hive;
3

聚合查询3:GROUP BY, HAVING


#GROUP BY
hive> SELECT avg(a),b,sum(c) FROM t_hive GROUP BY b,c
16.0    2       3
56.0    2       62
11.0    2       34
61.0    12      13
1.0     12      34
17.0    21      3

#HAVING
hive> SELECT avg(a),b,sum(c) FROM t_hive GROUP BY b,c HAVING sum(c)>30
56.0    2       62
11.0    2       34
1.0     12      34

7. Hive视图

Hive视图和数据库视图的概念是一样的,我们还以t_hive为例。


hive> CREATE VIEW v_hive AS SELECT a,b FROM t_hive where c>30;
hive> select * from v_hive;
41      2
71      2
1       12
11      2

删除视图


hive> DROP VIEW IF EXISTS v_hive;
OK
Time taken: 0.495 seconds

8. Hive分区表

分区表是数据库的基本概念,但很多时候数据量不大,我们完全用不到分区表。Hive是一种OLAP数据仓库软件,涉及的数据量是非常大的,所以分区表在这个场景就显得非常重要!!

下面我们重新定义一个数据表结构:t_hft

创建数据


~ vi /home/cos/demo/t_hft_20130627.csv
000001,092023,9.76
000002,091947,8.99
000004,092002,9.79
000005,091514,2.2
000001,092008,9.70
000001,092059,9.45

~ vi /home/cos/demo/t_hft_20130628.csv
000001,092023,9.76
000002,091947,8.99
000004,092002,9.79
000005,091514,2.2
000001,092008,9.70
000001,092059,9.45

创建数据表


DROP TABLE IF EXISTS t_hft;
CREATE TABLE t_hft(
SecurityID STRING,
tradeTime STRING,
PreClosePx DOUBLE
) ROW FORMAT DELIMITED FIELDS TERMINATED BY ',';

创建分区数据表
根据业务:按天和股票ID进行分区设计


DROP TABLE IF EXISTS t_hft;
CREATE TABLE t_hft(
SecurityID STRING,
tradeTime STRING,
PreClosePx DOUBLE
) PARTITIONED BY (tradeDate INT)
ROW FORMAT DELIMITED FIELDS TERMINATED BY ',';

导入数据


#20130627
hive> LOAD DATA LOCAL INPATH '/home/cos/demo/t_hft_20130627.csv' OVERWRITE INTO TABLE t_hft PARTITION (tradeDate=20130627);
Copying data from file:/home/cos/demo/t_hft_20130627.csv
Copying file: file:/home/cos/demo/t_hft_20130627.csv
Loading data to table default.t_hft partition (tradedate=20130627)

#20130628
hive> LOAD DATA LOCAL INPATH '/home/cos/demo/t_hft_20130628.csv' OVERWRITE INTO TABLE t_hft PARTITION (tradeDate=20130628);
Copying data from file:/home/cos/demo/t_hft_20130628.csv
Copying file: file:/home/cos/demo/t_hft_20130628.csv
Loading data to table default.t_hft partition (tradedate=20130628)

查看分区表


hive> SHOW PARTITIONS t_hft;
tradedate=20130627
tradedate=20130628
Time taken: 0.082 seconds

查询数据


hive> select * from t_hft where securityid='000001';
000001  092023  9.76    20130627
000001  092008  9.7     20130627
000001  092059  9.45    20130627
000001  092023  9.76    20130628
000001  092008  9.7     20130628
000001  092059  9.45    20130628

hive> select * from t_hft where tradedate=20130627 and PreClosePx<9;
000002  091947  8.99    20130627
000005  091514  2.2     20130627

Hive基于使用完成,这些都是日常的操作。后面我会继续讲一下,HiveQL优化及Hive的运维。

转载请注明出处:
 http://blog.fens.me/hadoop-hive-intro/

打赏作者