• Posts tagged "vps"

Blog Archives

给KVM虚拟机增加硬盘

自己搭建VPS系列文章

自己搭建VPS系列文章,介绍了如何利用自己的计算机资源,通过虚拟化技术搭建VPS。

在互联网2.0时代,每个人都有自己的博客,还有很多专属于自己的互联网应用。这些应用大部分都是互联网公司提供的。对于一些有能力的开发人员(geek)来说,他们希望做一些自己的应用,可以用到最新最炫的技术,并且有自己的域名,有自己的服务器。这时就要去租一些互联网上的VPS主机。VPS主机就相当于是一台远程的计算机,可以部署自己的应用程序,然后申请一个域名,就可以正式发布在互联网上了。本站“@晒粉丝” 就使用的Linode主机VPS在美国达拉斯机房。

其实,VPS还可以自己搭建的。只要我们有一台高性能的服务器,一个IP地址,一个路由。可以把一台高性能的服务器,很快的变成5台,10台,20台的虚拟VPS。我们就可以在自己的VPS上面的,发布各种的应用,还可以把剩余的服务器资源租给其他的互联网使用者。 本系列文章将分为以下几个部分介绍:“虚拟化技术选型”,“动态IP解析”,“在Ubuntu上安装KVM并搭建虚拟环境”,“给KVM虚拟机增加硬盘”,“VPS内网的网络架构设计”,“VPS租用云服务”。

关于作者:

  • 张丹(Conan), 程序员Java,R,PHP,Javascript
  • weibo:@Conan_Z
  • blog: http://blog.fens.me
  • email: bsspirit@gmail.com

转载请注明出处:
http://blog.fens.me/vps-kvm-disk/

前言

虚拟机作为灵活配置的服务器主机,给系统运维和管理带来了巨大的便利。CPU,内存,硬盘,网络等的可配置,给了虚拟机非常强大的优势,是物理机不能比拟的。今天讲一下如何给KVM虚拟机增加新硬盘。

kvm-disk

目录

  1. host增加物理硬盘并分区
  2. 通过virsh给guest增加文件硬盘
  3. 通过virsh给guest增加分区硬盘

1. host增加物理硬盘并分区

HOST作为KVM的宿主计算机,管理所有GUEST虚拟机。我们通过给HOST增加物理硬盘,然后分给GUEST,从而实现给虚拟机硬盘扩容的效果。

如何给计算机增加物理硬盘并分区,请参考:多硬盘分区管理fdisk 文章
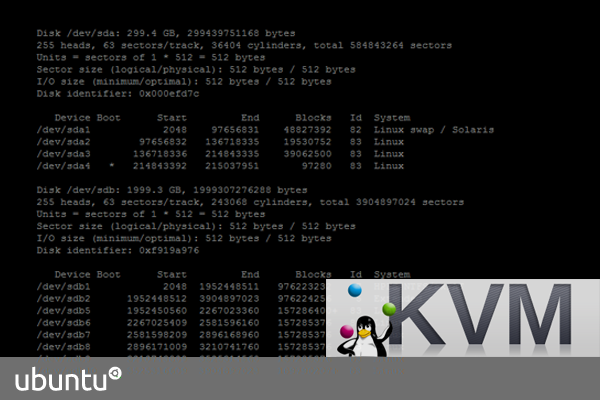
查看HOST机的硬盘


~ sudo fdisk -l

Disk /dev/sda: 299.4 GB, 299439751168 bytes
255 heads, 63 sectors/track, 36404 cylinders, total 584843264 sectors
Units = sectors of 1 * 512 = 512 bytes
Sector size (logical/physical): 512 bytes / 512 bytes
I/O size (minimum/optimal): 512 bytes / 512 bytes
Disk identifier: 0x000efd7c

   Device Boot      Start         End      Blocks   Id  System
/dev/sda1            2048    97656831    48827392   82  Linux swap / Solaris
/dev/sda2        97656832   136718335    19530752   83  Linux
/dev/sda3       136718336   214843335    39062500   83  Linux
/dev/sda4   *   214843392   215037951       97280   83  Linux

Disk /dev/sdb: 1999.3 GB, 1999307276288 bytes
255 heads, 63 sectors/track, 243068 cylinders, total 3904897024 sectors
Units = sectors of 1 * 512 = 512 bytes
Sector size (logical/physical): 512 bytes / 512 bytes
I/O size (minimum/optimal): 512 bytes / 512 bytes
Disk identifier: 0xf919a976

   Device Boot      Start         End      Blocks   Id  System
/dev/sdb1            2048  1952448511   976223232    7  HPFS/NTFS/exFAT
/dev/sdb2      1952448512  3904897023   976224256    5  Extended
/dev/sdb5      1952450560  2267023360   157286400+  83  Linux
/dev/sdb6      2267025409  2581596160   157285376   83  Linux
/dev/sdb7      2581598209  2896168960   157285376   83  Linux
/dev/sdb8      2896171009  3210741760   157285376   83  Linux
/dev/sdb9      3210743809  3525314560   157285376   83  Linux
/dev/sdb10     3525316609  3904897023   189790207+  83  Linux

~ df -h
Filesystem      Size  Used Avail Use% Mounted on
/dev/sda3        37G  3.4G   32G  10% /
udev             24G  4.0K   24G   1% /dev
tmpfs           9.5G  1.1M  9.5G   1% /run
none            5.0M  8.0K  5.0M   1% /run/lock
none             24G  152K   24G   1% /run/shm
none            100M   28K  100M   1% /run/user
cgroup           24G     0   24G   0% /sys/fs/cgroup
/dev/sda2        19G  3.6G   14G  21% /home
/dev/sda4        92M   34M   54M  39% /boot
/dev/sdb1       931G  100G  832G  11% /disk/sdb1
/dev/sdb6       148G  188M  140G   1% /disk/sdb6

下面将进行两个测试:
通过virsh给guest增加文件硬盘:通过文件硬盘的镜像/disk/sdb6/c1d6.img
通过virsh给guest增加分区硬盘:直接使用分区硬盘/dev/sdb5

2. 通过virsh给guest增加文件硬盘

创建文件硬盘的镜像


~ cd /disk/sdb6/
~ sudo qemu-img create -f raw /disk/sdb6/c1d6.img 10G
Formatting '/disk/sdb6/c1d6.img', fmt=raw size=10737418240

~ ls -l
-rw-r--r-- 1 root root 10737418240 Jul  8 16:37 c1d6.img
drwx------ 2 root root       16384 Jul  8 09:03 lost+found/

通过virsh管理工具加载硬盘


~ sudo virsh
Welcome to virsh, the virtualization interactive terminal.
Type:  'help' for help with commands
       'quit' to quit

#查看系统内的虚拟机
virsh # list
Id Name State
----------------------------------------------------
5 server3 running
6 server4 running
7 d2 running
8 r1 running
9 server2 running
12 c1 running

#在这里我们要对c1进行硬盘扩容
virsh # edit c1

#找到硬盘配置(原来的系统硬盘)
<disk type='file' device='disk'>
<driver name='qemu' type='raw'/>
<source file='/disk/sdb1/c1.img'/>
<target dev='vda' bus='virtio'/>
<address type='pci' domain='0x0000' bus='0x00' slot='0x04' function='0x0'/>
</disk>

#增加文件硬盘,vdb
<disk type='file' device='disk'>
<driver name='qemu' type='raw' cache='none'/>
<source file='/disk/sdb6/c1d6.img'/>
<target dev='vdb' bus='virtio'/>
<address type='pci' domain='0x0000' bus='0x00' slot='0x06' function='0x0'/>
</disk>

#保存退出

重启c1虚拟机


#请使用destroy命令,reboot和shutdown不管用。
~ virsh # destroy c1
Domain c1 destroyed

#list找不到c1 
~ virsh # list
 Id    Name                           State
----------------------------------------------------
 5     server3                        running
 6     server4                        running
 7     d2                             running
 8     r1                             running
 9     server2                        running

#启动虚拟机c1
~ virsh # start c1
Domain c1 started

#进入虚拟机c1
~ console c1

在c1中,进行硬盘查检并分区


~ sudo fdisk -l

Disk /dev/vda: 42.9 GB, 42949672960 bytes
16 heads, 63 sectors/track, 83220 cylinders, total 83886080 sectors
Units = sectors of 1 * 512 = 512 bytes
Sector size (logical/physical): 512 bytes / 512 bytes
I/O size (minimum/optimal): 512 bytes / 512 bytes
Disk identifier: 0x000516aa

   Device Boot      Start         End      Blocks   Id  System
/dev/vda1   *        2048      499711      248832   83  Linux
/dev/vda2          501758    83884031    41691137    5  Extended
/dev/vda5          501760    83884031    41691136   8e  Linux LVM

Disk /dev/vdb: 10.7 GB, 10737418240 bytes
16 heads, 63 sectors/track, 20805 cylinders, total 20971520 sectors
Units = sectors of 1 * 512 = 512 bytes
Sector size (logical/physical): 512 bytes / 512 bytes
I/O size (minimum/optimal): 512 bytes / 512 bytes
Disk identifier: 0x00000000

Disk /dev/vdb doesn't contain a valid partition table

Disk /dev/mapper/u1210-root: 38.4 GB, 38394658816 bytes
255 heads, 63 sectors/track, 4667 cylinders, total 74989568 sectors
Units = sectors of 1 * 512 = 512 bytes
Sector size (logical/physical): 512 bytes / 512 bytes
I/O size (minimum/optimal): 512 bytes / 512 bytes
Disk identifier: 0x00000000

Disk /dev/mapper/u1210-root doesn't contain a valid partition table

Disk /dev/mapper/u1210-swap_1: 4294 MB, 4294967296 bytes
255 heads, 63 sectors/track, 522 cylinders, total 8388608 sectors
Units = sectors of 1 * 512 = 512 bytes
Sector size (logical/physical): 512 bytes / 512 bytes
I/O size (minimum/optimal): 512 bytes / 512 bytes
Disk identifier: 0x00000000

Disk /dev/mapper/u1210-swap_1 doesn't contain a valid partition table

/dev/vdb已经被识别,接下来 分区,格式化,挂载,使用

硬盘分区


~ sudo fdisk /dev/vdb

Command (m for help): p

Disk /dev/vdb: 161.1 GB, 161061274112 bytes
16 heads, 63 sectors/track, 312076 cylinders, total 314572801 sectors
Units = sectors of 1 * 512 = 512 bytes
Sector size (logical/physical): 512 bytes / 512 bytes
I/O size (minimum/optimal): 512 bytes / 512 bytes
Disk identifier: 0x3b49c6a0

   Device Boot      Start         End      Blocks   Id  System

Command (m for help): n
Partition type:
   p   primary (0 primary, 0 extended, 4 free)
   e   extended
Select (default p): p
Partition number (1-4, default 1):
Using default value 1
First sector (2048-314572800, default 2048):
Using default value 2048
Last sector, +sectors or +size{K,M,G} (2048-314572800, default 314572800):
Using default value 314572800

Command (m for help): w
The partition table has been altered!

Calling ioctl() to re-read partition table.
Syncing disks.

#分区生效
~ sudo partprobe

~ sudo fdisk -l
Disk /dev/vdb: 10.7 GB, 10737418240 bytes
2 heads, 17 sectors/track, 616809 cylinders, total 20971520 sectors
Units = sectors of 1 * 512 = 512 bytes
Sector size (logical/physical): 512 bytes / 512 bytes
I/O size (minimum/optimal): 512 bytes / 512 bytes
Disk identifier: 0xf0432cd6

   Device Boot      Start         End      Blocks   Id  System
/dev/vdb1            2048    20971519    10484736   83  Linux

格式化


~ sudo mkfs -t ext4 /dev/vdb1
mke2fs 1.42.5 (29-Jul-2012)
Filesystem label=
OS type: Linux
Block size=4096 (log=2)
Fragment size=4096 (log=2)
Stride=0 blocks, Stripe width=0 blocks
9830400 inodes, 39321344 blocks
1966067 blocks (5.00%) reserved for the super user
First data block=0
Maximum filesystem blocks=4294967296
1200 block groups
32768 blocks per group, 32768 fragments per group
8192 inodes per group
Superblock backups stored on blocks:
        32768, 98304, 163840, 229376, 294912, 819200, 884736, 1605632, 2654208,
        4096000, 7962624, 11239424, 20480000, 23887872

Allocating group tables: done
Writing inode tables: done
Creating journal (32768 blocks): done
Writing superblocks and filesystem accounting information: done

挂载


~ sudo mount /dev/vdb1 /home/cos/hadoopb

~ df -h
Filesystem              Size  Used Avail Use% Mounted on
/dev/mapper/u1210-root   36G  1.1G   33G   4% /
udev                    2.0G  4.0K  2.0G   1% /dev
tmpfs                   791M  232K  791M   1% /run
none                    5.0M     0  5.0M   0% /run/lock
none                    2.0G     0  2.0G   0% /run/shm
none                    100M     0  100M   0% /run/user
/dev/vda1               228M   29M  188M  14% /boot
/dev/vdb1               9.9G  151M  9.2G   2% /home/cos/hadoopb

使用
/home/cos/hadoopb的目录,已经挂载到了/dev/vdb1上面,我可以在hadoopb下载做任何的操作。

3. 通过virsh给guest增加分区硬盘

直接使用HOST的分区硬盘/dev/sdb5,做个虚拟机c1的分区


virsh # edit c1

#新增新硬盘vbc
<disk type='block' device='disk'>
<driver name='qemu' type='raw' cache='none'/>
<source dev='/dev/sdb5'/>
<target dev='vbc' bus='virtio'/>
</disk>

virsh # destroy c1
Domain c1 destroyed

virsh # start c1
Domain c1 started

virsh # console c1

登陆虚拟c1,查看硬盘信息


sudo fdisk -l
[sudo] password for cos:

Disk /dev/vda: 42.9 GB, 42949672960 bytes
16 heads, 63 sectors/track, 83220 cylinders, total 83886080 sectors
Units = sectors of 1 * 512 = 512 bytes
Sector size (logical/physical): 512 bytes / 512 bytes
I/O size (minimum/optimal): 512 bytes / 512 bytes
Disk identifier: 0x000516aa

   Device Boot      Start         End      Blocks   Id  System
/dev/vda1   *        2048      499711      248832   83  Linux
/dev/vda2          501758    83884031    41691137    5  Extended
/dev/vda5          501760    83884031    41691136   8e  Linux LVM

Disk /dev/vdb: 10.7 GB, 10737418240 bytes
2 heads, 17 sectors/track, 616809 cylinders, total 20971520 sectors
Units = sectors of 1 * 512 = 512 bytes
Sector size (logical/physical): 512 bytes / 512 bytes
I/O size (minimum/optimal): 512 bytes / 512 bytes
Disk identifier: 0xf0432cd6

   Device Boot      Start         End      Blocks   Id  System
/dev/vdb1            2048    20971519    10484736   83  Linux

Disk /dev/vdc: 161.1 GB, 161061274112 bytes
4 heads, 4 sectors/track, 19660800 cylinders, total 314572801 sectors
Units = sectors of 1 * 512 = 512 bytes
Sector size (logical/physical): 512 bytes / 512 bytes
I/O size (minimum/optimal): 512 bytes / 512 bytes
Disk identifier: 0x3b49c6a0

   Device Boot      Start         End      Blocks   Id  System
/dev/vdc1            2048   314572800   157285376+  83  Linux

Disk /dev/mapper/u1210-root: 38.4 GB, 38394658816 bytes
255 heads, 63 sectors/track, 4667 cylinders, total 74989568 sectors
Units = sectors of 1 * 512 = 512 bytes
Sector size (logical/physical): 512 bytes / 512 bytes
I/O size (minimum/optimal): 512 bytes / 512 bytes
Disk identifier: 0x00000000

Disk /dev/mapper/u1210-root doesn't contain a valid partition table

Disk /dev/mapper/u1210-swap_1: 4294 MB, 4294967296 bytes
255 heads, 63 sectors/track, 522 cylinders, total 8388608 sectors
Units = sectors of 1 * 512 = 512 bytes
Sector size (logical/physical): 512 bytes / 512 bytes
I/O size (minimum/optimal): 512 bytes / 512 bytes
Disk identifier: 0x00000000

Disk /dev/mapper/u1210-swap_1 doesn't contain a valid partition table

已经被正确识别
Disk /dev/vdc: 161.1 GB, 161061274112 bytes

接下来,可以参考上面类似的过程,分区,格式化,挂载,使用。

我们直接使用硬件分区,比分区的映射文件会更有效果。

我的方法可能不是最优的,我只是记录我的一些操作和体会,欢迎同学留言给我建议。

转载请注明出处:
http://blog.fens.me/vps-kvm-disk/

打赏作者

自己搭建VPS系列 之 在Ubuntu上安装KVM并搭建虚拟环境

vps-kvm

自己搭建VPS系列文章

自己搭建VPS系列文章,介绍了如何利用自己的计算机资源,通过虚拟化技术搭建VPS。

在互联网2.0时代,每个人都有自己的博客,还有很多专属于自己的互联网应用。这些应用大部分都是互联网公司提供的。对于一些有能力的开发人员(geek)来说,他们希望做一些自己的应用,可以用到最新最炫的技术,并且有自己的域名,有自己的服务器。这时就要去租一些互联网上的VPS主机。VPS主机就相当于是一台远程的计算机,可以部署自己的应用程序,然后申请一个域名,就可以正式发布在互联网上了。本站“@晒粉丝” 就使用的Linode主机VPS在美国达拉斯机房。

其实,VPS还可以自己搭建的。只要我们有一台高性能的服务器,一个IP地址,一个路由。可以把一台高性能的服务器,很快的变成5台,10台,20台的虚拟VPS。我们就可以在自己的VPS上面的,发布各种的应用,还可以把剩余的服务器资源租给其他的互联网使用者。 本系列文章将分为以下几个部分介绍:“虚拟化技术选型”,“动态IP解析”,“在Ubuntu上安装KVM并搭建虚拟环境”,“VPS内网的网络架构设计”,“VPS租用云服务”。

关于作者:

  • 张丹(Conan), 程序员Java,R,PHP,Javacript
  • weibo:@Conan_Z
  • blog: http://blog.fens.me
  • email: bsspirit@gmail.com

转载请注明出处:

http://blog.fens.me/vps-kvm/


第二篇 在Ubuntu上安装KVM并搭建虚拟环境,分为4个章节

  1. 环境准备
  2. 安装KVM软件
  3. 配置桥接网卡
  4. 创建虚拟机(Ubuntu, winxp)

1. 环境准备

1)  两台计算机,一台是操作计算机Client, 一台是服务器Server

Client: 笔记本电脑, Win7旗舰版,64位,内网ip: 192.168.1.101

Server(Host): 服务器, Ubuntu 12.04LTS 64位,2核CPU,4G内存,内网ip:192.168.1.10,


2) 在server启动时,进入BIOS中开起CPU虚拟化的支持

进入BIOS中,在config –> CPU选项中

  • Intel(R) Virtualization Technology (Enabled)
  • Intel(R) VT-d Feature (Enabled)

不同BIOS菜单稍有不同。


3) Server上,先安装Openssh-server,Client才能连接

~ sudo apt-get install openssh-server

Clinet通过Putty回家连接Server。

注:以下的所有操作都通过SSH进行。


4) Server系统环境

~ uname -a
Linux conan 3.5.0-23-generic #35~precise1-Ubuntu SMP Fri Jan 25 17:13:26 UTC 2013 x86_64 x86_64 x86_64 GNU/Linux
~ cat /etc/issue
Ubuntu 12.04.2 LTS \n \l


5) 查看CPU的虚拟化支持

~ egrep 'svm|vmx' /proc/cpuinfo
flags : fpu vme de pse tsc msr pae mce cx8 apic sep mtrr pge mca cmov pat pse36 clflush dts acpi mmx fxsr sse sse2 ss ht tm pbe syscall nx lm constant_tsc arch_perfmon pebs bts nopl aperfmperf pni dtes64 monitor ds_cpl vmx smx est tm2 ssse3 cx16 xtpr pdcm sse4_1 xsave lahf_lm ida dtherm tpr_shadow vnmi flexpriority

我机器是intel的CPU,可以查看vmx的标识


6) Server上,配置ubuntu下载源sources.list,我用的是sohu源。

~ sudo vi /etc/apt/sources.list
deb http://mirrors.sohu.com/ubuntu/ precise main restricted
deb-src http://mirrors.sohu.com/ubuntu/ precise main restricted
deb http://mirrors.sohu.com/ubuntu/ precise-updates main restricted
deb-src http://mirrors.sohu.com/ubuntu/ precise-updates main restricted
deb http://mirrors.sohu.com/ubuntu/ precise universe
deb-src http://mirrors.sohu.com/ubuntu/ precise universe
deb http://mirrors.sohu.com/ubuntu/ precise-updates universe
deb-src http://mirrors.sohu.com/ubuntu/ precise-updates universe
deb http://mirrors.sohu.com/ubuntu/ precise multiverse
deb-src http://mirrors.sohu.com/ubuntu/ precise multiverse
deb http://mirrors.sohu.com/ubuntu/ precise-updates multiverse
deb-src http://mirrors.sohu.com/ubuntu/ precise-updates multiverse
deb http://mirrors.sohu.com/ubuntu/ precise-backports main restricted universe multiverse
deb-src http://mirrors.sohu.com/ubuntu/ precise-backports main restricted universe multiverse
deb http://mirrors.sohu.com/ubuntu/ precise-security main restricted
deb-src http://mirrors.sohu.com/ubuntu/ precise-security main restricted
deb http://mirrors.sohu.com/ubuntu/ precise-security universe
deb-src http://mirrors.sohu.com/ubuntu/ precise-security universe
deb http://mirrors.sohu.com/ubuntu/ precise-security multiverse
deb-src http://mirrors.sohu.com/ubuntu/ precise-security multiverse
deb http://extras.ubuntu.com/ubuntu precise main
deb-src http://extras.ubuntu.com/ubuntu precise main

#更新源
~ sudo apt-get update


2. 安装KVM软件

1) Server上,安装KVM及virt管理软件

~ sudo apt-get install kvm qemu
~ sudo apt-get install virtinst python-libvirt virt-viewer virt-manager

在ubuntu上安装,真的很简单。


3. 配置桥接网卡

1) 在这里我们使用网卡桥接的方式

~ sudo apt-get install bridge-utils

2) 查看网卡的设置

~ ifconfig
eth0 Link encap:Ethernet HWaddr 00:1c:25:a1:99:fc
inet addr:192.168.1.10 Bcast:192.168.1.255 Mask:255.255.255.0
inet6 addr: fe80::21c:25ff:fea1:99fc/64 Scope:Link
UP BROADCAST RUNNING MULTICAST MTU:1500 Metric:1
RX packets:736674 errors:0 dropped:0 overruns:0 frame:0
TX packets:1098750 errors:0 dropped:0 overruns:0 carrier:0
collisions:0 txqueuelen:1000
RX bytes:63783787 (63.7 MB) TX bytes:1540374899 (1.5 GB)
Interrupt:20 Memory:fc200000-fc220000

lo Link encap:Local Loopback
inet addr:127.0.0.1 Mask:255.0.0.0
inet6 addr: ::1/128 Scope:Host
UP LOOPBACK RUNNING MTU:16436 Metric:1
RX packets:1156 errors:0 dropped:0 overruns:0 frame:0
TX packets:1156 errors:0 dropped:0 overruns:0 carrier:0
collisions:0 txqueuelen:0
RX bytes:114090 (114.0 KB) TX bytes:114090 (114.0 KB)

virbr0 Link encap:Ethernet HWaddr be:65:ec:88:86:3d
inet addr:192.168.122.1 Bcast:192.168.122.255 Mask:255.255.255.0
UP BROADCAST MULTICAST MTU:1500 Metric:1
RX packets:0 errors:0 dropped:0 overruns:0 frame:0
TX packets:0 errors:0 dropped:0 overruns:0 carrier:0
collisions:0 txqueuelen:0
RX bytes:0 (0.0 B) TX bytes:0 (0.0 B)

3) 已有的网卡

  • eth0是直接插入网线的以太网卡,
  • lo是本地网络,本机内部资源
  • virbr0是刚才我们装完KVM后,自己生成的虚拟网卡

4) 网卡桥接
我们增加一个叫br0的虚拟网卡,让这个网卡可以和eth0以太网的网卡做桥接

~ sudo vi /etc/network/interfaces
auto lo
iface lo inet loopback
auto eth0
iface eth0 inet manual
auto br0
iface br0 inet static
address 192.168.1.10
netmask 255.255.255.0
gateway 192.168.1.1
bridge_ports eth0

保存,重起网卡设置

~ sudo /etc/init.d/networking restart

再查看网卡的设置

~ ifconfig
br0 Link encap:Ethernet HWaddr 00:1c:25:a1:99:fc
inet addr:192.168.1.10 Bcast:192.168.1.255 Mask:255.255.255.0
inet6 addr: fe80::21c:25ff:fea1:99fc/64 Scope:Link
UP BROADCAST RUNNING MULTICAST MTU:1500 Metric:1
RX packets:91 errors:0 dropped:0 overruns:0 frame:0
TX packets:100 errors:0 dropped:0 overruns:0 carrier:0
collisions:0 txqueuelen:0
RX bytes:6260 (6.2 KB) TX bytes:15470 (15.4 KB)

eth0 Link encap:Ethernet HWaddr 00:1c:25:a1:99:fc
UP BROADCAST RUNNING MULTICAST MTU:1500 Metric:1
RX packets:605 errors:0 dropped:0 overruns:0 frame:0
TX packets:425 errors:0 dropped:0 overruns:0 carrier:0
collisions:0 txqueuelen:1000
RX bytes:112441 (112.4 KB) TX bytes:61529 (61.5 KB)
Interrupt:20 Memory:fc200000-fc220000

lo Link encap:Local Loopback
inet addr:127.0.0.1 Mask:255.0.0.0
inet6 addr: ::1/128 Scope:Host
UP LOOPBACK RUNNING MTU:16436 Metric:1
RX packets:36 errors:0 dropped:0 overruns:0 frame:0
TX packets:36 errors:0 dropped:0 overruns:0 carrier:0
collisions:0 txqueuelen:0
RX bytes:2100 (2.1 KB) TX bytes:2100 (2.1 KB)

virbr0 Link encap:Ethernet HWaddr 2a:b8:36:cf:cc:c6
inet addr:192.168.122.1 Bcast:192.168.122.255 Mask:255.255.255.0
UP BROADCAST MULTICAST MTU:1500 Metric:1
RX packets:0 errors:0 dropped:0 overruns:0 frame:0
TX packets:0 errors:0 dropped:0 overruns:0 carrier:0
collisions:0 txqueuelen:0
RX bytes:0 (0.0 B) TX bytes:0 (0.0 B)

这个时候eth0,已经没有具体的IP地址。IP地址出在了br0的虚拟网上面。

我们ping一下公网ip,看看是不是通的。

~ ping 8.8.8.8
PING 8.8.8.8 (8.8.8.8) 56(84) bytes of data.
64 bytes from 8.8.8.8: icmp_req=1 ttl=46 time=51.7 ms
64 bytes from 8.8.8.8: icmp_req=2 ttl=46 time=50.8 ms

4. 创建虚拟机

通过virt虚拟机管理软件,创建虚拟机(Guest)。

上传2个安装镜像到Server: u1204.iso, xp.iso

放在/home/conan/os目录下面。

1)创建Guest1, Ubuntu 64位LTS 12.04版本(命令行,无可视化界面)

把u1204.iso文件mount一个目录

~ sudo mount -o loop /home/conan/os/u1204.iso /home/conan/os/ubuntu
~ ls /home/conan/os/ubuntu
boot dists EFI isolinux pics preseed ubuntu
cdromupgrade doc install md5sum.txt pool README.diskdefines

创建虚拟机

~ sudo virt-install --connect=qemu:///system \
--name g1 \
--ram 2048 \
--vcpus=2 \
--os-type=linux \
--os-variant=ubuntuprecise \
--accelerate \
--hvm \
--disk path=/home/conan/os/g1.img,size=6,bus=virtio \
--location /home/conan/os/ubuntu \
--extra-args='console=tty0 console=ttyS0' \
--network bridge=br0,model=virtio \
--graphics none

进入安装界面

lqqqqqqqqqqqqqqqqqqqqqqqu [!!] Select a language tqqqqqqqqqqqqqqqqqqqqqqqqk
x x
x Choose the language to be used for the installation process. The x
x selected language will also be the default language for the installed x
x system. x
x x
x Language: x
x x
x C x
x English x
x x
x <Go Back> x
x x
mqqqqqqqqqqqqqqqqqqqqqqqqqqqqqqqqqqqqqqqqqqqqqqqqqqqqqqqqqqqqqqqqqqqqqqqqqj
<Tab> moves; <Space> selects; <Enter> activates buttons

安装系统

lqqqqqqqqqqqqqqqqqqqqqu [!] Configure the network tqqqqqqqqqqqqqqqqqqqqqk
x x
x Please enter the hostname for this system. x
x x
x The hostname is a single word that identifies your system to the x
x network. If you don't know what your hostname should be, consult your x
x network administrator. If you are setting up your own home network, x
x you can make something up here. x
x x
x Hostname: x
x x
x localhost____________________________________________________________ x
x x
x <Go Back> <Continue> x
x x
mqqqqqqqqqqqqqqqqqqqqqqqqqqqqqqqqqqqqqqqqqqqqqqqqqqqqqqqqqqqqqqqqqqqqqqqj
<Tab> moves; <Space> selects; <Enter> activates buttons

安装完成

2). 创建Guest2, Ubuntu 64位LTS 12.04版本(通过VNC,有可视化界面)

在server端,我要打开vnc_listen的端口支持

~ vi /etc/libvirt/qemu.conf
#打开注释
vnc_listen="0.0.0.0"

重启virt软件

~ sudo /etc/init.d/libvirt-bin restart
~ netstat -nlt|grep 5900
tcp 0 0 0.0.0.0:5900 0.0.0.0:* LISTEN

我们需要使用到Xming和putty配合,可以让putty远程传输的VNC信号通过Xming显示出来。

在putty里面,我们要修改一下配置。

putty1

putty2

启动Xming软件

xming

执行命令

~ sudo virt-install --connect=qemu:///system \
--name g2 \
--ram 2048 \
--vcpus=2 \
--os-type=linux \
--os-variant=ubuntuprecise \
--accelerate \
--hvm \
--disk path=/home/conan/os/g2.img,size=6,bus=virtio \
--cdrom /home/conan/os/u1204.iso \
--network bridge=br0,model=virtio \
--graphics vnc

xming-1_1

通过Xming显示了VNC的界面,ubuntu安装画面

xming-1_2

安装完成

3. 创建Guest3, Winxp(通过VNC,有可视化界面)

注1:这里的winxp必须安装版,ghost是不行的。

注2:windows的安装,必须要使用VNC界面方式,没有命令直接安装的方法

执行命令

sudo virt-install --connect=qemu:///system \
--name g3 \
--ram 1024 \
--vcpus=1 \
--os-type=windows \
--os-variant=winxp \
--accelerate \
--hvm \
--disk path=/home/conan/os/g3.img,size=4 \
--cdrom /home/conan/os/xp.iso \
--network bridge=br0,model=ne2k_pci \
--graphics vnc

xming-2_1

通过Xming显示了VNC的界面,WinXP安装画面

xming-2_2

安装完成

虚拟机互相通信

我们启动Guest1(ubuntu), Guest3(winxp).

  • Client: ip: 192.168.1.101
  • Server: ip: 192.168.1.10
  • Guest1: ip: 192.168.1.11
  • Guest3: ip: 192.168.1.12

他们都在同一网段,相互可以ping通,也可以相互调用。

如果你实验结果和我一样,那么恭喜你,已经实现了通过KVM搭建自己的VPS过程。


错误解决方案

1. 错误代码:

libvirtError: internal error Process exited while reading console log output: char device redirected to /dev/pts/4
Could not access KVM kernel module: Permission denied
failed to initialize KVM: Permission denied
No accelerator found!

解决办法:

~ sudo rmmod kvm_intel
~ sudo modprobe -r kvm_intel
~ sudo modprobe kvm_intel nested=1


下一篇文章,将介绍VPS内网的网络架构设计。


转载请注明出处:

http://blog.fens.me/vps-kvm/

打赏作者